Tag Archives: DIY

FO: Mitered Detail Cardigan


Success!  At least one of last week's WIPs is complete!
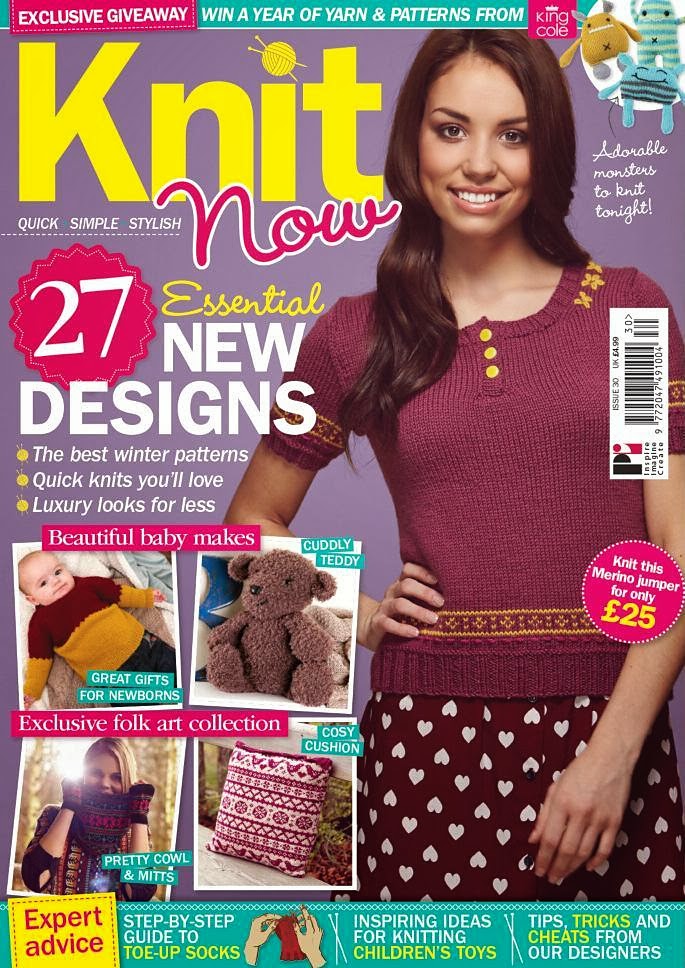
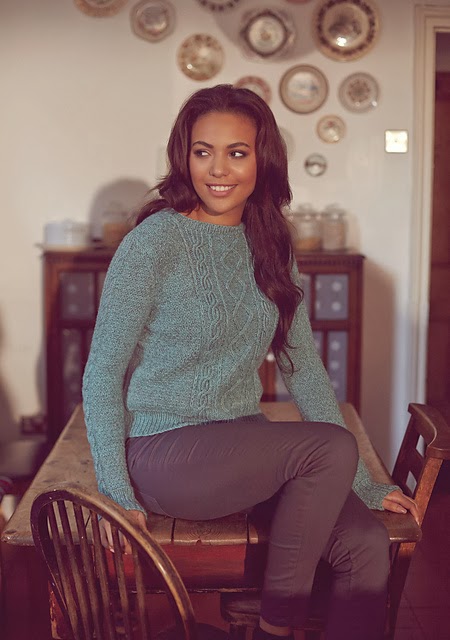
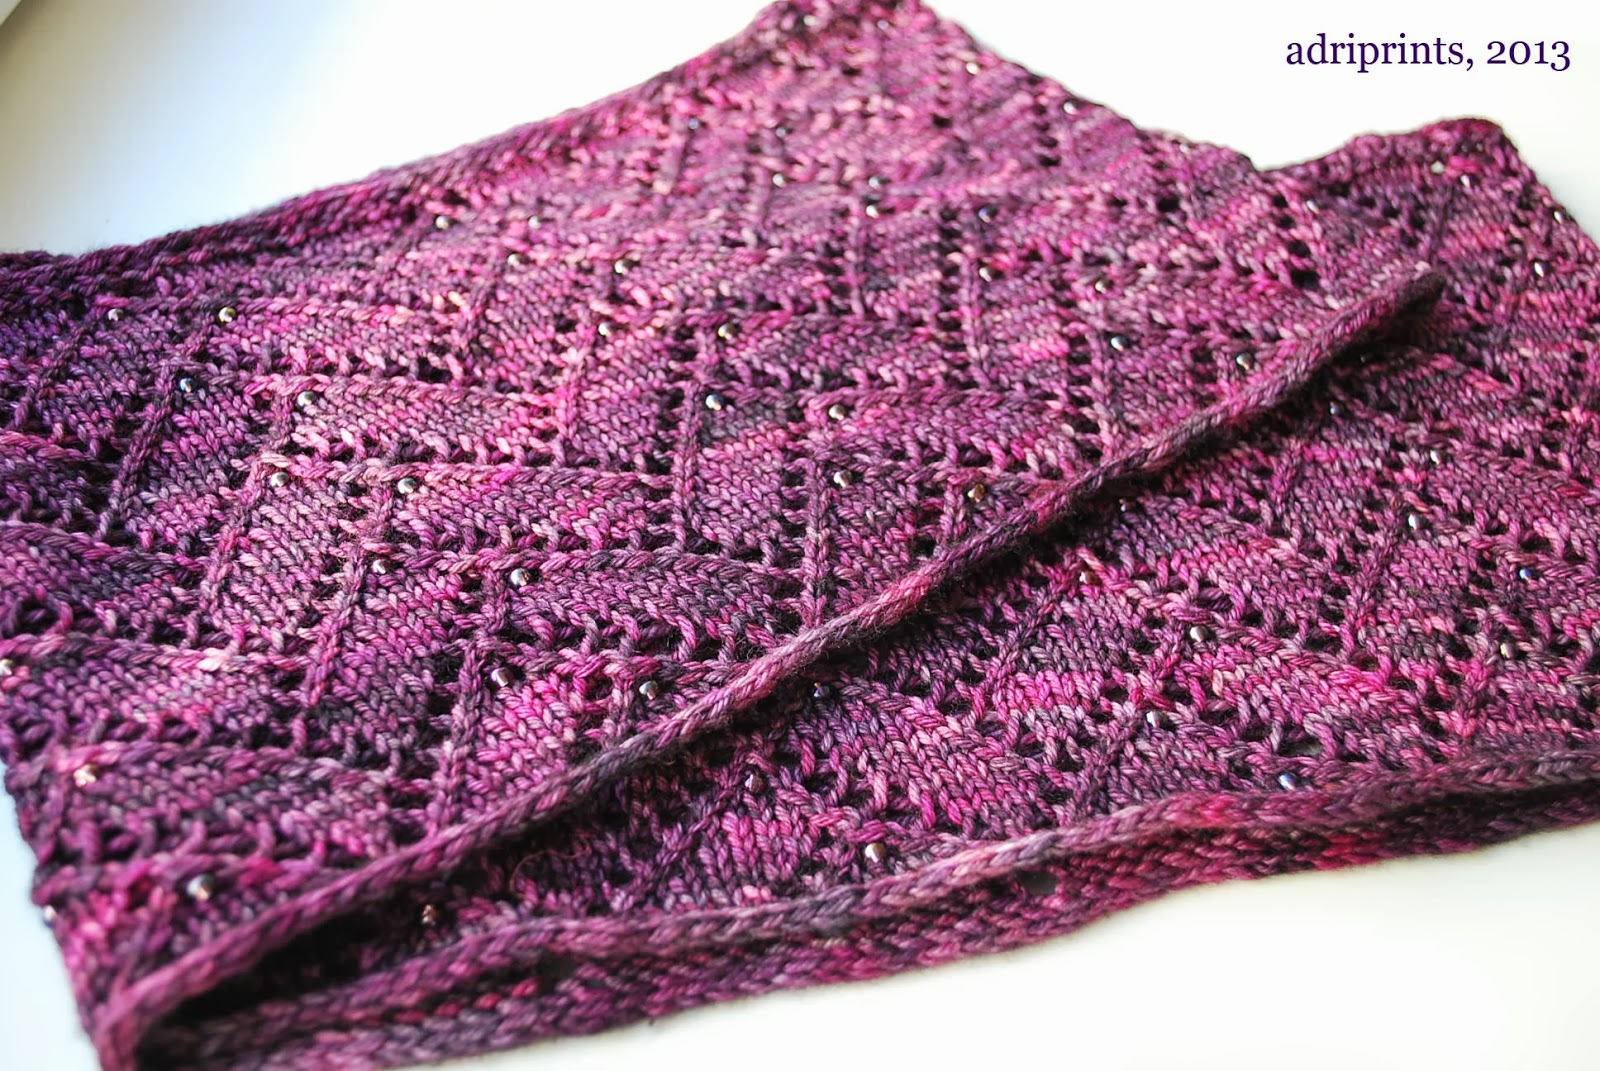
Originally meant for the Ravellenics (Ravelry Olympics-watching related activities), the "Mitered Detail Cardigan" project really pushed me to learn how to better use my knitting machine.  Originally, this yarn was going to be Mary Anarella's lovely "Simplicity" cardigan, but as my belly kept growing, I thought, "that look's just not going to work on me." So, I set about designing this cardigan while keeping "Simplicity" as a visual inspiration, but sharpening it up a bit for pregnancy and after-pregnancy use.  Here's the result...


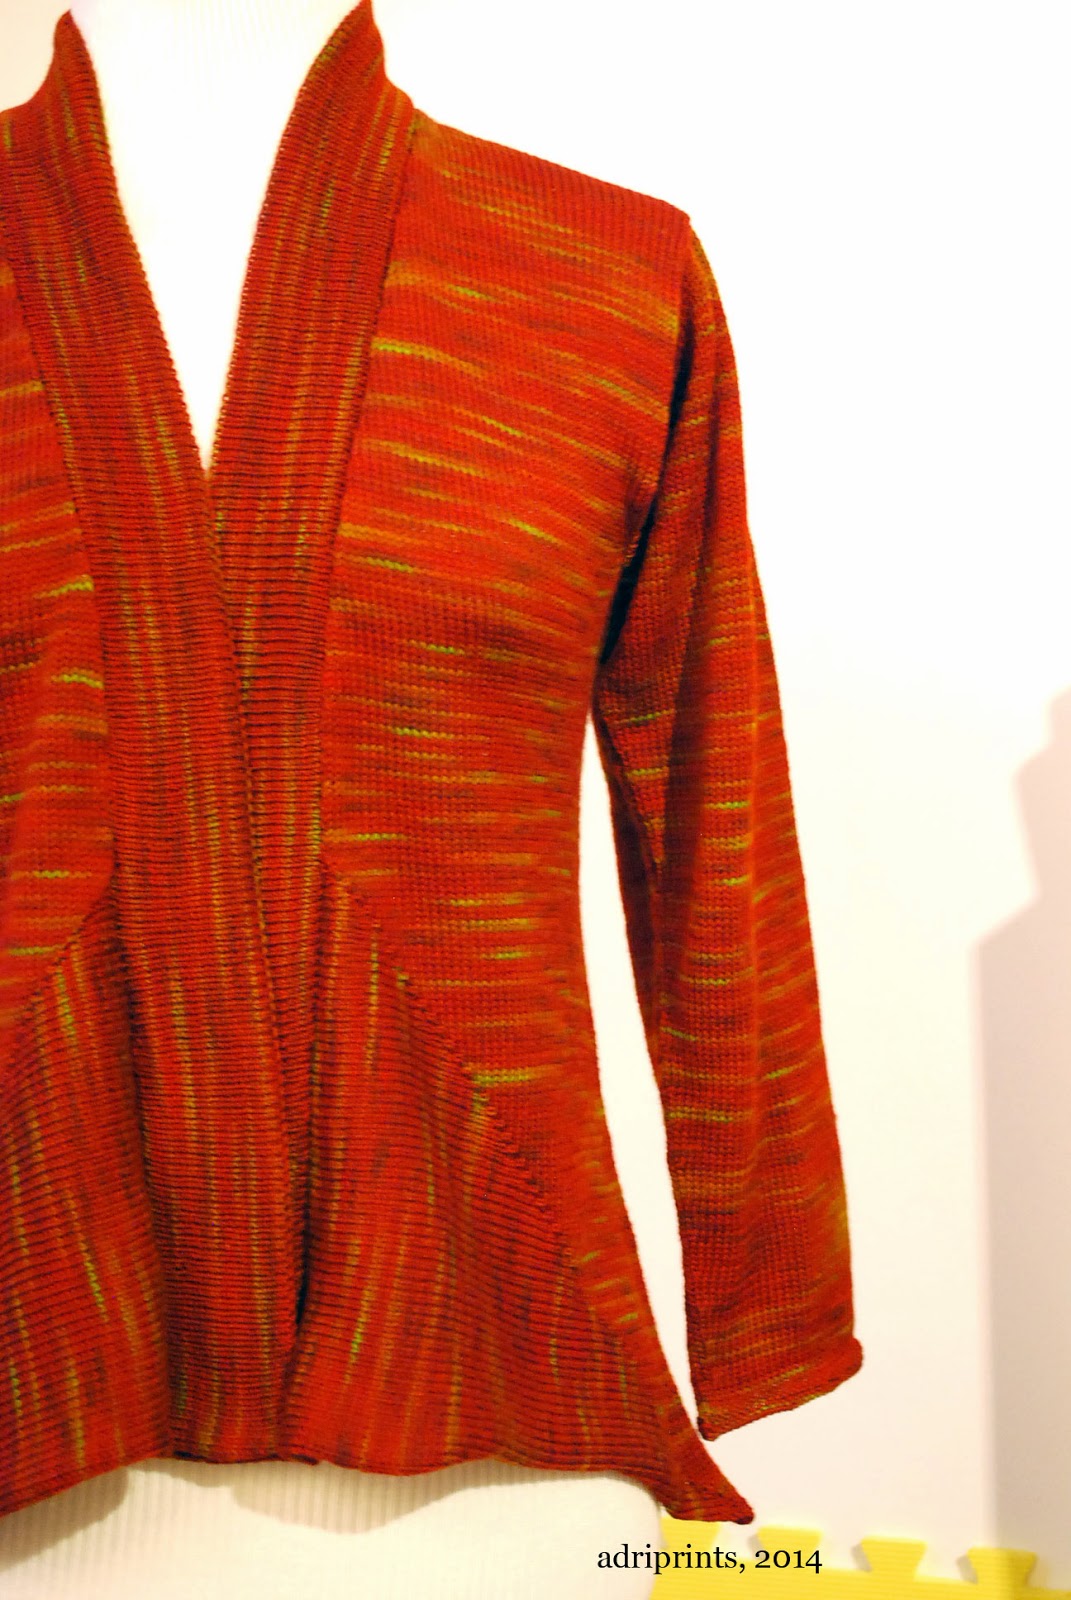
The front diagonal details were done using short rows.  So fast!


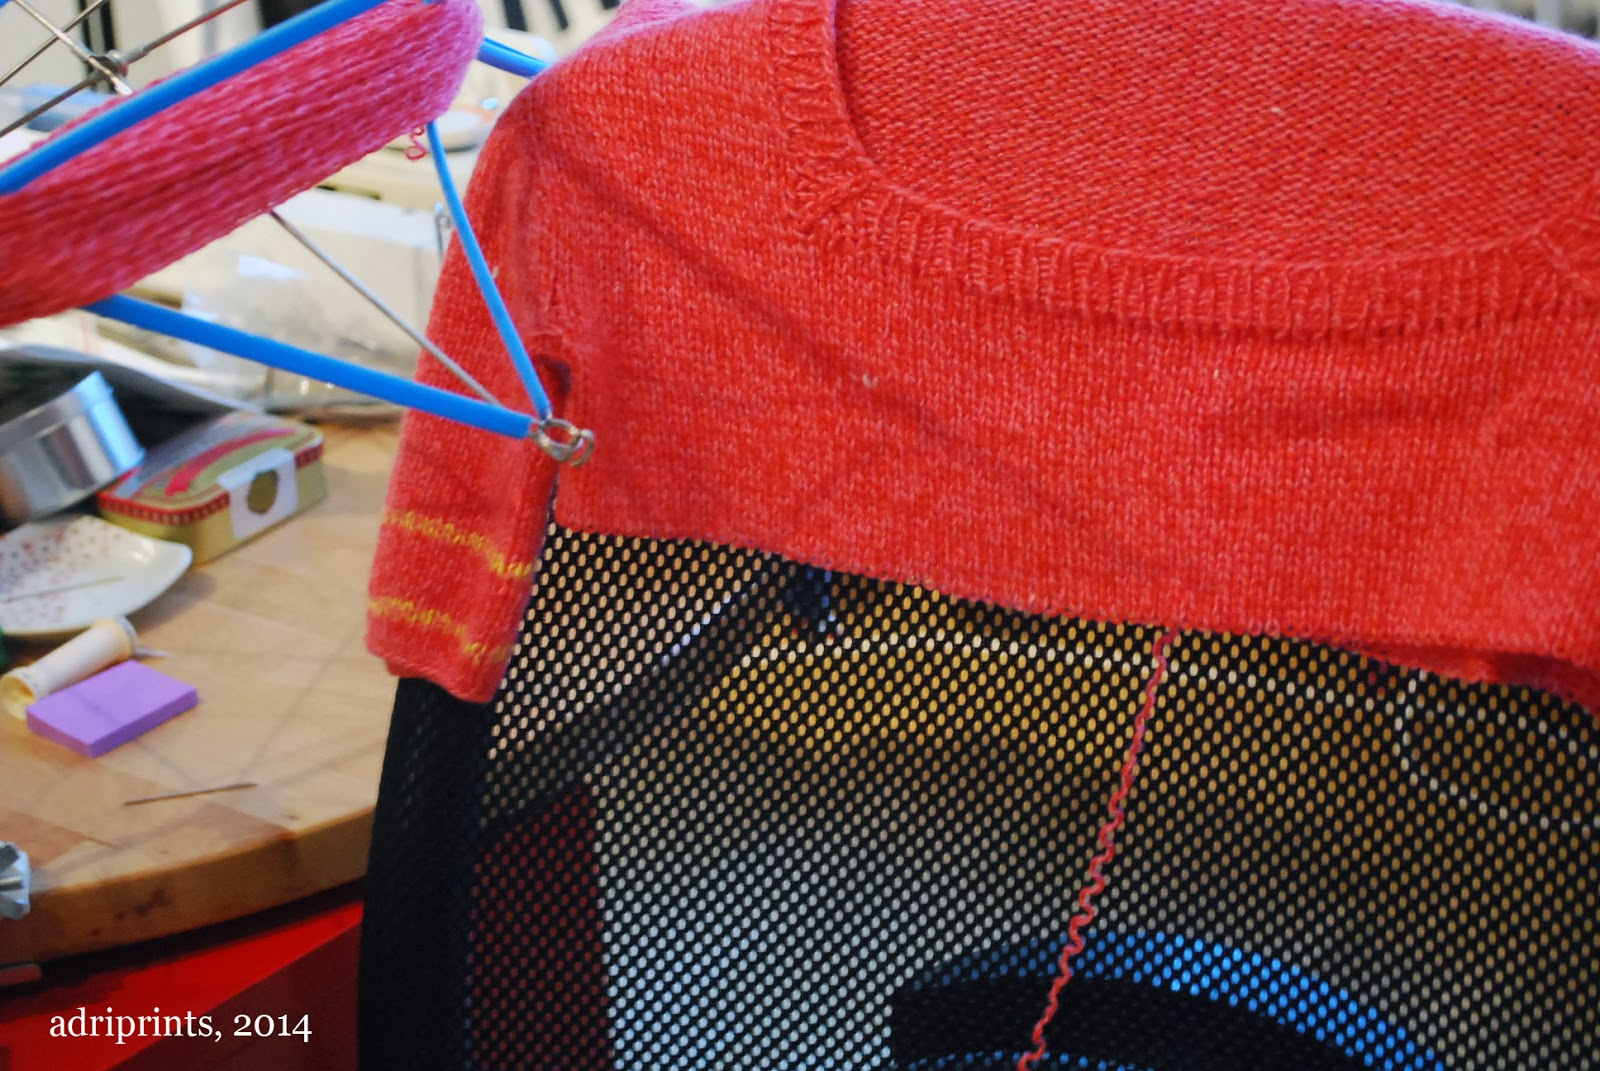
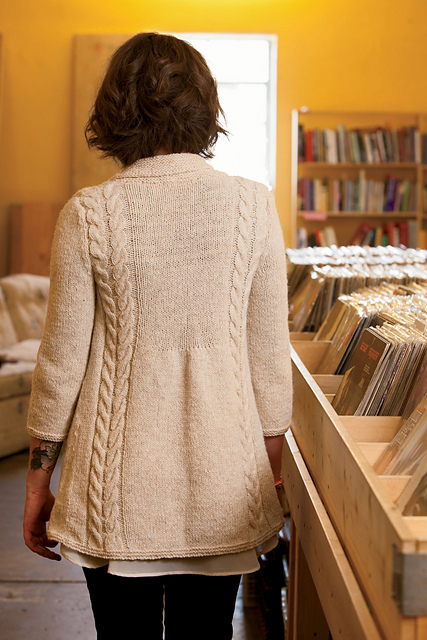
Back diagonal details done by transferring stitches.  Not so fast.


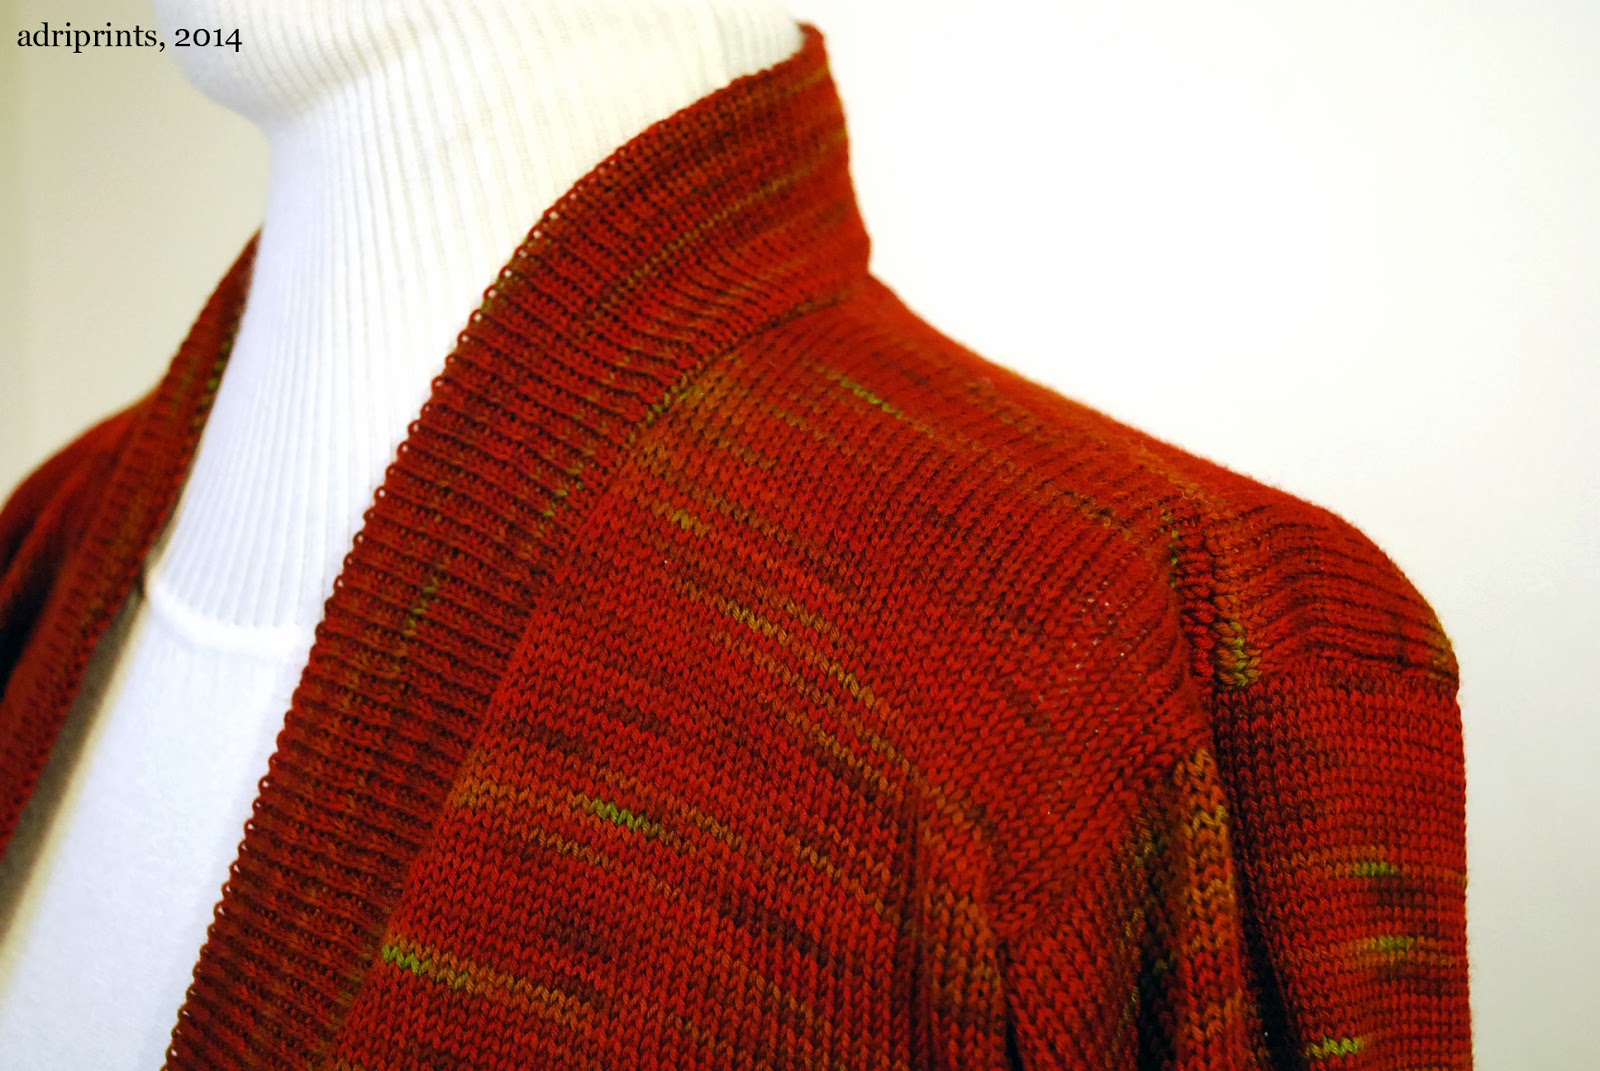
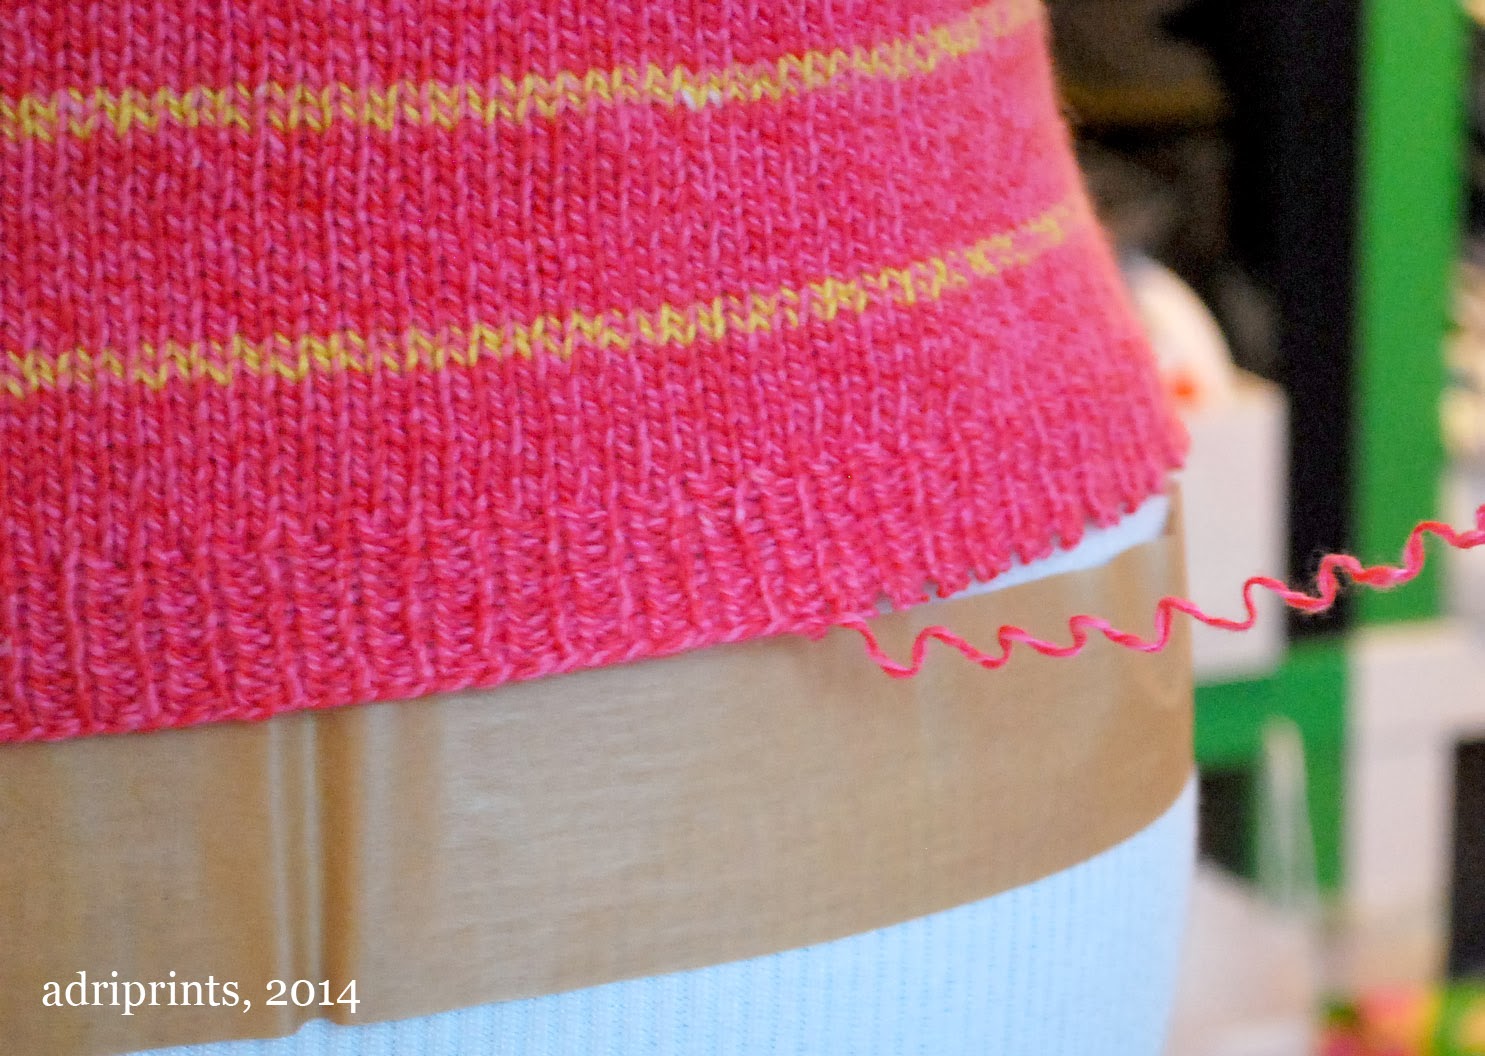
The folded over border was knit in two halves on the machine and then stitched together at the back of the neck.  

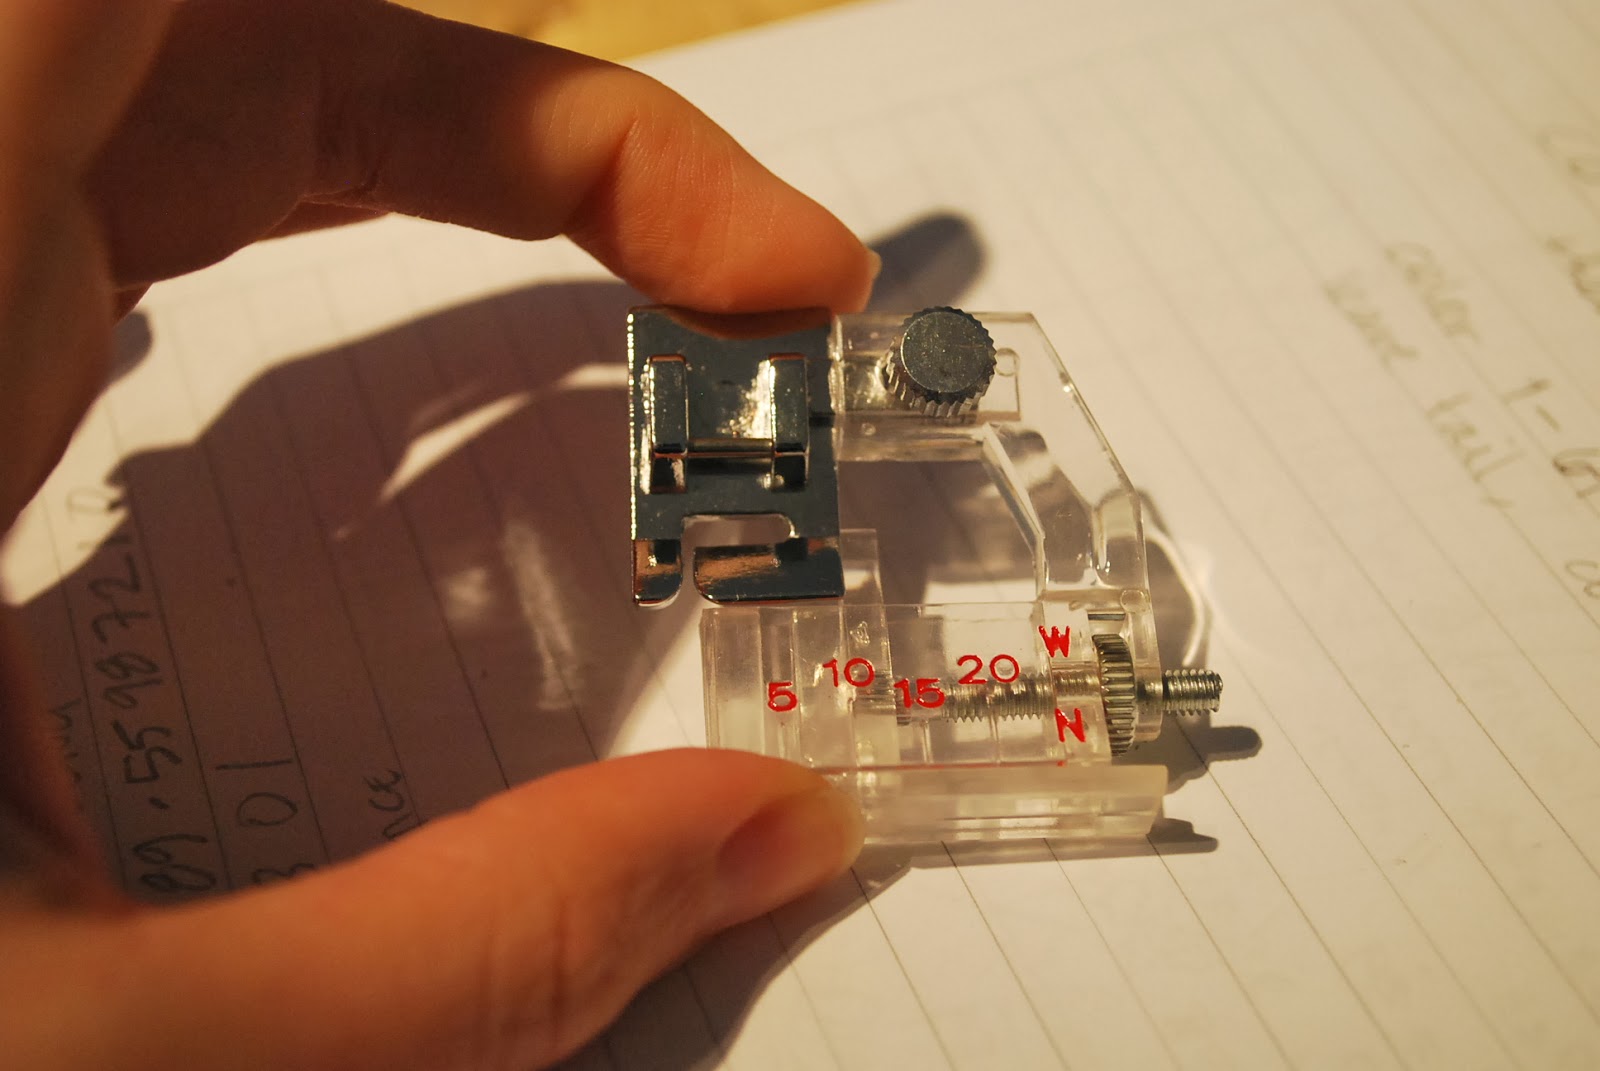
That turning purl row, which is so simple to do by hand, was kind of a nightmare to do by KM (knitting machine).  See, I didn't know that there was a difference between stitch transfer tools and garter bars.  There is a difference.  A big difference.  These large transfer tools are simply giant combs that hold stitches and help you move them over, and they have a tiny hole like a small transfer tool.  

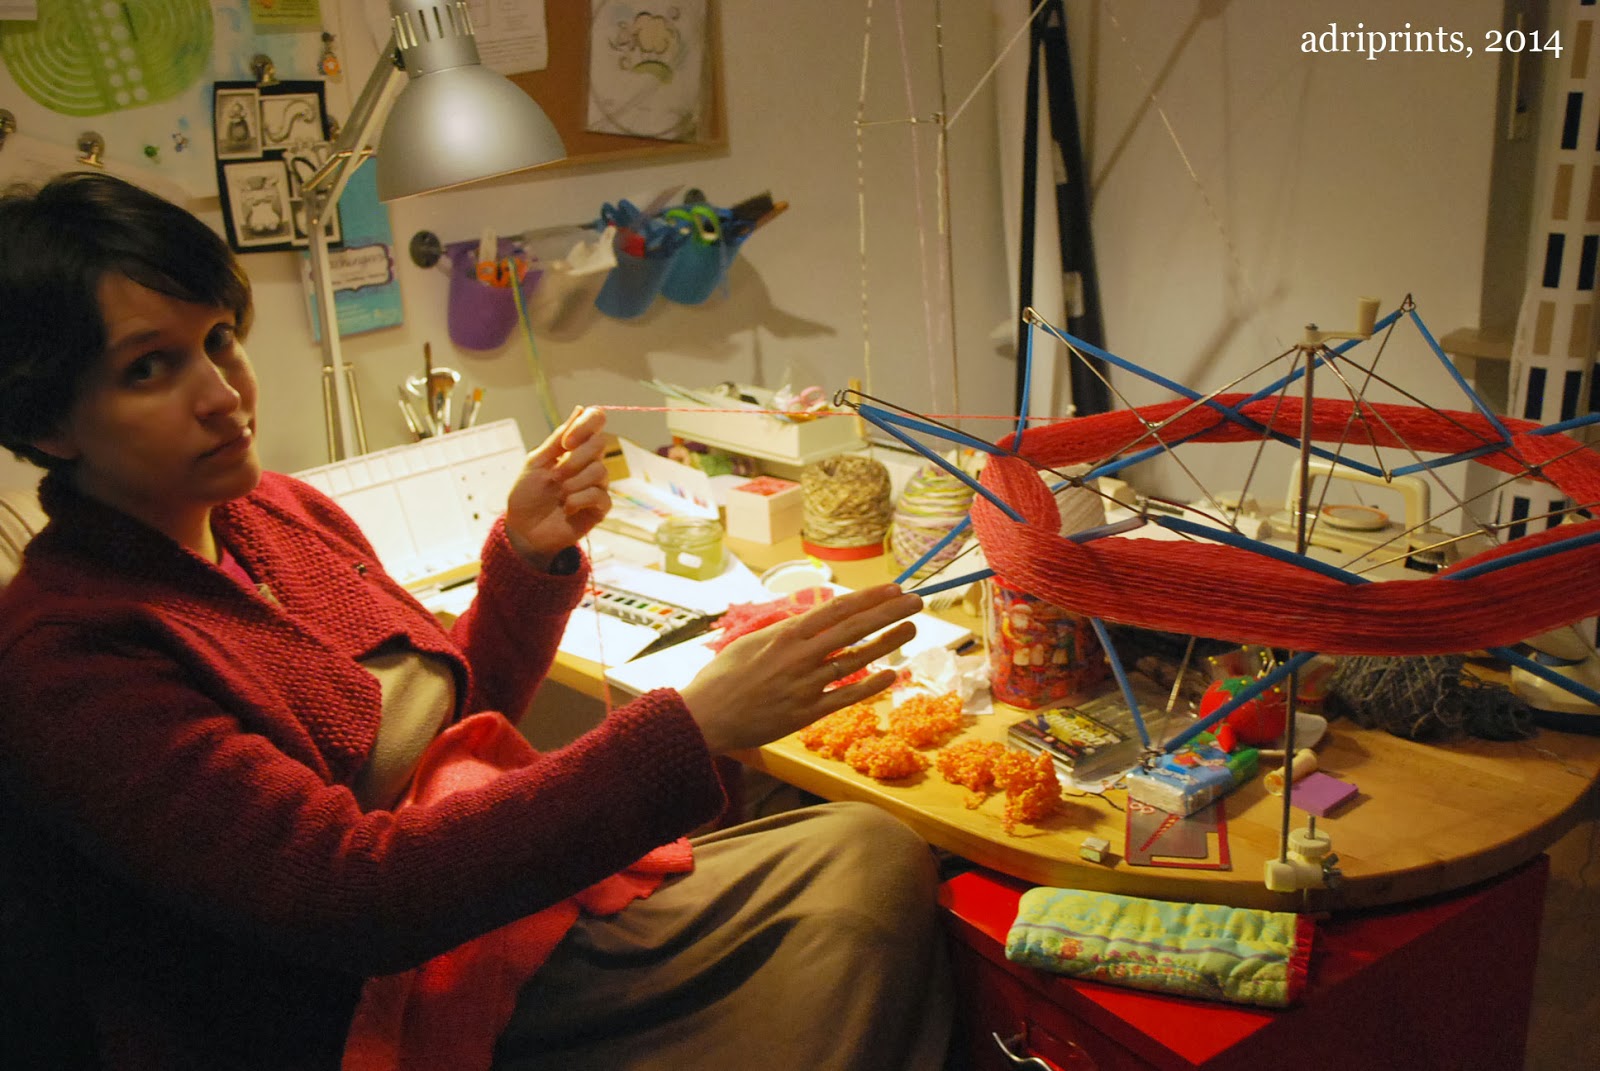
Garter bars on the other hand, allow you to, not just move the stitches, but also flip them over and efficiently create a garter stitch.  I did the first side's turning row by hand-manipulating each stitch individually with a tappet tool.  It took me over an hour.  I did the other side by attempting to use the transfer tool as a garter bar, and failed.  I ended up holding the transfer comb horizontally directly under the hooks of the machine and individually lifting the back of each stitch onto its respective hook.  Faster than tappet tool, but not very much fun.  ((insert hysterical laughter here))


The back mitered square detail was not done with short rows which were fast and lovely by KM.  Each of those centered double decreases was done using the stitch transfer combs I mentioned previously.  All the stitches on each side were moved over by one toward the center where they met in the middle.  It took me 3 hours to do each side.  My friends at the local SnB laughed at me and said it would have been faster by hand.  True.  But, I learned how to use my machine with confidence!  That was worth it, right?  How else was I going to learn other than by challenging myself to do ridiculous things under an unrealistic artificial deadline?  What's that you say?  Was that reasonable advice you just gave me? Pshaw.  Reason-schmeason.


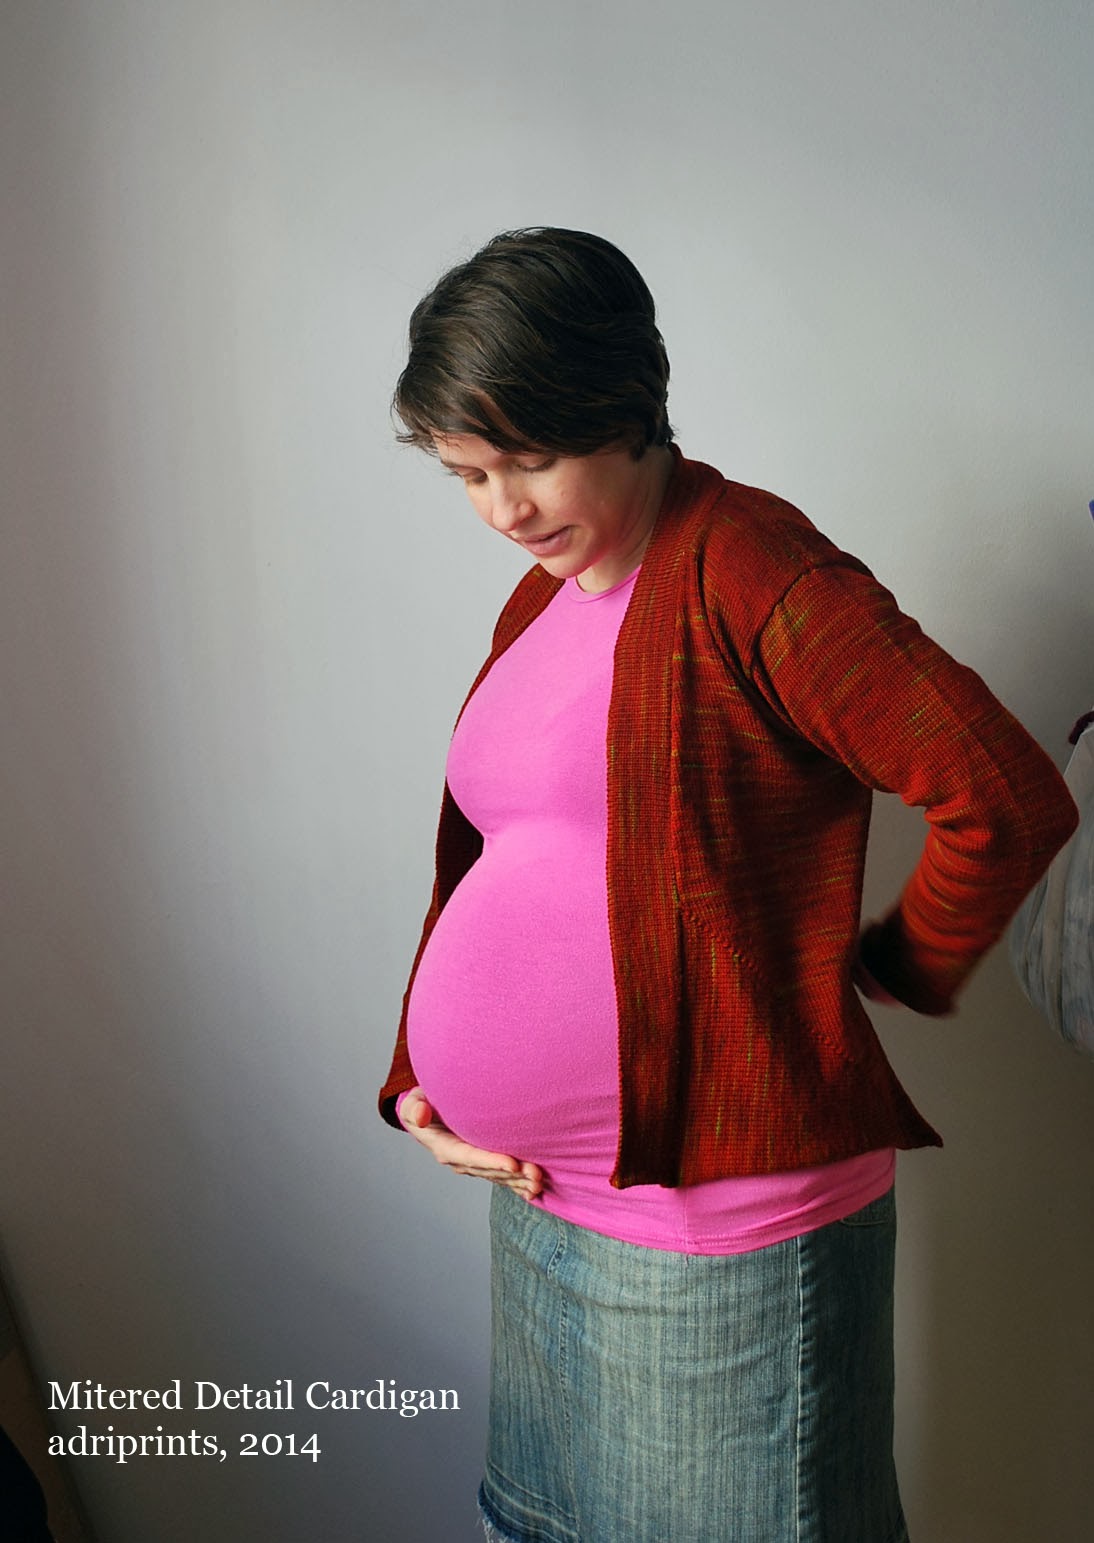
Project Title: Mitered Detail Cardigan
Designer: Me  (using Simplicity by Mary Anarella & 128-14 Jacket in ”Fabel” by DROPS design as inspiration)
Yarn: Wollmeise Lace in "Nobody's Perfect - Spice Market"
Amount Used: 281g of 300g skein
Machine Tension Settings: T6.75 for main knitting, T6 for edging
Main Gauge: 26 sts x 40 rows = 4"
Border Gauge: @T6, 24 sts x 50 rows = 4" (blocked to emphasize horizontal stretch)

Unwinding

Sometimes you unsew, sometimes you unknit.  This weekend it was time to unknit and unwind... literally.


The project:
Avril in April was a contiguous method hand-knit top completed last year, but worn only once.  The sleeves and neckline were a bit too unflattering for me.  The neckline came down too low, and the sleeves were weird and poofy. Cool contiguous technique though!  The yarn used is a beautiful, bubble-gum/pepto/play-doh pink cashmere blend yarn.  So, I didn't want to just trash or donate it.  Despite the slightly pop-princess color, I truly love the yarn.  I also have some in play-doh yellow which I used for the stripes. I think it could be something else that I'd wear more often.  Yes.  Time to unwind!


Unwinding takes time!!


Every knitted stitch that was picked up needed to be unwound by hand with a hook or tapestry needle.  That took some patience, but in the end there's this!


 A bunch of little pink balls and one big hank.  So, how do you re-use the yarn once it's all kinked up from knitting?  Well, next, I'll secure the yarn off the winder.  Then, I'll soak it and hang it to dry with a knitting machine weight on one end.  When it's dry, I'll re-wind it into a yarn cake and knit it up!

Knit Now: Ammersee Top and Wind & Storm

When you design and submit patterns to publications, you never know what will strike an editor's fancy.  In this latest issue of Knit Now, Issue #30, you'll find that my knitting pattern, Ammersee Top, is on the cover!  Had she not told me ahead of time, I'd have scared the neighbors with my squealing for joy.  This is the first time I've ever had one of my designs on the cover of any publication, and it was a very exciting surprise I'm so glad to share with you all.

Ammersee Top, photo by  Dan Walmsley, (c) Practical Publishing

Ammersee Top is an alpine-inspired short-sleeved top featuring stranded colorwork, and hand-embroidery to finish the look.  The sample was knit over a speed knitting session of two weeks or so in the fall.  You may recall a bit of a hint when I revealed the button placket in this post here.

Ammersee Top, photo by  Dan Walmsley, (c) Practical Publishing
Also,  in this issue is a favorite pattern of mine which I've been trying to get published since I imagined it.  It's called Wind & Storm, and was inspired by last year's interminable winter (although it could totally fit with the U.S.'s current frosty situation).  The pattern remained in sketch form for a while, so I was so happy to work with Knit Now and Blacker Yarns in order to make it a reality.  The yarn is really cool - I used specifically Blacker Yarns Pure Organic Wool Corriedale with Black Welsh Mountain - it's a real working yarn with body, but softens after washing.  It has this lovely marled look, but still allows for great stitch definition.  I spit-spliced all the yarn ends so I had no ends to weave in when I was done knitting.  Also, because of the quick turnaround, I had help from a friend to knit the sleeves on this beauty... Thanks, Emma!!

Wind & Storm, photo by  Dan Walmsley, (c) Practical Publishing

Wind & Storm, photo by  Dan Walmsley, (c) Practical Publishing

Wind & Storm, photo by  Dan Walmsley, (c) Practical Publishing

Issue #30 of Knit Now can be found here: http://www.moremags.com/knitting/knit-now/knit-now-30-565

Bedroom Brainstorming

A few weeks back I shared some pictures from the mostly unpacked portions of our new house. Most of the photos took place in the dining room, which looks like this:
dinning room before
Green walls, white trim, hard wood floors in great condition, and a lot of natural light. The photos I shared give the impression that that’s how the entire house looks. The rest of the house is great! But the upstairs has some features that aren’t really my favorite.

For instance, here’ a quick shot of the corner of my bedroom.
bedroom
Still has the great floors and natural light, but almost all of the upstairs has this dark, dated wood panelling–and as you can see, most of our furniture is all wood-colored. We collected our furniture (and registered for the Cherry crib) all when we were living in spaces with white walls, so there was some contrast. Now our bedroom feels like one big brown blah except for our quilt–and since we rent, painting is out of the question.

The other thing to note about the bedroom, is that it is huge. I haven’t measured the square footage, but what you see really is a corner of it. There is the other half of the king bed and a couple of dressers out of the picture, plus room for more. When we moved in, and told Athrun the baby would be staying in our room, he said there was room for his (double) bed as well as all our stuff and stuff for the baby. He was right, we could make it a family bedroom if we wanted. (We don’t, for the record.) There is just a lot of wall space to cover in there–so it’s no small task to brighten this room up.

bedroom south wall
I want to start on this wall, where the baby’s stuff will be. (This isn’t the final arrangement. The crib is sort of just sitting there for now, but it will be in this general vicinity.) The small dresser on the left is for the baby too.

I have a few thoughts about how to add some color and brightness to the room, as well as make it look a little bit more up-to-date. First, linens for the crib will probably be white with some sort of brightly colored pattern on them–including a crib skirt. The dresser needs to be painted, though I haven’t decided on a color yet, and the drawer pulls updated. I would also like to find a way to raise it a little bit, because it could also double as a changing table in the room.

I know curtains would be a big help, but I really don’t want to put up the only ones I have that will fit these windows, because they’re, you guessed it, brown. They were purchased when I lived in a tiny apartment with no blinds and needed dark curtains to keep the light out in the mornings, and they’ve followed me ever since–and chocolate brown curtains look pretty nice on a white wall, I think. All that to say that I don’t want chose curtains until I know what I’m doing to the walls.

I have been thinking about something like what I found on this blog

Fabric Wallpaper DIY from The Golden Girl Blog
See post here


Spraying fabric with starch so it acts like wallpaper–but is completely removable. Since I have so much space to cover, I am thinking about doing just one wall at a time and working my way around the room. To make it affordable, I am thinking of buying a bunch of white or natural fabric and printing my own designs and colors onto it. Right now I’m thinking about teals and turquoises and greens, because I find them tranquil, and they match our quilt.

I have some simple fabrics on order. When they come in, I am going to try the fabric wallpaper DIY with a scrap in a discreet place to make sure that it won’t damage the paneling. I’ll let you know how it goes.

2013, A Year in Review

This past year's work collage:


So, what *did* I do last year?  And, did I meet my resolutions from 2013? Let me revisit my resolutions, and let's see how faithful I was to them...
"And, my 2013 New Years Resolutions...knitting- publish a few more patterns, learn brioche knitting. Crochet - do a bit more of it. Sewing- sew a pair of perfectly fitting jeans/trousers, drape 1 dress or outfit. Quilting- finish quilting the 2 quilts from last year and make 1 quilt. Design - learn more about WordPress to create an online shop"
Knitting - I definitely published more patterns than I was expecting: Lustig Hat and Gloves, Squishy Cabled Vest, Easy Lace Loop/Cowl, Rosita Hat and Mittens, Bow Slouch, Columbina Camisole, Tyrian Loop, and Laren Fingerless Mitts... phew!  And, two projects still aren't published... more about that in the near future.

Rosita Hat & Mittens, photo copyright Knitscene/ Harper Point
Brioche knitting - I signed up for a class, and started learning, but then forgot to finish the online course!  Oops.  Let's give that one a try again this year.

Crochet - I used it more frequently this year, and I made a few amigurumi gifts and used crochet as a border in some of my own projects.


Sewing - I did manage to create a pair of jeans that fit me really, really well!  BUT... then I grew out of them, and more on that in the near future.  I loved participating in Me Made May, and hope to do it again next year if possible.
((Confession.)) I still haven't draped anything!! I failed here.  I did start drafting skirt and bodice slopers, but definitely no draping!  ((Ugh.  Guilty feelings here.))

Quilting - I did way more quilting than I thought I could!  I learned to free-motion quilt and I finished a bed-sized brown quilt, a mini lap version,  the blue sampler quilt, a baby quilt, and a double-wedding ring quilt for a friend.


Design-  I finally got my portfolio site transferred to WordPress, but I still haven't created an online shop.  Anyone have advice on easy PDF distribution systems with templates on WP?  Also, I redesigned my crochet font StitchinCrochet(PRO), and released it!


2014...  Truth be told, I don't know what resolutions I should make.  I am anticipating some big changes in my life, and the only things I can hold onto at the moment seem very vague...

1) make some art:  get back into pen and ink, finish digital illustration commissions
2) make some things with yarn: finish hand-knit projects, use machine to stash bust
3) make some things with fabric: continue on the quilting and sewing goodness track
4) blog more efficiently and step away from the internet traps (facebook and cheesy news sites)

Happy New Year!
Cheers to the new year!

New Pattern: Laren Mitts!

I hope everyone is enjoying their holidays!  Earlier this week, this sneaky pattern was published without me even realizing it!  :D  ((Cheeky chevrons, getting all published while I was holiday daydreaming... ))

photo: copyright Harper Point, Knitscene 2013


Anyway, Laren Mitts pattern is now available in the Spring 2014 issue of Knitscene!

photo: copyright Harper Point, Knitscene 2013


photo: copyright Harper Point, Knitscene 2013

They make a great stash buster and gift since they knit up so quickly!

Details:
-Sizes 6¾ (7¼, 8)" palm circumference; shown in size 7¼"

Supplies:
-Yarn Zitron Finest Royal Alpaca (100% alpaca; 109 yd [100 m]/50 g):
• #6057 kitten grey (MC), 1 (2, 2) skein(s)
• #6059 porcelain (CC), 1 skein

Gauge: 24 sts and 27 rnds = 4" in Chevron patt on larger needles

Tools
• Size 6 (4 mm): set of double-pointed needles (dpn)
• Size 4 (3.5 mm): set of dpn
• Markers (m)
• Stitch holders
• Tapestry needle

Commission Complete: Twin Boy Blanket

At last, I finished the machine-knitted blanket for the baby boy fraternal twin.  The longest part was the finishing...  Crocheting a border on the quilt was quite a feat using a 2.75mm crochet hook!

blanket being blocked
Instead of hand-grafting all the long strips together, I found a method that worked quite well... I zig-zag stitched them together using my sewing machine.  A zig went into one strip, and the zag went into the other.  This kept the edges bound together and sealed in the woven ends.


The crochet border was added as a nice finishing touch, but also helps keep the edges from rolling inward as machine knitted items tend to do.

I'm already onto the twin baby girl's blanket, and I'll post photos as soon as it's complete!

Previous post on these two blankets: http://adriprints.blogspot.de/2013/08/weekend-update.html

Craftsy BOM 2012 – Blue Quilt Done!

Finished binding this rather large quilt yesterday evening, and took some photos of the finished blue quilt on the ironing board.  Maybe I can get someone to hold it up over their heads so I can take a photo of the full quilt front and back.  In the meantime, here's my too-excited-to-wait photos...


The quilt is bound using DIY binding made from backing fabric scraps.  Since the blocks were medallion-style quilted, then sewn together, this made for a LOT of scraps.


I'm really pleased with how the blocks came together. Doing the free-motion quilting in smaller chunks really let me explore different motifs and techniques.  For new FMQ-ers like me, I found Leah Day's motifs, tips, and tricks to be invaluable.  Her main website is free, and her first Craftsy course focuses specifically on this quilt as well as generally handy techniques for free-motion quilting on a regular home sewing machine.  Those Machinger's gloves that she recommends are not a gimmick.  If you have perpetually dry hands like I do in winter, those gloves saved me a lot of muscle aches. They helped me grip the quilt-sandwich open-handed - letting the machine do it's job without fighting the weight of the fabric.  I'm now using the gloves for all kinds of sewing, not just quilting.


I bought this binding foot off of e-bay to sew on the binding, but I couldn't figure out how to turn corners with it.  So, it's great for straight binding, or continuous binding, but not so much for corners.  Maybe there's some kind of trick I don't know. (?)


 I don't like it when my blankets have a lip or any edge that can snag a toenail.  So, I ended up doing a second pass on the binding with a zig-zag stitch.


Next up... finish the twins knitted blankets and a whole host of  holiday projects!  I think I'm going to wear this quilt over my shoulders while I work on the knitting machine.  It's cold today!

Happy crafting, everyone!

Blue Quilt Progress!

Ack, I thought I had finished more blocks than I really had.  It turns out, I ran out of backing fabric, and I had left some with batting ready to go, but no backing fabric.  I had been using up all of my green fabric as backing for the blue quilt, but I've run out!  So, I'm improvising.  Time to stash bust...


But, I did make some progress.  Even with a bit of the "shaky hands" at the beginning, I got through free-motion quilting six more blocks from the quilt.  Hopefully, I can get all the medallions done this week and get started sewing them together.  There's still binding and washing, too!
little bit of the shaky-hands, but oh well!


Tyrian Loop, Knitscene Winter 2013

Tyrian Loop is a lace beaded loop that was just published in Knitscene Winter 2013!  I'm really happy to be included in this issue along with two of my super designer friends, Dilettant Knits with her lovely pattern, Black Cherry Pullover and Rock & Purl was the featured designer with several patterns, Stereo Mittens, Hi-Fi Pullover, and Victor Shawl!

Here's my own photo of the loop focusing on texture...


And from the Knitscene site...

copyright Knitscene/Harper Point, 2013

A bit about the Tyrian Loop:
It comes in two sizes 48 (21 1/2)” circumference and 7 (10)” tall; shown in size 48”
Yarn 
Malabrigo Arroyo (100% superwash merino; 335 yd 305 m/100 g): #872 purpuras, 1 skein 
Gauge
21 sts and 38 rows = 4” in Geometric Lace patt 
Tools 
• Size 4 (3.5 mm): 32 (16)” circular (cir) needle 
• Size 10 (0.75 mm) steel crochet hook 
• Marker (m) 
• Tapestry needle 
• 180 (112) 4 to 4.5 mm Rocaille beads with silver centers

This loop (or cowl) has a fun geometric lace pattern, uses an i-cord as a foundation and bind-off, and includes beads that add eye-catching pop.


And, just a bit of pride in my pals' work...

Dilettant Knits, Black Cherry Pullover

copyright Knitscene/Harper Point, 2013


Rock and Purl, Featured Designer in the issue designed a whopping 4 projects for this issue...

Stereo Mittens
copyright Knitscene/Harper Point, 2013
Hi-Fi Pullover
copyright Knitscene/Harper Point, 2013
Victor Shawl
copyright Knitscene/Harper Point, 2013
and Quadraphonic Cardigan
copyright Knitscene/Harper Point, 2013