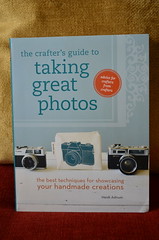
Monthly Archives: March 2012

Review: Crafter’s Guide to Taking Great Photos

Post image for Review: Crafter’s Guide to Taking Great Photos

photos_008

First, the facts:

Title: The Crafter’s Guide to Taking Great Photos: The Best Techniques for Showcasing Your Handmade Creations

Author: Heidi Adnum

Published by: Interweave Press, 2011

Pages: 192

Type: Photography

Chapters:

1. Getting Started
2. Photo Fundamentals
3. Finishing Up and Getting it Out There

KS: Crafters photos

The In-Depth Look:

Setting aside the knitting needles for a moment, let’s think about photographs, shall we?

I know not everyone takes pictures of their knitwear, but lots of people do. Maybe you have a knitting blog, or just like to share your finished objects on Ravelry. Or maybe you sell your knits (and other crafts).

If this is true, you owe it to yourself–and your knits–to take the best pictures you can.

I know that my own photography took enormous strides forward when I started blogging in 2005. I saw so many fantastic photos on other knitting blogs, I made a conscious effort to up my own game. Once you start seeing GOOD photographs of knits, you want your own to be as good as possible.

This book is aimed at all crafters. Anybody who makes anything. Knitting, quilting, woodwork, basket-weaving, embroidery … pretty much everything.

Step-by-step, this book helps you figure out what you need to do to set up the best shots. How to choose the right background. How to get the right lighting. How to adjust your camera settings for this very specific niche of photography. How to tweak things later in Photoshop or other editing software. The nice thing is that the tips for things like lighting involve a lot of cheap methods like making a reflector with cardboard and aluminum foil, rather than recommending you go out and buy hundreds of dollars of professional lighting equipment. Nor does the book look down at those using point-and-shoot cameras instead of DSLRs.

Mind you, there are lots of photography books out there; books that go into much greater depth than this does. But none have quite this focus. Photographing handknits is a very specific niche. Other photography books may cover the same details about light metering and white balance, but they almost never mention how to capture the texture of your stitching. They rarely ever tell you how to model an item so that it looks its best. Most photography books are concerned with the actual photo. They’re not concerned with your desire to capture a lovingly-made item on film.

Once the basics (like lighting, colors, and backgrounds) have been covered, the author zooms in on specific kinds of crafts. If you’re taking pictures of handknits, for example, you’re probably looking for a different aesthetic than someone who makes cutting-edge bookends from steel, or intricate wood carvings. The bulk of the book is taken up with looks at specific types of crafts, with hints, sample photos, and a Q&A with a crafter who specializes in that particular craft.

Here’s one crucial detail, though.

This book’s focus is on not only taking good photos, but more specifically, on taking good photos so you can SELL your crafts. There are tips on how to make the “look” of your online store consistent, how to show the scale of your items, what to do to encourage a buyer to browse through your other items. Most of the crafters I know are interested in making things for the joy of making/sharing them, not so much because they’re trying to sell them, but because they love the knitting. But that doesn’t really matter. The elements that go into a good photograph are the same either way. My eyes started to glaze ever so slightly, though, after reading about “the look of your online store” so many times when I don’t actually have one.

Really, though, this is a useful book. The sample photos scattered throughout are adorable, beautiful, and inspiring. They made me want to visit a LOT of Etsy stores to buy things because the photos were so enticing–which is exactly the point. When I take pictures of my handknits, I might not be trying to sell them, but I am trying to sell the idea of them. The feel, the texture, the softness. I want the person looking at the photo to feel like they can touch them, to see just how delectible and cuddly they are.

To do that, I need great photos. And to get those, this book is just what I need.

Want to see bigger pictures? Click here.

This review copy was kindly donated by Interweave Press. Thank you!

My Gush: Lots of helpful photography tips and inspiring pictures.

Planting A Garden: Grand Plan & First Steps

It is officially time, y’all.

Last week, Zac and I spent nearly every waking hour out of doors. We hauled load after load of compost down to the garden, and turned load after load of it in to last year’s double-dug beds, transforming the wintry, clay crust into a dark, even tilth.

In the first bed went our root vegetable seeds: St. Valery and Jaune Obtuse du Doubs carrots, Chioggia, Bull’s Blood, and Golden beets, and, in a row together, Guernsey Half-Long parsnips and French Breakfast radishes (the radishes, quick to germinate and come to maturity, mark the parsnips’ row, shade out competing weeds, and are harvested and gone by the time the parsnips need the space. This is a trick I picked up from Country Living, which is hands-down our second favorite magazine, next, of course, to By Hand.)

Jerry observed us carefully.

From a llama’s eye view, you can see the layout of the garden a little better. In front is the root bed, the bed I’m standing and planting is the greens bed (succession planted with about 8 types of lettuce), and the bed to my back is the onion bed. Beyond that, there’s a perennial bed on the left (overwintered garlic, to be replaced by asparagus, two rhubarb crowns, and some horseradish), and a yet-to-be-dug potato bed on the right.

Further beyond that, in another fenced-off area, is the New Garden– a plot about the size of four beds, currently inhabited by Elwyn, Brooks, and White, our wonderful weed-eating geese. Once they eat the weeds down to nothing, we’ll dig four beds there: one for tomatoes, one for peppers, one for cucurbitaceae, and one for beans and peas.

I’d go in to our plans for putting berry bushes all along the back of the house, and planting herbs and dye plants all in the front, but it makes me tired just to think about.

If you remember the insane bounty of last summer’s garden (only the original three beds), you may wonder why on earth we’d want to grow any more food than last year.

It might have something to do with the best compliment I’ve ever received (I overheard Susan telling someone this weekend “Caroline never met anything she didn’t want to grow,” which, isn’t that just the best?), but there’s another, bigger reason there as well.

Baby Jalapeños

Here is the big announcement: we’re starting (another) CSA!

But don’t get excited just yet.

Since it looks like we’ll be faced another deluge of food (not only vegetables, but also milk, cheese, eggs, and bread) this summer, we realized we’d need a release valve of sorts– we needed to find someone to give all this food to, so that we weren’t sneaking squashes in the A/C repair van, giving bushels of beans to the mail lady, and plying everyone who set foot in the house with watermelon jam.

Leggy Tomato Babies

Since Susan has the alchemical talent of turning everything she touches into gold, she suggested with sell 5 shares in our summer garden (20 weeks, from Mid-May through September) at the cut-rate price of $100 each to some friends. At $5 a week, the shares were gone in about 37 seconds, and we’ve got a heck of a waiting list. Since the whole venture really is experimental (how much do Zac and I like gardening for an audience? Did we plant enough lettuce for 5 families?), we decided to start really, really small.

That makes us back all the money we spent on seeds and plants, while teaching us what works and what doesn’t, and also allows us to offload our inevitable zillions of tomatoes onto our 5 lovely customers.

Little Herbs

So keep your fingers crossed for us and for our garden (and if I owe you an email, think of me transplanting thousands of thread-thin onions, and forgive me). I’m already pretty sore from shoveling– just in time for Shearing School next weekend!– and a little more tan than I’d like to be. That said, if you have a spring or summer farm stay coming up, prepare to be pressed in to service! (Just kidding (Or am I?))

This is going to be the best summer yet. And we’re never going to spend money on food again.

P.S. Zac and I are going to go cut down some trees in the woods today. Why, pray? To inoculate them with Oyster and Shiitake mushroom spores, and start a little mushroom garden under the deck. We’ll expect our first harvests in about a year. No problem.

a grain bag bag! and other stuff…

the grain bag

Last year I bought a grain bag bag, and I have been using it a lot. However, I’m heading to Spain (in a week!!!), and the bag isn’t especially at all secure. And so I made my own, with a zipper on the top and inside zippered pockets for the ipad and passport/money.

Start with this:
grain bag bag

Fold, iron, duct tape, sew, add zippers, seat belts…
grain bag bag (1) grain bag bag (3) grain bag bag (6) grain bag bag finished 001 (2) grain bag bag finished 001 (5)

And end with this:
grain bag bag finished 001 (9) grain bag bag finished 001 (1)

The new bag is a tad bigger, and it’s wider at the bottom. This will be great for my upcoming trip. The older bag has better placement of the writing and logo.

Lessons learned:

Going to the junkyard to cut seatbelts out of cars is way a lot of FUN. It was a cold day with snow on the ground, so I didn’t fully explore the place. I’d been looking into trucks, thinking that they might have longer belts, but not really. Then I turned around and saw the “caution” writing on the belt in a trans am. So I just grabbed the two from that car.

Actually, it took a lot of effort to cut them out with a box cutter… which is a good thing!

The seatbelts from trucks, where they exist, are generally dirtier than those from cars. The passenger side belt is much nicer than the driver side belt. It’s likely that the two belts from a single car won’t match perfectly due to dirt and use, but a good wash helped that.

Having a business that begins with A does pay. Aable was the first junkyard I found in our area, so I phoned and then went out later that day. On my way I passed FOUR other junkyards. It’s as though every second business in Chelsea is a junkyard… it’s what a lack of zoning can do. I still think it was worth driving the extra couple miles… it was a huge yard, and the guy there was great.

I love my kenmore! It sewed through four layers of seatbelt, no problem… though by the end, and maybe it was six layers of seatbelt I tried to push it through, the needle bent…
grain bag bag (7)

Though it was a fun project, and something I wanted to do, it was also a royal pain in the ass. I think I spent four or five hours on the sewing, never mind getting the seatbelt, zippers (a trip to Waterville), buckley things, and most recently and yet to be added, a magnetic clasp.

There are a few other photos in this flickr set.

mushroom sweater update

The body is done! It was done two or more weeks ago… and I haven’t gotten around to picking up the sleeves. It’ll happen, but it probably won’t be finished until sometime in May.
striped mushroom sweater body striped mushroom sweater body (1)

It looks skinny, but as you can see, it’ll stretch. It’s sized for 50 inch chest, though I tapered for the waist. I’m happy with the shoulder detail, and that the back is about 2-3 inches longer than the front (the sides match up, I used shortrows).
striped mushroom sweater body (2) striped mushroom sweater body (4)

gratuitous doggy pic

Gravy in socks…
gravy in socks

crazy sink

I had to go to just about the world’s worst and least effective training a week or two ago. I work in an office… I don’t need somebody who is reading the slides and doesn’t really know anything about the subject to inform me about hazard communication (label your chemicals) and blood borne pathogens (um?).

Do you have two containers of toner? You need your material safety data sheet posted in the location where you store your toner. In case somebody accidentally ingests it. Give me a frackin’ break! And the bloodborne pathogens was all about hiv and hep C, and the information was not exactly right. I pointed these things out of course. And that all of us in the room were more likely to be exposed to ticks and Lyme disease, and even rabies in an office environment (bats flying about the old buildings) than what they covered. The response? Well, unfortunately OSHA doesn’t have standards for these things. Again, give me a break!

But the sink in the bathroom was way cool…
sink
You have to step on the metal bar near the floor to turn it on, and then warm water sprays all down and around. Talk about a waste of water! But apparently the place used to be a factory, and everybody would have break at the same time, so at one time these sinks saved money.

Not so much anymore.

oddities

knife shadow
Can somebody explain this shadow?

etc

I had that nasty cold that’s going around. Mom felt bad for me and sent some lovely flowers!
flowers

I turn 51 tomorrow…

I hope to post about the snowpile. It’s practically non-existent, but it has become a tradition. So, stay tuned… I’ll take a photo on the first day of spring as usual, and announce a contest.

Clearly I have not been blogging much, nor have I been reading many blogs. In large part I blame Facebook, and also the Ravelry forums. Also, I have a new toy, that iPad, which is a lot of fun. However, I think I need something better to synch feeds with my Google Reader.

Feedly displays nicely, but there’s no organization… I can’t mark things as read, it doesn’t record that I’ve read things, AND it doesn’t grab all of the feeds, and of the ones it does grab, it doesn’t display all of them correctly or allow me to visit all the websites. So I’ve stopped using it. Anybody got a recommendation?

Did I mention I’m going to Spain?!?!?!?!

For two and a half weeks! With a friend!!! I’ll be posting pics to facebook, since that’ll probably be the easiest.

Flowering snowball progress

flowering snowball baby quilt progress flowering snowball baby quilt progress flowering snowball baby quilt progress

I haven’t really made friends with the curvemaster foot just yet but we did make good progress over the course of assembling blocks for the flowering snowball quilt. I discovered I need to move my needle position one to the left and that I work better without the tweezers. My concave curved piece needs to be on top and I need to stretch it slightly on the cut edge as I sew. I tried to take a few photos to remind myself how to do it but it’s tough to sew and take pictures at the same time. I wasn’t too sure about the blocks as I was assembling them individually but once I got them all together I really loved the result. I’m planning to stitch in the ditch along the edges of the blocks and then stitch along the edges of the pink pieces that form circles.


Catching up, a couple of designs

This starts with a story about Dave and some delicious yarn.  Dave is one of my co-workers, one of the guys I work most closely with every day.  Last summer, I was knitting a sweater for the JMF trunk show and whenever Dave would come into my office, if my knitting was on my desk, he would pick up the ball of Chadwick and pet it.  He loved it – how soft it was, the gorgeous color, how warm it seemed.  I was charmed, because most of my co-workers seem to regard my knitting as just a weird thing I do (and I don’t even tell them about the spinning!).

Dave really is an all around great guy, and his appreciation for my knitting told me that I had to knit him a hat, out of the Chadwick that he had spent all summer petting and admiring.  Because he was an artist in another life, I knew I wanted it to have some colorwork to make it interesting.  Since he’s a guy (obviously), I didn’t want it to be TOO interesting.  When I went looking for just the right pattern, I couldn’t find it, so I decided to make one up for myself.

Here is what I came up with:

Picket Fence on a Country Road

And he loved it!  He was so excited when I gave it to him, I was really touched – there’s nothing better than having your work really appreciated by the giftee, you know?  He wore it around the office, he told everyone I had made it for him, and the best part was that he was completely surprised.  I loved it.

I decided that I would write the pattern up and it is available from Ravelry as a free download, and I am really happy to be able to share it with everyone.

Fresh on the heels of finishing Dave’s hat, JMF announced that they were doing a design contest.  Folks in the group on Ravelry encouraged me to enter Picket Fence in the contest, but there was a catch – the rules said you could only use two balls of yarn.  Although I hadn’t used more than two balls worth of yarn, since I had three colors, it was out.

I’d had such fun designing Picket Fence, though, I decided I would try another design for the contest.   I just squeaked it in on the deadline and I learned a LOT from the process.

I was really pleased with how it turned out (there’s more pictures on its Ravelry project page:

Geometric Hat, modeled by Miss Hannah

And I’m pleased to say that tonight, when they announced the finalists for the contest, my hat was one of the ones they selected!  There are a lot of amazing, gorgeous patterns in the running, and you should definitely go and vote for your favorites.  Of course, I hope that one of them is my pattern, but I will not feel bad at all if I lose to any of the other patterns up there – they are all that good.  If I win, KFI gets to keep my pattern, and hopefully they will make it available.  If I don’t win, I’ll be publishing it myself and will let you all know when that happens.

I Knit a Womb

Last night, I got home, and was feeling a little cranky–I am having diet issues, which I may bring up at a later time–and I had forced myself to take the day off work. (Blogging doesn’t count.) I have been experiencing knitting ennui this week. Too much Farmer’s Market knitting, not enough me knitting. Then I noticed my phone had downloaded the new episode of Cast On. I listened as I piddled about the apartment. Brenda spoke about knitting wombs. So I grabbed the pattern off knitty, sat down and got to work.

I had the perfect yarn. The pipe cleaners. The stuffing.

And it was fun. It took about an hour all together, and I had some trouble with the pipe cleaners. It fulfilled my knitting desire and also fit right in with my mood, a little cranky, a little defiant, a little quirky.

I would like to knit more toys. Small toys like this one. I don’t think I have the patience for giant toys. I should figure out a tiny dino pattern or two. Now that would be appropriate.

Loopy Wicker Cowl

I created the Loopy Wicker Cowl for the Juniper Moon Farm Design Contest. The basic guidelines were to use up to 2 balls of either Willa or Chadwick. This is a very quick knit, I made both the single and 2-color version in a few hours on a Saturday afternoon. It is also very warm and soft. You could easily adapt this pattern to be wider, it works on a 6-stitch repeat with 1 stitch on either side (so multiples of 6, plus 2 stitches).


And special thanks to photographer Susan Gibbs and model Caroline Fryar of Juniper Moon Farm for allowing me to republish this photo from the blog post about the contest finalists:

Loopy Wicker Cowl
Size – one size fits most adults

Materials:
1 ball Chadwick
(if making the 2-color version, 2 balls Chadwick)
This pattern uses 70-80 yards of yarn in total.

Size 8 (US) needles
1 button

Gauge: 18 sts and 27 rows over 4 inches / 10 cm in stockinette

Pattern notes: On the odd numbered rows, the yarn is wrapped twice around the needle when purling. These extra wraps are dropped in the even numbered rows and are what makes the long loops that form the wicker-like pattern.

Cast on 26 stitches.

Row 1 (WS): Purl entire row, wrapping the yarn twice around the needle when making the purl stitch.

Row 2 (RS): Dropping each extra wrap, K1, *sl 3 to cable needle and hold in back, k3, k3 from cable needle, repeat from * until 1 st remains. K1.

Row 3: same as row 1

Row 4: Dropping each extra wrap, K4, *sl 3 to cable needle and hold in front, k3, k3 from cable needle, repeat from * until 4 sts remain. K4.

Repeat rows 1-4 until the cowl is 20 inches long (50 cm). Bind off by purling. Finishing by sewing a button on one end.

To make the 2-color version, cast on 10 stitches in main color, then 6 stitches in contrast color, then 10 stitches in main color. Follow the pattern as written but always use the same color to knit as the stitch below is.

the state of cat nation

009 010 014

We’ve had a difficult week for the kitties this week. Last week Gabby girl had a seizure. I took her straight away to the vet for an intense battery of blood tests. She’s been diagnosed with FIP, dry form. Of course that meant Riley and Winnie had to go in for blood work right away. It was time for Winnie’s yearly exam so we did that at the same time. Riley is all clear so she will get an FIP vaccine and from here on out she’ll get that along with her yearly vaccinations. Winnie has a very high titer but no evidence of active FIP other than a low white blood cell count and an odd little cough/snort when she eats. For now we will just watch Winnie very closely but if there’s a change in her cough she’ll go in for x-rays of her chest. Gabby will go on prednisone which should make her more comfortable and hopefully improve her appetite since weight is our primary concern right now. So far, she has only had one seizure so she doesn’t need a seizure medication.  This disease is not well understood but since the FIP virus is sequestered in macrophage cells and is not shed by the body there is no need to quarantine Gabby.

Swayback Girl Clovers

Skirting a Jacob Fleece


Samson's Fleece on the Hoof
We named this farm after the Jacob sheep we love so much, thinking that Jacobs would be the only kind of fiber animal we'd ever need.  Funny how things change, but there was good reason for us to at least begin that way.  Jacob wool grows naturally in at least two colors on the sheep's back.  You can dye it if you want, but it's awesome the way it is.  This wool is super easy to spin, and very versatile.  This primitive breed can be medium coarse to impressively soft, and everywhere in between.

Let me show you how I usually skirt my raw Jacob fleeces, to take best advantage of all its unique qualities.

First, we lay the fleece out on the screen skirting table, cut ends down.  We see what we saw on the sheep before shearing - the outside of the fleece.  We can see all the grassy areas, and the coarse, icky areas.


I work my hands all around the outer edge of the fleece, finding the places where the wool is not as soft as I'd like.  I pull out grass and burrs, super dirty parts, felted bits, and short cuts.


Around the edge of the fleece that came off the animal's back legs, we find a good-sized coarse area called the "britch."  On most sheep, this is the least desirable wool.  You can see how harsh and hairy it looks.


Once most of the bad stuff is removed, I flip the fleece over to see the cut side.  You can see that the wool is much cleaner close to the skin.  Samson has nice bright white wool and deep black wool - some Jacobs are browner or grayer than this.


The second cuts, or the tiny bits of wool that are caused by the shearer going twice over the same spot, are easy to see when they stick to the opposite colored wool.  We pick those off and toss them to the birds, for nesting material.


On a pure white sheep, we'd be done at this point.  But with these spotted Jacobs, we have a couple of options:  we can wash and blend all the wool together into a nice heathery roving that looks gray, or we can sort the wool into three different piles - the white wool, the black wool, and the wool along the color borders that is too intermingled to separate cleanly.  Samson has more white than black wool, so I'll start with the white.  In the picture above, I've started pulling the large section of white wool (lower right corner) away from the black spots, getting pretty close to the black without pulling any of the black into the white.  I use a motion I call "Pac Man hands" to pull and part the fiber into the clear color groups.   This takes time and patience.


See, now I have the largest pure white areas pulled away from the black spots.  Now, I spread the remaining fleece out and work from the inside of the black spots, making sure I don't get any white mixed in.  This leaves the wool that's just too hard to separate cleanly - a mixture of black and white.  How much wool you leave in this "mixed" group is completely up to you.  I try to work pretty fast, and I don't mind a large amount of mixed colors.


Here are my three bags full - black, white, and mixed.  These batches are ready to be washed.  When they're clean, we can continue to remove any grass or short bits that have not been separated out yet.  The mixed wool, when carded, will become a gorgeous heathered gray.  With three different colors of wool from one sheep, you can see that the possibility for natural colorwork is vast - fair isle patterns, stripes, mosaic knitting -- you name it.

If you haven't ever tried spinning or knitting with Jacob, I highly recommend giving it a go.  Your fiber fingers will shout for joy!