Tag Archives: How-to

Gluten Free, Lactose Free Vanilla Cupcakes

Cupcakes always hang out with succulents, right?

My middle kiddo, Felix, turns four today. So, it’s a day to celebrate.

I don’t talk much about the kiddos on the blog, except to say how much work they are. But Felix so amazing. He loves the alphabet and numbers and drawing people with faces. He likes animals and playing outside and water. He likes to work beside me when I’m writing at the dining room table. He sits at one of Brock’s old computers and types words like “sunny” and “pizza” and some amalgamation of letters that I think is supposed to be purple. He’ll get it soon.

One thing Felix loves, even though it does not love him back is chocolate. So we avoid it now, which has been throwing me for a loop because all of my go to deserts have chocolate in them. I mean, if there’s not chocolate, why bother, amiright?

That’s where these vanilla cupcakes come in. The are light and moist and just the right amount of sweet. Paired with a rich vanilla buttercream, I don’t even miss the chocolate.

I adapted these from a regular old gluten and dairy filled recipe. So you can totally make that version too. But, if you’re like me and half my family, wheat and dairy only make you sick, which totally takes away from the sugar high, you know. So I made mine with gluten free flour, buttery sticks, and lactose free kefir, but if you want to completely avoid the dairy, just substitute your favorite dairy-free milk. I used kefir because the recipe called for buttermilk, and I was trying to approximate the taste and effect buttermilk has in cake. Like buttermilk, kefir adds depth of flavor and makes the cake fluffy.

For best results, these are the products I used in these cupcakes (some of these are affiliate links):

Pin the recipe for later!

And now onto the good stuff:

Gluten Free, Lactose Free Vanilla Cupcakes

Ingredients

  • 2 3/4 cups Bob’s Red Mill One-to-One Gluten Free Flour
  • 1 TBSP Baking Powder
  • 1/2 tsp sea salt
  • 2 sticks Earth Balance Buttery Sticks (1 cup), room temperature
  • 2 cups granulated sugar
  • 5 large eggs, room temperature
  • 1 1/4 cups lactose free kefir (or sub your favorite non-dairy milk)
  • 1 TBSP Vanilla

Directions:

  • Preheat over to 350
  • Line and grease two muffin tins
  • In medium bowl, combine dry ingredients and whisk until blended. Set aside
  • In large bowl, beat buttery sticks on medium with hand mixer (or stand mixer, or, if you’re using a whisk, do like Bob Ross says and “Beat the devil out of it.”) Seriously, beat the butter for like, three minutes, scrappin’ down those sides. Buttery stuff should be light and whipped looking
  • Add sugar and beat for another two more minutes until mixture is on the fluffier side of doughy. (About two minutes)
  • Beat in eggs one at a time.
  • Mix Vanilla in with Kefir
  • Add 1/3 of flour mixture, beat until combined
  • Add 1/2 of kefir mixture, beat until combined
  • Add second 1/3 of flour mixture, beat until combined
  • Add rest of kefir mixture, beat until combined
  • Add rest of flour mixture, beat until combined
  • Using 1/4 size measuring cup, portion out batter into muffin tins. Will make about 24-30 cupcakes.
  • Bake for 14 minutes or until edges start to brown and middles are set
  • Let cool for five minutes in tin, then move to cooling rack to cool completely before frosting.

Icing Recipe

  • 2 buttery sticks (1 cup), room temperature
  • 4-6 cups powdered sugar
  • 1 TBSP vanilla
  • 1-2 TBSP almond milk as needed

Direction:

  • Beat the devil out of the buttery sticks again
  • Sift in powdered sugar 1-2 cups at a time, beating until combined
  • Add vanilla after 4 cups, adding almond milk as needed to thin.

Frost cooled cupcakes as desired.

Enjoy!


delicious

How to Beat the Overwhelm

Anybody else drinking all of the coffee lately?

I have big dreams.

That’s never been a secret around here.

And making those dreams into a reality takes work. And it’s work I’m excited to get done, even if it’s big and scary, like announcing my debut novel, which comes out in 77 days, btw.

My days and weeks are busy. I get up early. I work until midnight, and most of it has nothing to do with being an author. It’s cooking, it’s cleaning. It’s taking care of kiddos, and during weeks like last week, it’s a whole hell of a lot of taking care of myself.

If a week was ever gonna derail me from accomplishing my goals, it was last week.

I’ve been battling a virus that is mostly an annoying cold, but has really done a number on my appetite. (Read, for a few days I had none.) I slept in everyday. I came home from work early one night and laid on the sofa. I missed emails. There were days that I didn’t write. My to-do lists sat untouched.

I was frustrated. Guilt weighed me down as more and more stuff piled up.

As I’m emerging from the worst of the virus, I’m completely overwhelmed with the volume of things I need to get done over the next few days–stuff I probably won’t get done this week either, because it’s Felix’s birthday on Tuesday, and mom stuff always comes first.

But here’s the thing.

I’m OK with it.

Do I guilt myself? Of course I do.

Do I let it stop me from doing what I can?

Absolutely not.

Sure, I only got a fraction of what I wanted to accomplish done last week, but what I did do was important. Taking care of yourself is important, even if that means sleeping all days and drinking all of the kombucha and reading The Allure of Julian Lefray

Inventorying what I did helps but the overwhelm of what I didn’t into prespectived: I finished writing a prequel to The Other Lane (more on that later). I bought ISBNs, because that’s the responsible author thing to do. I posted to Instagram TWICE. All despite feeling like shit.

Badassery achieved.

Giving myself credit for what I did already makes the backlog feel more manageable.

And tomorrow, I’m baking cupcakes to celebrate Felix and not apologizing for only writing 16 words.


PS, you should totally follow me on Instagram. I’ve been posting a lot of pretty desk photos, but also some teasers from The Other Lane. There are knitting pictures too.

Yellow Birthday Cake Recipe – Gluten Free, Dairy Free

I love sprinkles.


I don’t talk about food much on the blog anymore. I don’t like to interrupt other people’s journeys with talk of where I am and what I’m doing, because it is 100% tailored to the things that don’t make me feel like shit. And it bugs me when people get evangelical about their diets, like veganism can save the world and all cavemen go to heaven. Whatever and ever. Amen. Plus, along with the spiel, there is usually some sort of implied (or overt, let’s be real) fat shaming, and that’s just not cool. But, one of the things I do enjoy is experimental baking, and let’s be honest, when you can’t eat much fun stuff, everything is experimental.

But, in case you are like me, and you don’t feel like experimenting, here is a cake recipe that works.

If you aren’t like me, and can eat all the wheat and dairy you want–you should be able to substitute regular flour, butter and milk for all the gluten free, non-dairy ingredients in this cake. If you do, let me know how it goes!

I had big plans before the holidays to make myself a French Opera Cake, which is super complicated, and basically takes the whole day. Sometime around Christmas–probably about the time I was making my third batch of frosting in as many days–I decided that I didn’t want fancy and complicated. I wanted simple and classic.

Ah, yellow cake


Enter my favorite standby: yellow cake with chocolate frosting. It doesn’t get any better than that. And this is my favorite recipe. I love this recipe because it makes a nice, light, moist, spongy cake, and that’s not too sweet. It’s a texture that can be hard to achieve with gluten free flour. If a cake recipe has too many liquids in it, the texture can turn gummy, which is just gross. Ew.

Ingredients:

Cake:

  • 1/2 cup butter substitute, I use Earth Balance Soy Free Vegan Buttery Sticks, softened
  • 1/4 cup coconut oil, softened
  • 3 eggs (or 3 flax eggs to make vegan)
  • 2 1/2 cups gluten free flour blend. Use your favorite, and don’t forget the xantham gum if you need it. If you’re new to gluten free baking, try Bob’s Red Mill 1-to-1 flour that already has the xantham gum mixed in. It’s very close to the blend I mix myself.
  • 2 1/2 teaspoons baking powder
  • 1/2 teaspoon salt
  • 1 1/2 cups granulated sugar
  • 1 1/2 teaspoons vanilla
  • 1 1/4 cups coconut milk (I used 1 cup full fat canned coconut milk–shaken–and added 1/4 cup filtered water to dilute.)


Frosting:

  • 1 cup buttery sticks, softened
  • 4-5 cups powdered sugar
  • 3/4 cup cocoa powder
  • 1-3 tablespoons coconut milk (or other non-dairy milk–I didn’t want to open another can of coconut milk for two tablespoons, so I just used water.)


Now here’s a pet peeve of mine. When I read baking blogs, no one ever whips their butter. Sure they’ll tell you to cream your butter and sugar, but no one ever says to whip your butter (or in this case butter-like-stuff and coconut oil) before you add the sugar. In this recipe that step is crucial. Don’t skip it. In fact, don’t skip it again, ever. If a recipe starts “Cream butter and sugar” whip your butter first, then add the sugar a little at a time to keep your butter fluffy. Trust me. It works.


Note, this recipe includes a lot of whipping and mixing. While ideally, a Kitchen Aide mixer would be used, not everyone has one of those. If you’re like me, you think, “Oh, having one of those would be so nice. Maybe for Christmas.” Then you look at your kitchen, snort, and say, “When I have someplace to effing put it.” So, if you have a fancy Kitchen Aide, whip out that paddle attachment and get going on that butter. If not, a hand mixer will work. And if you don’t have one of those either, no worries. I have made this recipe with a wooden spoon and a whisk. Make sure your butter is very soft before you begin, and it’s a totally cool way to get rockin arms, I promise.


Layer cake for the win!


Instructions

  1. Spray and flour 2 8- or 9-inch round pans. (You could use a 9×13 cake pan, but let’s be honest, we all know sheet cakes are lame–unless it’s Texas Sheet Cake, and really, that’s almost brownies anyway)
  2. Preheat over to 375F
  3. Sift flour, salt and baking powder together in medium bowl and set aside
  4. In large bowl, whip butter, scarping the sides until silky and light. (If you’re beating something, you better be scarping those sides, I’m just sayin.)
  5. Add sugar to butter 1/4 cup at a time, whipping until smooth in between, beat for one minute after last cup of sugar
  6. Add eggs one at a time, whipping for about 30 second in between eggs
  7. Add vanilla (and yellow food coloring if you want a really yellow cake) and whip until combined
  8. Alternate adding flour mixture and coconut milk until everything is well combined. You should have a fluffy, silky smooth batter that’s almost too thick to pour.
  9. Divide evenly into two pans and bake for 25 minutes or until toothpick comes out clean.
  10. Allow to cool in pans for 10 minutes, then turn out onto cooling rack to cool to room temperature.
  11. Once cool, frost and build cake. Decorate as desired.

Chocolate Buttercream Frosting

  1. Whip buttery stuff until smooth and creamy, scarping sides
  2. Sift in two cups of powdered sugar and beat until smooth
  3. Sift in 3/4 cup cocoa powder and beat until smooth
  4. Sift in remaining 2-3 cups of powdered sugar to taste, adding no more than a tablespoon of liquid at a time thin the frosting as needed.

I like a thick, rustic looking frosting job. Cake decorator I ain’t. If you like to get out pastry bags and rummage through drawers for icing tips, good on you. Have fun with it, but you’ll likely want to make a slightly thinner frosting. Be careful about adding too much liquid at once. Always add it little by little until you get the consistency you want. It doesn’t take much to go from frosting to glaze.


Happy Birthday to Me!


So yes, tomorrow is my 33rd birthday. I’ll have my typical birthday post up then. And if you follow me on instagram you can watch for updates as I go on my birthday adventure.

My first online class!

About My First Class on Skillshare

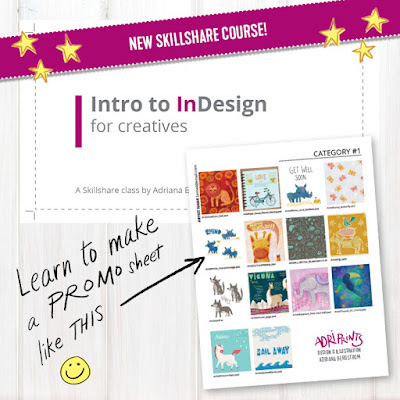
My first class is about learning to use Adobe InDesign (which already comes bundled with many Adobe CC accounts) to make beautiful, clean, perfectly aligned contact sheets that are easily edited, updated, and exported to help you sell your work.
I created this course to help de-mystify InDesign. A lot of creatives, artists, and photographers pay for Adobe CC, but are not sure how to take advantage of all the software it brings. So, this is my effort in making Adobe's publishing software work for you. InDesign is a really robust piece of software and the perfect companion for Illustrator and Photoshop when you're looking to put it all together and publish your work.

I created this course to help de-mystify InDesign.
I've used InDesign to produce all kinds of promotional and informational materials throughout the years: business cards, mailers, postcards, booklets, portfolios, and contact sheets.
I focused on contact sheets as a way to explore InDesign and learn concepts that will easily translate to a lot of other projects. If you'd like to learn more, you can check out the class here on Skillshare.
I'd love to hear what you think!! And, if you've never used Skillshare before, here's a link for a  free 2 month trial of their premium membership - the link's limited to the first 10 who use it though, but take advantage while you can!

How To Transform Any Mitten Pattern into Flip-tops

I do a lot in a day. I have a word count to hit, videos to make, knitting to get done, food to cook, cleaning to do, a job that actually pays, and oh yeah, kids to take care of. Most days, I don’t get all of this done. And let’s be honest, I throw over cleaning in favor of word count most of the time. Even then, words come in starts and fits in stolen moments between all of the other tasks.

Still, it’s a lot, and I get a lot of, “How do you get everything done?” questions. I usually joke that I just don’t sleep.

Last night, that was no joke.

2am Rufus/Mommy selfie because woke baby is woke

This is a photo I snapped around 2 am when I gave up trying to get Rufus back to sleep (he woke up as we were trying to go to bed) and we came downstairs. We didn’t get back to bed until 4. While I don’t sleep much, I usually get more than 2 or so hours.

You know what I have accomplished today? I got the kids to and from school. I got meals made. I showered. It’s 9pm and I am just now writing a blog post I usually have up and promoted by 11am (and written no later than the day before it goes live, but we’re not talking about yesterday.) The word count hasn’t been touched. Next week’s videos were not filmed, etc.

But I try to count the important things. The kids were taken care of. I get to spend the evening with my husband instead of working. There’s a big batch of soup and some leftover spaghetti in the fridge to make meals easier tomorrow. And Nanowrimo starts in a week. Thanksgiving will come just a few weeks after that, and all of my siblings are coming home. There are so many good things coming.

And then there are flip top mittens.

This is my longest video yet, but I feel like it’s comprehensive.

The pattern I am using in this video is my free simple chunky mittens, but as the title said, you can translate this technique to pretty much any mitten pattern.

If you make a pair of these mittens, I’d love to see them. Tag your post with #simplechunkymittens or take a #mittenselfie. I’ve got a few on instagram myself.

How To Decrease the Hand of a Mitten


Happy Monday! I am excited for another week of querying literary agents, knitting mittens and writing, writing, writing. What are you excited about working on this week? I mean, I know you’re knitting mittens, and I’d love to see how those are going, but what else?

Here is this week’s installment of the Simple Chunky Mittens knitting tutorial. Today we learn how to k2tog and create an even, round top to our mittens. We even check for fit and weave in an end.

We’re so close to having a finished mitten! Next week we’ll knit the thumb and that’s it!

If you like, here is the written pattern we are using.
And if you need to catch up with the videos, they begin, here.[contact-form]

Don’t forget to share your progress photos with #mittenselfie and #simplechunkymittens. I’ll be searching for your photos on instagram.

How to Cast On to Double Pointed Needles


Back when I was teaching knitting classes regularly, I had a lot of students who had never knit in the round, and more specifically, had never knit with double pointed needles (DPNs), because they were intimidated by the mechanics of it. So we spent the whole first two hour lesson in any sock or mitten class learning how to cast on and getting to know all those needles.

Today’s video is like a condensed, 10-minute version of that class. It’s got all my tips and tricks, but it doesn’t take long to watch. And even better, you can watch the parts you need over and over again. I am still learning the video editing process, and I still sound like a grade A idiot on film, but my husband said I could tag this video as knitting ASMR, so I’m calling that a win.

If you would like to follow along with the written pattern, check it out here.

Next Monday we’ll increase for the thumb!

Tie Dyeing for the New Baby

I haven’t made too many things exclusively for this new baby. I still have so much leftover from Felix, that we’re not lacking for much. Still, this new little one will be a person all their own, so a few thing just for him or her seems appropriate.

This past weekend was chilly and drizzly, which is strange for Kansas in July, and I got a Tulip tie dye kit on sale at Michael’s, so I enlisted my 10 year-old’s help in tie dyeing a few things for the new baby. Not only did we get to spend some quality time together, it helped get him invested a little bit in the prep for the new baby. He’s not exactly enthused about having another new sibling at the moment, but this was fun for both of us.

Tie Dyed Osnaburg for the Ring Sling

We started with three yards of osnaburg done in the classic spiral technique. It came out perfect! I’ll be making another ring sling out of this as soon as my rings come in.

When I was going through our baby clothes a couple of weeks ago, I found more than 10 plain white onesies. While I’m all for the practicality of a neutral onesie, I’m not typically known for dressing my babies practically or along gender lines, so we had a lot of fun tie dyeing some onesies in all colors.

Athrun dyed this one. It might be my favorite.

This guy was created by rolling from top to bottom and using two rubber bands to divide it into three sections. Then Athrun absolutely saturated it in dye. I love it!

TieDyedOnesie2
This one reminds me of turtles

We dyed everything dry, and this guy was the only one that kind of repelled the dye. It’s a Disney brand organic cotton onesie, and I don’t think Felix ever wore it, so there’s the chance that it had never been washed. I’m not entirely sure, but I love how the dye came out anyway. This was accordian folded then sectioned into four, dyed alternately with lime and kelly greens.

TieDyedOnesie4
I love the color bleeds on this one.

As a contrast the the Disney onsie, this Gerber one was dyed using the same technique (just a different orientation) and really soaked up the dye!

It's a sunburst! Complete with sunspots!
It’s a sunburst! Complete with sunspots!

We used the bullseyes technique on this one, and the colors are so much fun.

The clean up onesie
The clean up onesie

Included in the kit was a sheet of plastic to protect your work surface, which worked great, but we were left a bunch of dye drips all over the plastic when we were done. (The instructions say to cover the plastic with paper towels to soak up drips, but we don’t use paper towels, so we improvised.) I used one last onesie to soak up the dye. Way better than paper towels. Baby will look like they helped dye their own wardrobe.


And just for fun, when I went to edit photos for this post, I had a large amount that accidentally looked like this:

wrap fabric plus belly and feet
I can only see my feet because the baby has started to drop

At 35 weeks, the belly is getting in the way of everything.

Review: The Beginner’s Guide to Writing Knitting Patterns

Review: The Beginner’s Guide to Writing Knitting Patterns post image

2016-04-24 014

First, the facts:

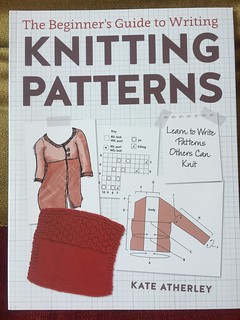
Title: The Beginner’s Guide to Writing Knitting Patterns: Learn to Write Patterns Others Can Knit

Author: Kate Atherley

Published by: Interweave Press, 2016

Pages: 127

Type: How-to

Chapters:

Introduction
1. Pattern Structure and Elements
2. The Actual Knitting Instructions
3. Charts
4. Grading
5. Formatting & Layout
6. The Process
7. Selling Online
8. On Copyrght
Appendix A: Basic Pattern Template
Appendix B: Abbreviations, Standard Terms and Glossary
Appendix C: Resources & Bibliography

KS: Beginner's Guide to Knitting Patterns

The In-Depth Look:

It’s about time, frankly, that someone put together a book this good, this thorough, and this useful for pattern writing.

You might have noticed that knitting is rather, um, popular these days. Despite the good showing of the recent surge in adult coloring books, I don’t see interest in knitting waning any time soon.

But, like anything else, once people have done something for a while, they start to want to do more. You’ve mastered garter stitch? Try stockinette stitch. You’ve mastered hats? Try mittens. You’ve mastered cables? Try lace.

You’ve mastered following patterns? Try designing your own.

I think this is an excellent idea, mind you. I’m a huge fan of being a Thinking Knitter, and for a lot of basic shapes and styles, there’s really no reason most moderately skilled knitters couldn’t simply design their own pullovers or basic shawls. Why not? It’s fun!

But the next step … sharing your patterns with others? Ah, that’s where new designers get into trouble. They think it’s easy. Yes, some parts might be–knitting a swatch, plotting a curve on a graph, combining colors–but others? How about scaling a pattern for different sizes? What about creating stitch charts? Or writing the instructions so that they’re clear? Just because you can read that specialized knitting code of “(RS) K3, p1, *k tbl, p1, C6R, p1, rep from * 3 times.” doesn’t mean it can’t be improved.

Like anything else, good designing is a lot harder than it looks. Anyone can write a sentence, after all, but not everyone is Shakespeare.

So here, finally, is a book that actually tells you how to write patterns for other people–patterns you can design and then sell. Patterns people will want to knit.

Mind you, this isn’t a book about the process of designing. It’s not going to tell you how to shape a sleeve cap or how to get the best gauge for the perfect drape. It’s about writing the pattern. It says right in the introduction, “This book is for any knitter who creates his or her own designs and is looking to write instructions to allow others to knit those designs.”

Honestly, I can only wonder what took so long. I’ve seen far too many bad patterns out there–and by “bad” I mean badly realized, badly designed, badly written, badly spelled, as well as just plain ugly. Sometimes the fault is the design itself, with things like sleeve cuffs so small you’d never fit a hand through it, but most of the time? It’s not so much the design as the instructions I’m supposed to follow to get that finished product on my needles.

Thank you, Kate Atherley, for putting together this incredibly clear, concise, and useful book for all those talented designers out there who don’t quite know how to get their instructions down on paper for other people. I think your book is brilliant and sorely needed.

Which means, if it wasn’t clear enough, that if you are even remotely interested in producing knitwear designs for other people, and if you’ve never done this before, you really need to get this book. Trust me. I’ve seen far too many otherwise brilliant designs suffocating under terribly written instructions and horrible charts and pattern layout. Don’t let that happen to you!

You can get your copy here or at your favorite local shop.

Want to see bigger pictures? Click here.

This review copy was kindly donated by Interweave Press. Thank you!

My Gush: It’s about time.

Other posts for this author:

Process: Advent Calendar Noel Image

Hello! I just wanted to introduce myself in case you hadn't met me before.  I'm Adriana Hernandez-Bergstrom!  I go by Adriprints on my work, and  you can find me really easily with that moniker.  I'm the founder of the Finch & Foxglove art collective, and I did the first illustration on our digital Advent Calendar.

I am a really process-oriented person and I love learning how others get to the images they do.  I hope you can learn a little bit from my process too!

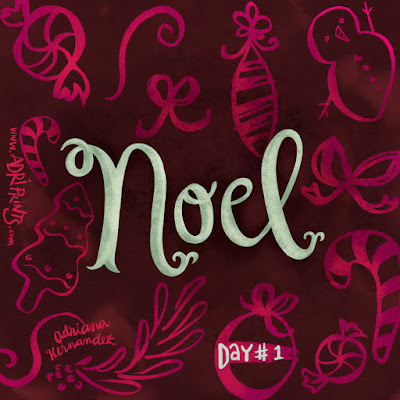
The "Noel Peppermint Bark" illustration started off as a doodle that I did in August or September.  I was at my mom's house playing around with an old watercolor set that I had left at her house in case all my luggage was lost.  In my mind, I was working on a tropical-Christmas kind of theme...


In between then and now, our group came up with a wonderful color palette for our advent calendar.  We looked at vintage Christmas postcards to get us started.  These colors were rich and wonderful, but not really tropical... and I really wanted to use the "Noel" lettering.  So I traced the lettering in Adobe Illustrator with the pen tool, used a color from our palette, and started working on composition with the other illustration assets that matched the palette a bit better.  I had created these assets or icons a few weeks ago by painting in watered down gouache.  They were extras from the greeting card project I did in October, and I did a direct "live trace" using Adobe Illustrator to capture them...


Once I had a composition that I liked, I brought each element separately into Photoshop, converted them to Vector Smart Objects and began to add texture and depth...


I really wanted a rich feeling like chocolate in the background, and at first I tried mint + chocolate with the lettering...


But, as you can see it looked a bit too cold in this version.  It read like mold or marble or something unappetizing.  So, next I tried peppermint, and that is what you see in the final image.  A little bit tastier, I think!


This is just one of the many illustrations in our wonderful digital advent calendar.  Follow along on our Finch & Foxglove Advent Calendar page!