Posted onNovember 25, 2013byAdri H.|Comments Off on Craftsy BOM Blue Sampler Quilt: Nearly at the finish line
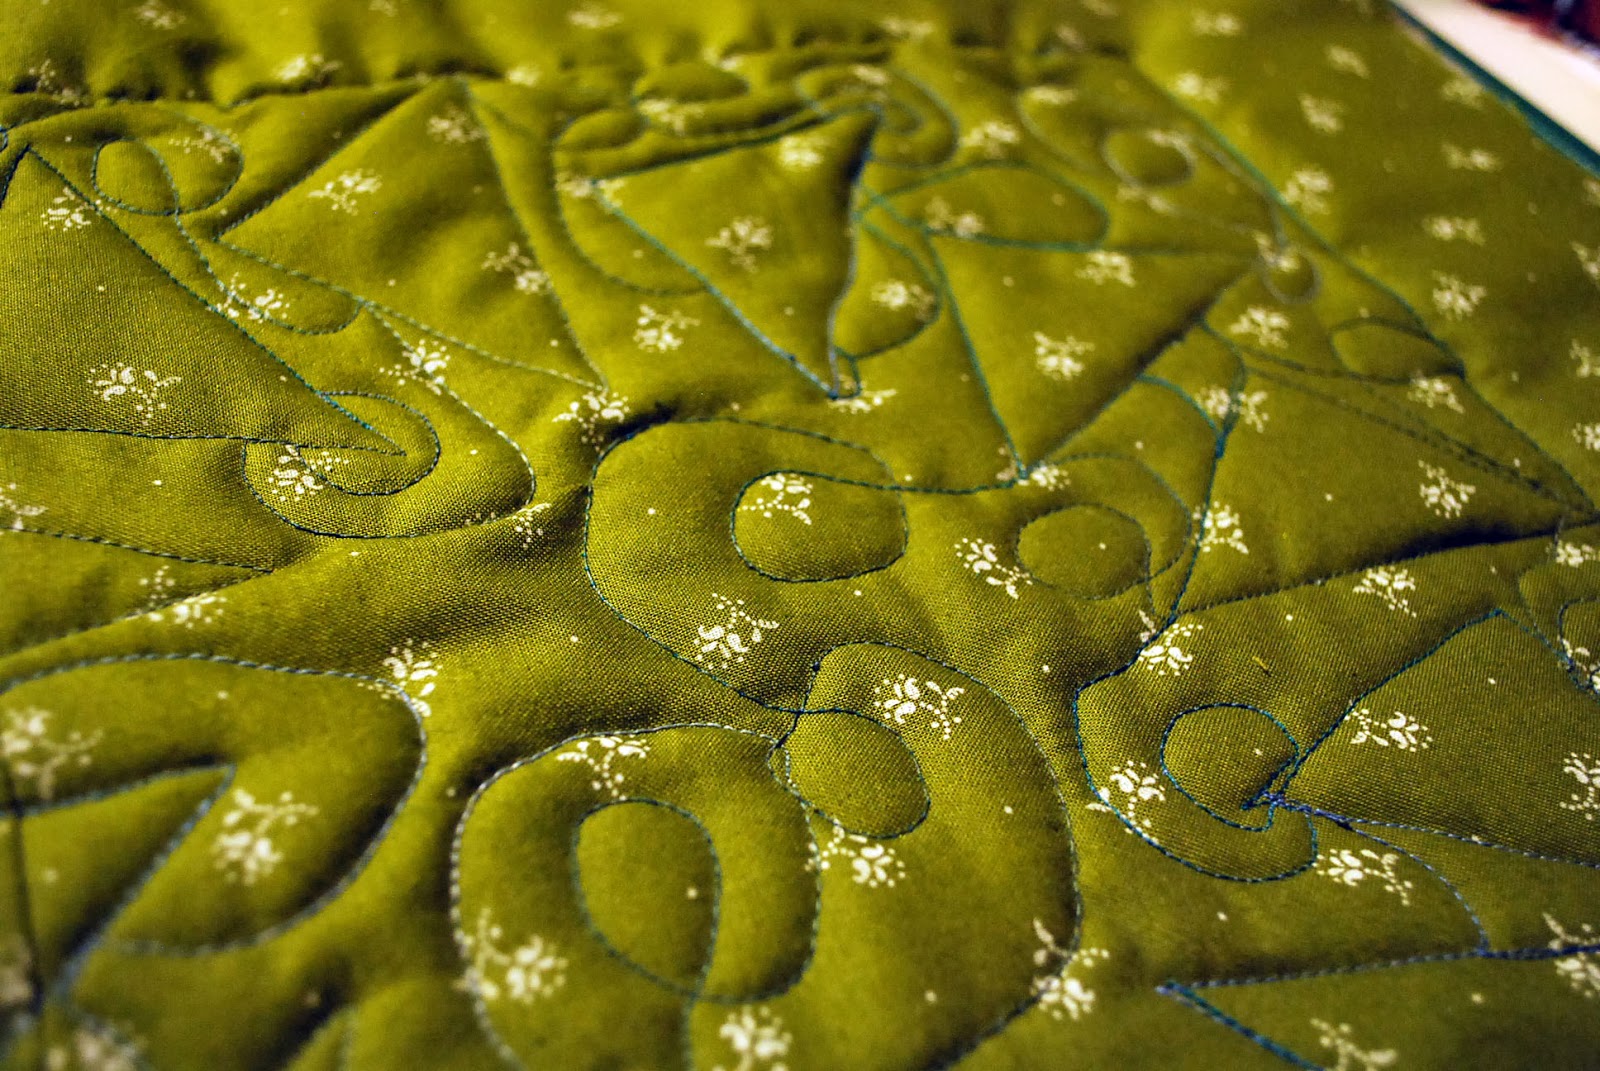
Medallion style quilting definitely has its advantages. I was able to comfortably FMQ (free-motion quilt) each medallion which is something I can't do easily with a full quilt sandwich. But, it also is quite tedious. Putting together each block in order gets a bit tiresome. I guess I'm ready for this project to be d-o-n-e!
I show you... progress!
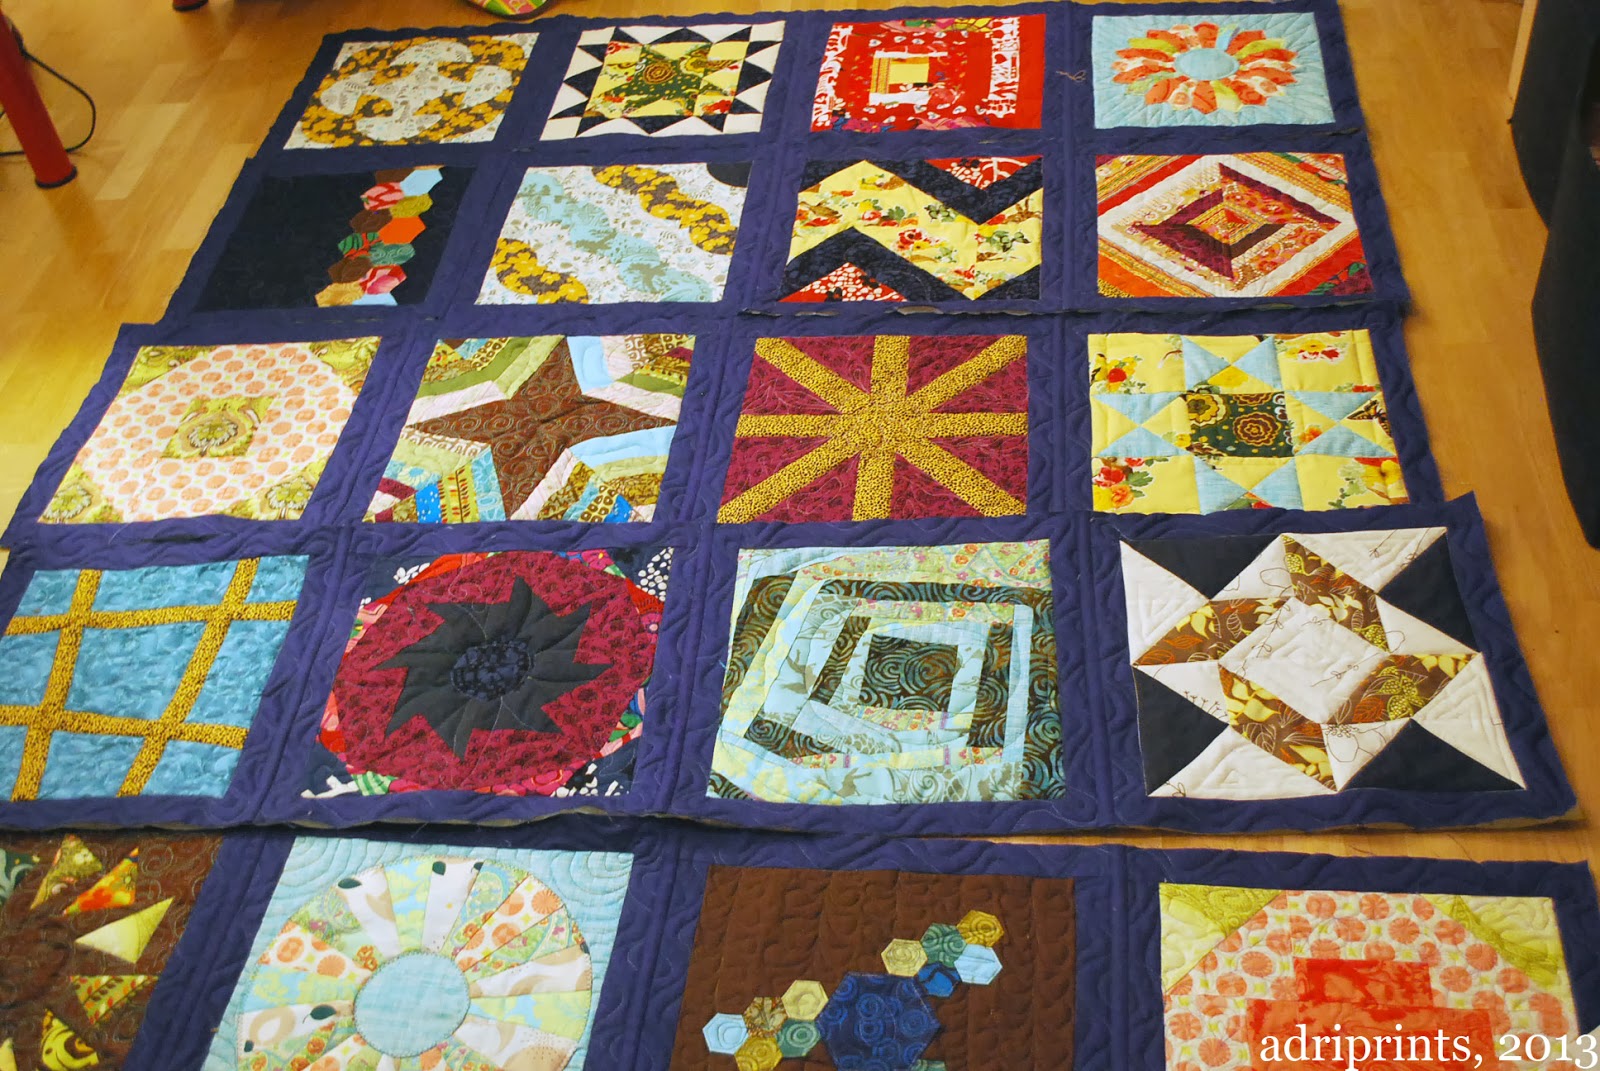
A wild, sampler quilt made with scraps of fabric from all over the place.
So close! I'm almost there! What's left? I've got to sew together 4 strips of the blue stand-in fabric (ran out of the original) and random scraps for the back and then even up the edges. Somehow even though I measured my blocks and I thought they were all the same, one row of medallions is slightly larger than all the rest. Dunno what I did differntly, but I just need that last gust of energy to finish this up!
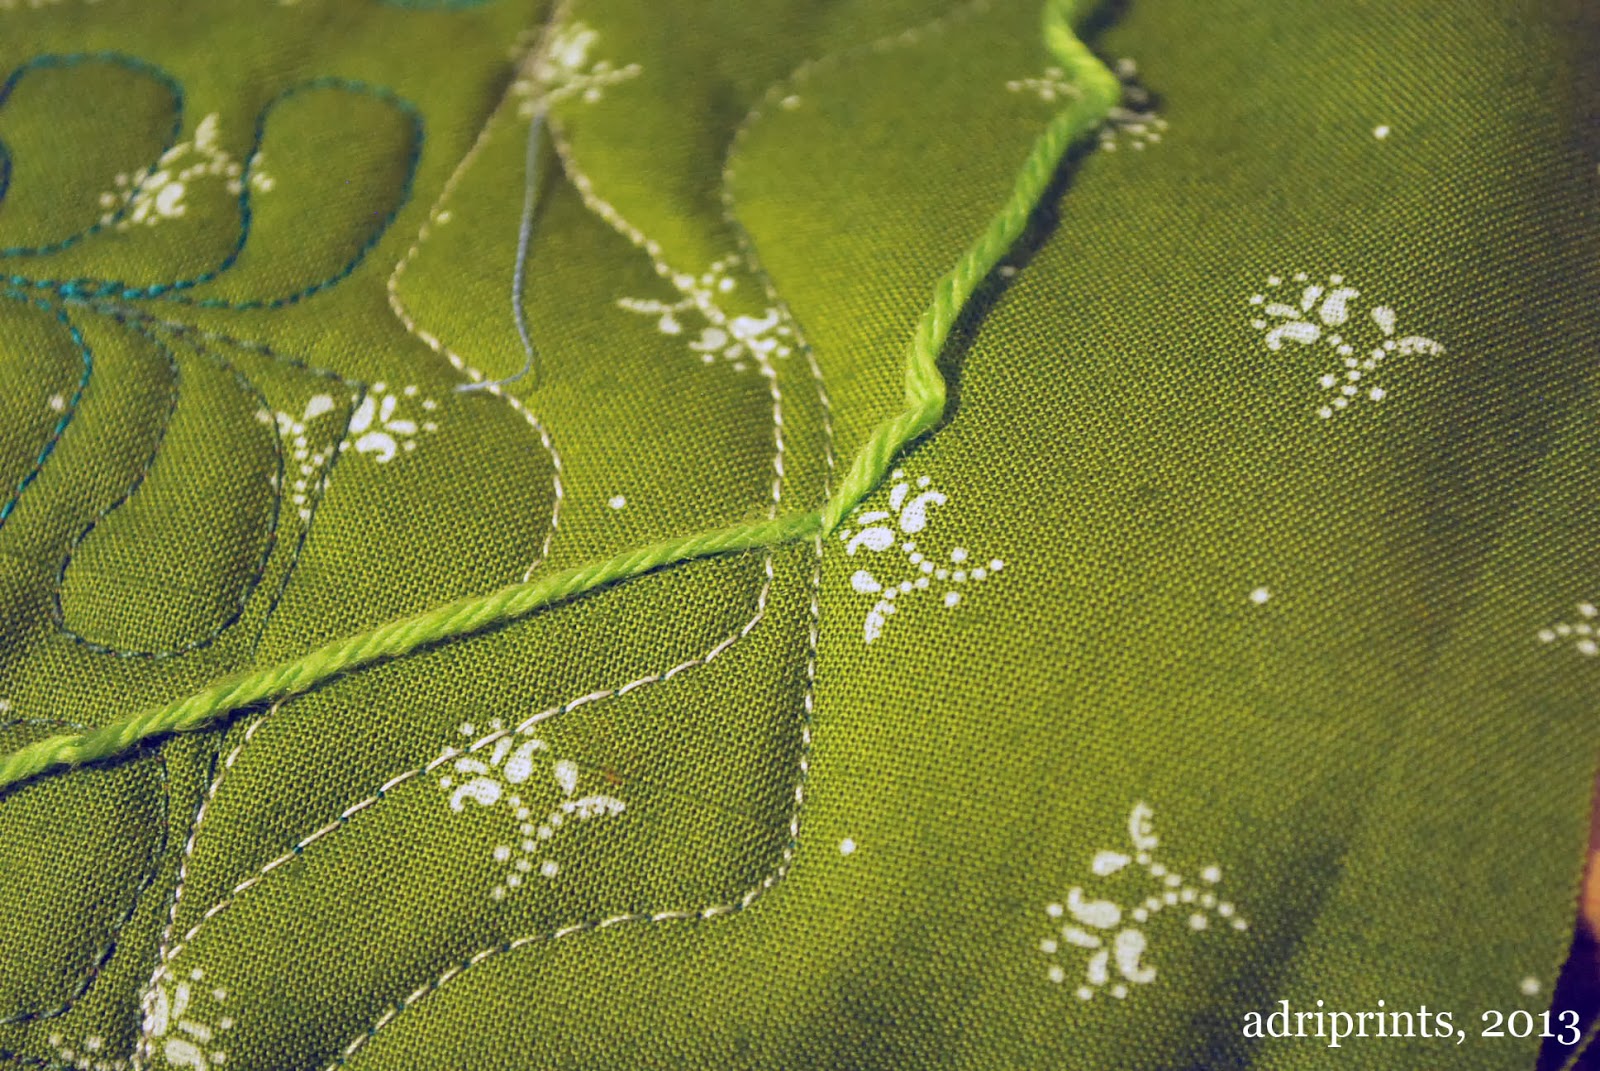
Also, some advice. Keep your fancy yarns away from enthusiastic FMQ'ing. Tee hee! Still not sure how I did that.
Also, don't forget to enter this week's giveaway which ends Wednesday, November 27th. I'm giving away a lovely silk/mohair scarf! See giveaway post here.
Comments Off on Craftsy BOM Blue Sampler Quilt: Nearly at the finish line
Ack, I thought I had finished more blocks than I really had. It turns out, I ran out of backing fabric, and I had left some with batting ready to go, but no backing fabric. I had been using up all of my green fabric as backing for the blue quilt, but I've run out! So, I'm improvising. Time to stash bust...
But, I did make some progress. Even with a bit of the "shaky hands" at the beginning, I got through free-motion quilting six more blocks from the quilt. Hopefully, I can get all the medallions done this week and get started sewing them together. There's still binding and washing, too!
As I frantically try to finish up three Tiramisu dresses I have cut out, I have added more to the sewing pile.
Today I got an email announcing the fall pattern lineup over at Oliver & S.
One of the patterns in particular caught my eye, because it’s a nearly exact iteration of the playdress and leggings combo I used to buy from a certain overpriced Scandinavian-inspired company.
Look!
I immediately emailed the link to my friend Lisa and I am pretty sure we both squealed in delight.
All I need are some cute knit fabrics! Can’t you picture Oona tearing around the house in such a set?
The sizes go up to a childrens’ 12, so even Neve could benefit.
Pretty sure I will be downloading this and pouring over internet fabric stores tonight.
on Friday, Julie and I got together and among other things, we sewed an apron! During the photo shoot, I’ve discovered that having an apron is absolutely invaluable to what I do – detail work. We had been using an Apron that Susie got at Squam, which was great, but it wasn’t quite specialized enough for what we needed.
So, Julie and I started out to make an apron. What follows is more like a photo essay of what happened, as we learned a lot about what my final apron should be. It runs out, we made a proto-type or a muslin of the finished apron!
After jotting down some notes and designs on paper, we gathered our materials…
I cut out my pieces (the first and second time)
Julie overlock stitched a raw edge that would be turned into a bottom of a pocket because we had pre-pleated it and figured that she would have an easier time getting over the pleat bump.
After pining in place, I measured where the fold line should go and marked it using blue chalk so I could follow it while sewing since I couldn’t see the guidelines on the side of the foot. (Next time, measure how wide the foot is and use that as the seam allowance.
We might have taken a few cats in bags break. This one was well-timed since I had needed to rip out my stitches (which Julie did). The pleat action threw me off course on my measuring and therefore on my sewing. Things were lopsided and not in a charming way.
Second attempt, much nicer. This time, I just topstitched and didn’t bother sewing and turning. I ironed that sucker into place first!
It was during this that I realized that when I cut a new piece, I should adjusted in the wrong direction and so needed to make a new back piece.
I marked out where all of my sewing lines needed to be for the pockets, knowing that I would have to wash the final project. I figured having straight lines was worth it, since it was all contrast stitching.
Then it was onto the binding…
Getting a mitered corner just so was a little tricky, so we turned to youtube…
I turned the last bit of binding tape under before stitching it down. This was all going to be turned on the wrong side of the apron, so I didn’t kill myself to get it perfect.
Sometimes, you might miss the back of the bias tape and you might need to go over it again. And then again when you still miss it.
Then I stitched the twill tape down using the same color thread instead of contrasting color.
I learned so much about what modifications I needed to make this apron work, it was invaluable to make this prototype. Next time, I’ll lower the pockets, widen the center pockets, make a trash bag that will live on the apron strings, make a fabric loop to attach a lint brush to, make the side pockets not as deep, and either wash the bias tape first, or not trust when it guarantees that it’s color fast.
I tried to get some modeled shots, but it just wasn’t working. I’m sure that Susie will get lots during the next photo shoo!
Posted onAugust 28, 2013byAdri H.|Comments Off on Double Wedding Ring Quilt, Autumn Colors
Today, I'm showing a double wedding ring quilt I made for a friend who was married earlier in August. I was stumped as to what to make for this sewing buddy and when the double wedding ring quilt challenge came along I thought it was kismet. I rolled with it.
the pieced top, not yet quilted
She tends to like colors found in fall leaves: coppers, golds, and rich, warm reds, so I dug into my stash and came up with silk fabric I had been holding onto until a special project came along. I have to admit I was daunted by the curved piecing and the multiple seams. And the plaid silk, while being lovely to touch, feels like paper to sew, and it shows every mistake you make. I tried to match the plaid too! That was a fun challenge since I was using leftover fabric, but I think it worked reasonably well considering!
I am not actually sure how I completed the piecing for this quilt, but somehow I did it. I should read up on how others have completed the task so I can get a bit better at it for next time. ((This is really the year of the wedding in my world!! Six weddings?! And I'm just counting the ones I'm attending.))
I was really proud of how nice the binding came out! Hurray! For successful research and applying skills learned from YouTube!
I made the Pastille dress from Colette's Sewing Handbook a few weeks back. Originally, I started it for a wedding back in May, but didn't finish it in time to re-do the sleeve facings. In the end, I still paired it with a silver satin sash/ribbon to break up the blue. It's a bit plain, but perfect for the second wedding which was blue themed!
Here's the top...
And, I had to take full-dress shots afterward because I couldn't find any photos of the dress in its entirety in the preliminary wedding photos. Also, Mom, if you read this post, know that I swear I ironed the dress for the wedding. I just didn't feel like ironing it for the blog photo. And, it's the same stubborn fabric crease that I starched, steamed, and pressed... and still it came back weeks after the original event!!
Pattern: Pastille dress, Colette patterns (from the Colette Sewing Handbook) Fabric: blue cotton chambray, super lightweight and comfy, but wrinkles like the dickens Notions: zipper, hook/eye closure, silver satin ribbon at front Accessories: silver satin sash at waist First Worn: August wedding, 2013 Wear Again? Yeah, probably for picnicking... just need a more casual belt.
Since Susan has been staying with us while we work on getting her house packed up we though it would be nice to have a weekend where we could simply enjoy each others’ company and get some crafting done.
Our friend Tanya came up from Roanoke, and our friends Lisa and Erin came in from town.
Maddie kept little Marie occupied and happy so Lisa could work on a dress for her.
Creative mess!
We had plenty of good food as well, as is to be expected when this particular group gets together! This was our brunch. Gluten free crepes with fresh blueberries, maple whipped cream and brown sugar breakfast sausage.
Tanya made us a delicious burrito dinner with lots of fixings.
We all worked hard on our various sewing projects, but we spent plenty of time chatting and catching up as well. I’m not sure anyone finished any of the projects they brought, but we all made some good headway on them.
This coming weekend we are having a sale at Susan’s house to clean out all of her stuff. It will be sad, but good. She’s moving to a smaller property and focusing on keeping only things that are meaningful to her.
I only had two problems when putting the dress together: the zipper was faulty and broke after I installed it completely. There were a lot of curse words. I then pulled it out and put in a new one. This time I was pissed off, though, so I did a sloppier job and therefor you can see the zipper this time. Whereas the broken zipper had been sewn in beautifully. Of course.
Then, when I was working on the hem I busted a needle on my serger. Totally my fault, but still. Very frustrating. Lesson: don’t sew while pissed off.
This dress is coming to the beach with me this weekend, for sure!
I can’t believe i am posting pictures of myself TWO DAYS IN A ROW.
I am so not the kind of photogenic that this requires.
Oh well. You’ll have to suffer my awkwardness to see the dress.
It’s a pattern I’ve made before but am not crazy about. As in, the finished product is good, but I have to work with next to no instructions and do some heavy altering. Last time it came out too long, so this time I cut it shorter. Too short, as it turns out. But, as it is a summer dress it’s not too terrible.
The fabric is Moda that I got at my local fabric store.
Just about an inch longer and slightly looser in the skirt and it would be perfection.
I’m pretty happy with my zipper installation, though. Except for a small bit at the top, you can’t see it at all. Practice, practice.
I had enough fabric left to make a simple A – Line skirt. It’s on the machine now, waiting for finishing. I also cut strips to make some bias tape with it for various projects. If I could have bought this fabric by the bolt, I would have. The yardage I got was clearly not enough for everything I want to do with it!