Tag Archives: How-to

Fractal 3-ply: A “gradient spin”

When I think of gradient spinning, I think of starting with “gradient-dyed fiber” such as Fiber Optics’ gradient collection. Sadly, I have not yet gotten my hands on on of them yet. However, a fractal 3-ply attempt last year gave me the push to try a kind of gradient spinning.

I got a great batt from Fiber Stash back in April at the Wild and Woolly Weekend in Vermont. The 3.7 oz batt is 98% Corriedale, 2% twinkle, in a blue-purple, light blue, and black – here it is, unrolled:

The first step was to divide it into three sections, for a 3-ply, so that each section had each of the three colors. I then split 2 of the sections into even thirds, based on the colors, and the last section was split into sixths based on colors. I split the sections based on weight.

The idea is a fractal ply, but because I am doing a 3-ply, I will do it so that 2 of the sections are the same color, and a third is changing. The middle is the part divided into six:

I finally finished spinning, plying, skeining and washing, and here’s what the finished result looks like:

I think a shawl is in order to show off the lovely and subtle color changes. This produced 284 yards of yarn at 12 wpi. I have an identical batt which I will spin the same way, and will knit with all of it to make a good-sized shawl.

Tutorial: Fair-isle Floats

Review: Principles of Knitting

Post image for Review: Principles of Knitting

(I know, it’s almost two months since this came out, but it’s BIG, guys! Thanks for being so patient for the review.)

First, the facts:

Title: The Principles of Knitting: Methods and Techniques of Hand Knitting, The Comprehensive and Timeless Guide

Author: June Hemmons Hiatt

Published by: Touchstone, 2012

Pages: 736

Type: How-to, Reference

Chapters:

1. Learning and Methods
2. Constructing a Fabric
3. Decorative Techniques
4. Special Fabrics
5. Stitch and Color Patterns
6. Pattern Design
7. Materials
8. Working a Project

KS Principles of Knitting

The In-Depth Look:

Settle in–this is going to be a long story.

Principles of Knitting is one of the holy grails of the knitting world. A book so hard to find, yet so wonderful, that collectors go charging (their credit cards) to the ends of the earth to get their hands on a copy.

The amazing thing is that many of the people working that hard to find it, had never even seen a copy. It somehow flew under my book-radar when it came out in 1989, because I didn’t even remember having seen it when I started hearing the buzz about how this was the be-all and end-all of knitting encyclopedias. (The Alice Starmore books had much the same mythical appeal, but at least I remember having seen those in the bookstores when I was in college–I just didn’t have the spending money to buy them at the time, though I kicked myself for decades.)

Rumor had it that Principles of Knitting was perfection in print. That it covered absolutely everything, in great detail. That it was the only knitting book you would ever need. That it was worth every penny of the $200+ it usually cost to buy it. But then there were other rumors that the author was too opinionated. That she had her preferred methods and anybodey who didn’t follow them was simply wrong. That she pretty much ignored the methods she didn’t like.

Who knew if that was true, though? With copies long-since pilfered from local libraries, it wasn’t like anybody could actually check–unless you had a far-sighted friend who’d bought a copy when she had a chance.

Then, more rumors started whispering–that the author was updating the book. This rumor lasted for years. Every time it came up with a “I heard it’s coming next year,” the calendar would change and still, there’d be no book. Finally, it showed up on Amazon.com as available for pre-order, which was a good sign, but the expected date kept getting pushed back. And pushed back. And back again.

All of which is by way of saying that the new Principles of Knitting is HERE. And looking at it, I can see exactly why it took so long.

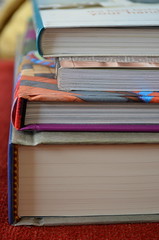
First, the book is HUGE. (See scale photo of it sitting with several other books in my review pile. There is simply no comparison.)

principles_001

How big, you ask? 736 pages. Seven hundred thirty six. That’s 300 pages more than Alden Amos’ Big Book of Handspinning. 500 more than Vogue Knitting’s Ultimate Knitting Book. 200 pages more than the biggest cookbook in my collection (Shirley Corriher’s Cookwise). There simply is no comparison to any other book in my library, not even Harry Potter and the Deathly Hallows which might have more pages, but they’re smaller and not so densely packed.

Because, these pages are densely packed. This truly is encyclopedic in its scope because the author tries to fit in, well, everything. There are a lot of knitting techniques now that weren’t around when she wrote this book back in the 80s. (Magic Loop and knitting with two-circulars spring to mind, just to name a couple techniques.)

I can’t even begin to pretend that I’ve read this entire thing (yet). I’ve read SOME of it, certainly, and I plan to read all of it, but it’s going to take a while. (Did I mention this is a rather large book?)

So, after that lengthy introduction, what follows is a light touch on some specifics.

  • For the size, it’s relatively light. The pages are thin–I’ve heard some people got copies with torn pages because they’re fragile–so that even though there are over 700 pages, it’s not as enormous as it could be.
  • Price can be an issue. It’s publication price is $45.00 (U.S.), but sells at Amazon for $27.00. The Kindle version, though, is $19.99. Considering the size and the shelf space, I sprung for BOTH.
  • Terminology. The author likes her own names for things, and this can get confusing. Her rationale makes sense, like when she prefers not to use the word “front” because it can mean different things (the front of a sweater or the part facing you the knitter), or using “right side” to mean the part of the knitting that shows because it’s also the opposite of left side for a cardigan. Things like that. The problem is that, while her rationale makes sense and she’s consistent in her own book … there are techniques and descriptions that are hard to find because you’re thinking of them by the names you’ve heard elsewhere.
  • The tone of voice, while clear and readable, can be a bit dry. We’ve gotten used to reading how-to books that have a breezy tone, and this book doesn’t. It reads like a reference book because it IS a reference book.
  • As I said, I bought the ebook version because the paper copy is so darn huge, and am finding both have their dis/advantages. It’s easier to browse through the paper copy for techniques or ideas–especially when I’m not sure what the author is calling them. But the Kindle version is obviously easier to cart around.
  • The illustrations are on the small side. I can see why, since there is so much information crammed into these pages–who wants to waste space–but it can make it a little tricky to see. Especially on the ebook version–on my Kindle, the pictures are the size they are and it’s not possible to zoom. (I can increase the size of the text, but not the graphics.)
  • Also for the Kindle/ebook version? There are no links to help you when there’s a reference like “See Cast Ons.” And while it’s possible to navigate from the table of contents or the index, I really wish they had formatted it so that all those links were live.
  • Ultimately, this book is something of a masterpiece. I’m nowhere near done reading it yet–I think I’m about at the 20% mark on my Kindle–but I’ve already seen references to techniques I hadn’t known before. Or had only heard about. It was well worth buying. Twice.

    You can get yours from Amazon in Paper or as an eBook.

    Want to see bigger pictures? Click here.

    My Gush: Just a phenomenal piece of work.

    How to Spin Thick n Thin Yarn

    Lately, I have been spinning a lot of thick n thin yarn for commissions or just for fun. I thought it would be fun to share how I do it.

    First, choosing a top is always rough. There are so many good colors and good dyers out there. Lucky for me, I found this little bundle of forgotten Corriedale Cross at the bottom of my spinning fiber bin.

    The first thing I like to look for when spinning thick n thin is a top that’s been dyed to have short color repeats.

    This isn’t exactly necessary, but I find it more aesthetically pleasing, plus it’s more fun for me to spin.

    Then, like with any spinning project, I pull out a little tuft of fiber and measure the staple length.

    About five inches. For this sort of project this is particularly important if you don’t want to be fighting while you draft out your thick parts.

    Now, for this next step, some folks may call this cheating, but I just call it good sense. I separate the top into 1 ounce bumps and then split each bump lengthwise until I have a pile of skinny strings of roving.

    Which I then roll into little nests for the sake of keeping neat and not having a pile of fiber fall into my lap every time I need to choose a new strand.

    The point of doing this is to peel the fiber down to size you want the “thick” parts of your yarn to be. I find that a good rule for fitting the the orifice on my Lendrum is to keep things about as thick as a sharpie.

    Another advantage to drafting this way: you get a lot of practice joining. By the time you spin 4 oz. of fiber, you’ll be a pro!

    Wheel Settings: I turn my wheel to my slowest ratio and have my take up set fairly low. It’s important to get enough twist into the yarn while keeping the thick parts lofty. My best advice is to play around with your wheel to find the best settings for you.

    Spinning Thin: When you start spinning, draft as you would normally, choosing a comfortable weight for your “thin” sections. (It’s important not to go too thin, otherwise it’s difficult to get enough twist into it.)

    Spinning Thick: Remember your staple length? Jump your drafting hand back that many inches, leaving a thick section, and start drafting for “thin” again behind it. Then just keep going, drafting and jumping as often as you feel you need to. Don’t worry about making it even, because the whole point of this yarn is that it is uneven.

    I definitely think this sort of thing works better on fibers with longer staple length, Corriedale, BFL for instance. I’m not saying it can’t be done with merino, I’m just saying you’ll have to work a little bit harder to get enough twist in so that it doesn’t fall apart when you take it off your bobbins. (Yes, this has happened to me.)

    I am in love with this Corriedale Cross wool (Crossed with Lincoln I believe, which is also SO FUN to spin.)

    I always let my bobbins set overnight before I skein this up. Since it’s a singles, it just makes me feel better about the strength and integrity of the yarn.

    After your yarn is skeined and tied up so it won’t tangle set the yarn by soaking it in your favorite wool wash. I do agitate it just a little bit to slightly full the thick parts. Fulling lends some extra integrity to the thick parts, they are less likely to pill or break. After the yarn is done soaking, I also sometime thwack it again the (round) towel bar in my bathroom for a little bit of extra fulling. Then set out to dry and you’re done!


    My favorite application for this kind of yarn is a funky cowl or beret.

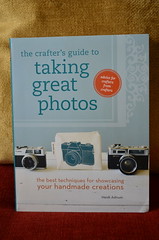
    Review: Crafter’s Guide to Taking Great Photos

    Post image for Review: Crafter’s Guide to Taking Great Photos

    photos_008

    First, the facts:

    Title: The Crafter’s Guide to Taking Great Photos: The Best Techniques for Showcasing Your Handmade Creations

    Author: Heidi Adnum

    Published by: Interweave Press, 2011

    Pages: 192

    Type: Photography

    Chapters:

    1. Getting Started
    2. Photo Fundamentals
    3. Finishing Up and Getting it Out There

    KS: Crafters photos

    The In-Depth Look:

    Setting aside the knitting needles for a moment, let’s think about photographs, shall we?

    I know not everyone takes pictures of their knitwear, but lots of people do. Maybe you have a knitting blog, or just like to share your finished objects on Ravelry. Or maybe you sell your knits (and other crafts).

    If this is true, you owe it to yourself–and your knits–to take the best pictures you can.

    I know that my own photography took enormous strides forward when I started blogging in 2005. I saw so many fantastic photos on other knitting blogs, I made a conscious effort to up my own game. Once you start seeing GOOD photographs of knits, you want your own to be as good as possible.

    This book is aimed at all crafters. Anybody who makes anything. Knitting, quilting, woodwork, basket-weaving, embroidery … pretty much everything.

    Step-by-step, this book helps you figure out what you need to do to set up the best shots. How to choose the right background. How to get the right lighting. How to adjust your camera settings for this very specific niche of photography. How to tweak things later in Photoshop or other editing software. The nice thing is that the tips for things like lighting involve a lot of cheap methods like making a reflector with cardboard and aluminum foil, rather than recommending you go out and buy hundreds of dollars of professional lighting equipment. Nor does the book look down at those using point-and-shoot cameras instead of DSLRs.

    Mind you, there are lots of photography books out there; books that go into much greater depth than this does. But none have quite this focus. Photographing handknits is a very specific niche. Other photography books may cover the same details about light metering and white balance, but they almost never mention how to capture the texture of your stitching. They rarely ever tell you how to model an item so that it looks its best. Most photography books are concerned with the actual photo. They’re not concerned with your desire to capture a lovingly-made item on film.

    Once the basics (like lighting, colors, and backgrounds) have been covered, the author zooms in on specific kinds of crafts. If you’re taking pictures of handknits, for example, you’re probably looking for a different aesthetic than someone who makes cutting-edge bookends from steel, or intricate wood carvings. The bulk of the book is taken up with looks at specific types of crafts, with hints, sample photos, and a Q&A with a crafter who specializes in that particular craft.

    Here’s one crucial detail, though.

    This book’s focus is on not only taking good photos, but more specifically, on taking good photos so you can SELL your crafts. There are tips on how to make the “look” of your online store consistent, how to show the scale of your items, what to do to encourage a buyer to browse through your other items. Most of the crafters I know are interested in making things for the joy of making/sharing them, not so much because they’re trying to sell them, but because they love the knitting. But that doesn’t really matter. The elements that go into a good photograph are the same either way. My eyes started to glaze ever so slightly, though, after reading about “the look of your online store” so many times when I don’t actually have one.

    Really, though, this is a useful book. The sample photos scattered throughout are adorable, beautiful, and inspiring. They made me want to visit a LOT of Etsy stores to buy things because the photos were so enticing–which is exactly the point. When I take pictures of my handknits, I might not be trying to sell them, but I am trying to sell the idea of them. The feel, the texture, the softness. I want the person looking at the photo to feel like they can touch them, to see just how delectible and cuddly they are.

    To do that, I need great photos. And to get those, this book is just what I need.

    Want to see bigger pictures? Click here.

    This review copy was kindly donated by Interweave Press. Thank you!

    My Gush: Lots of helpful photography tips and inspiring pictures.

    How To Do Cat Bordhi’s Sweet Tomato Heel

    I taught this at FiberCamp this past weekend, and since I made a handout I figured why not share it with you?

    I made the handout based on what I learned from Cat Bordhi’s own video at http://bit.ly/sweettomheel. I bought Cat Bordhi’s Sweet Tomato Heel Socks: an ebook after making the instructions – I bought the book because I love the Sweet Tomato Heel and even though I already know how to do it, the book currently has 63 pages (62 plus a title page) and right now has 9 patterns – there will be 11 total, and folks who purchase the book get the updates, so whenever those last 2 patterns come out you will get them. The book also has great troubleshooting information and a few versions of the Sweet Tomato Heel, like the padded sweet tomato heel.

    Buying the book was my way of saying “Thanks, Cat!” I understand that not everyone can do this, and that’s OK. I feel it’s OK to share this information because Cat herself shares it in a free YouTube video. I waited until after I wrote up the instructions so I wasn’t tempted to use the same language Cat did in the book, and thus plagiarize. If there is a problem, please definitely contact me, and I will change or take down whatever material is objectionable.

    You can download the PDF of the instructions I wrote up for how to do Cat Bordhi‘s Sweet Tomato Heel.

    JJ Blouse Tutorial – Part 3

    JJ Blouse Tutorial – Part 2

    JJ Blouse Tutorial – Part 1

    Bombshell Dress: Part 1