Tag Archives: Sewing

My First Mabel

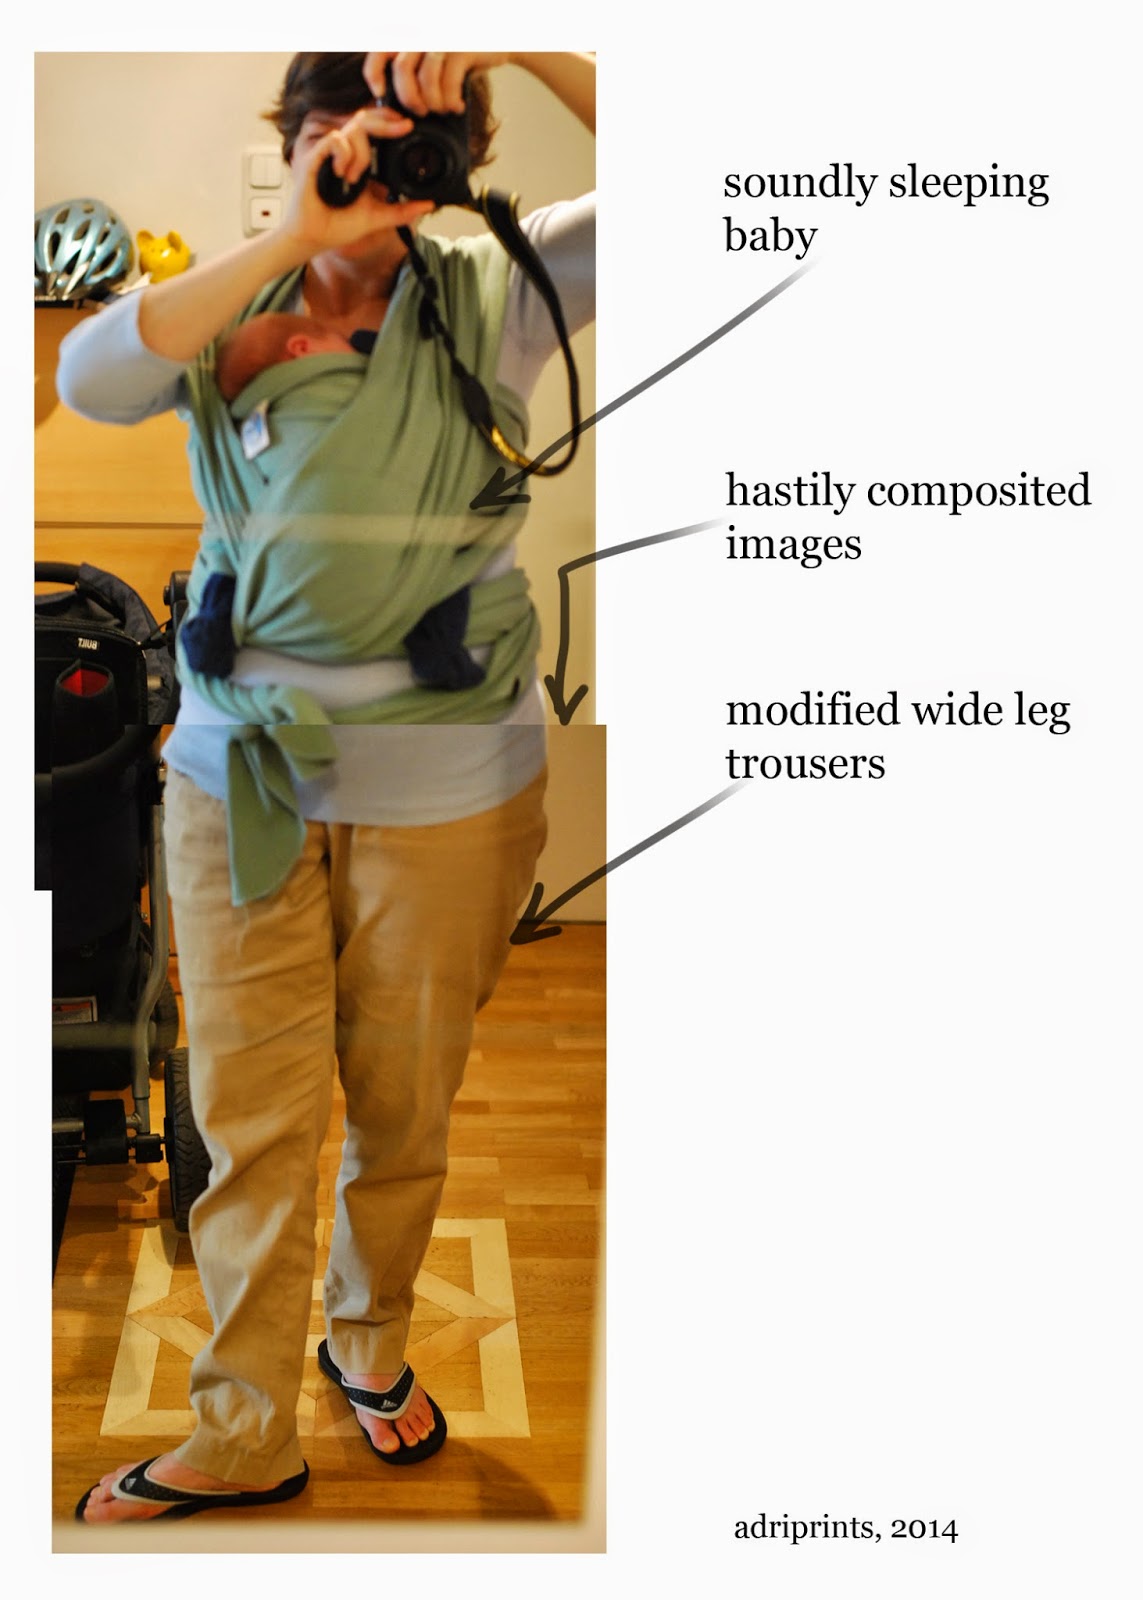
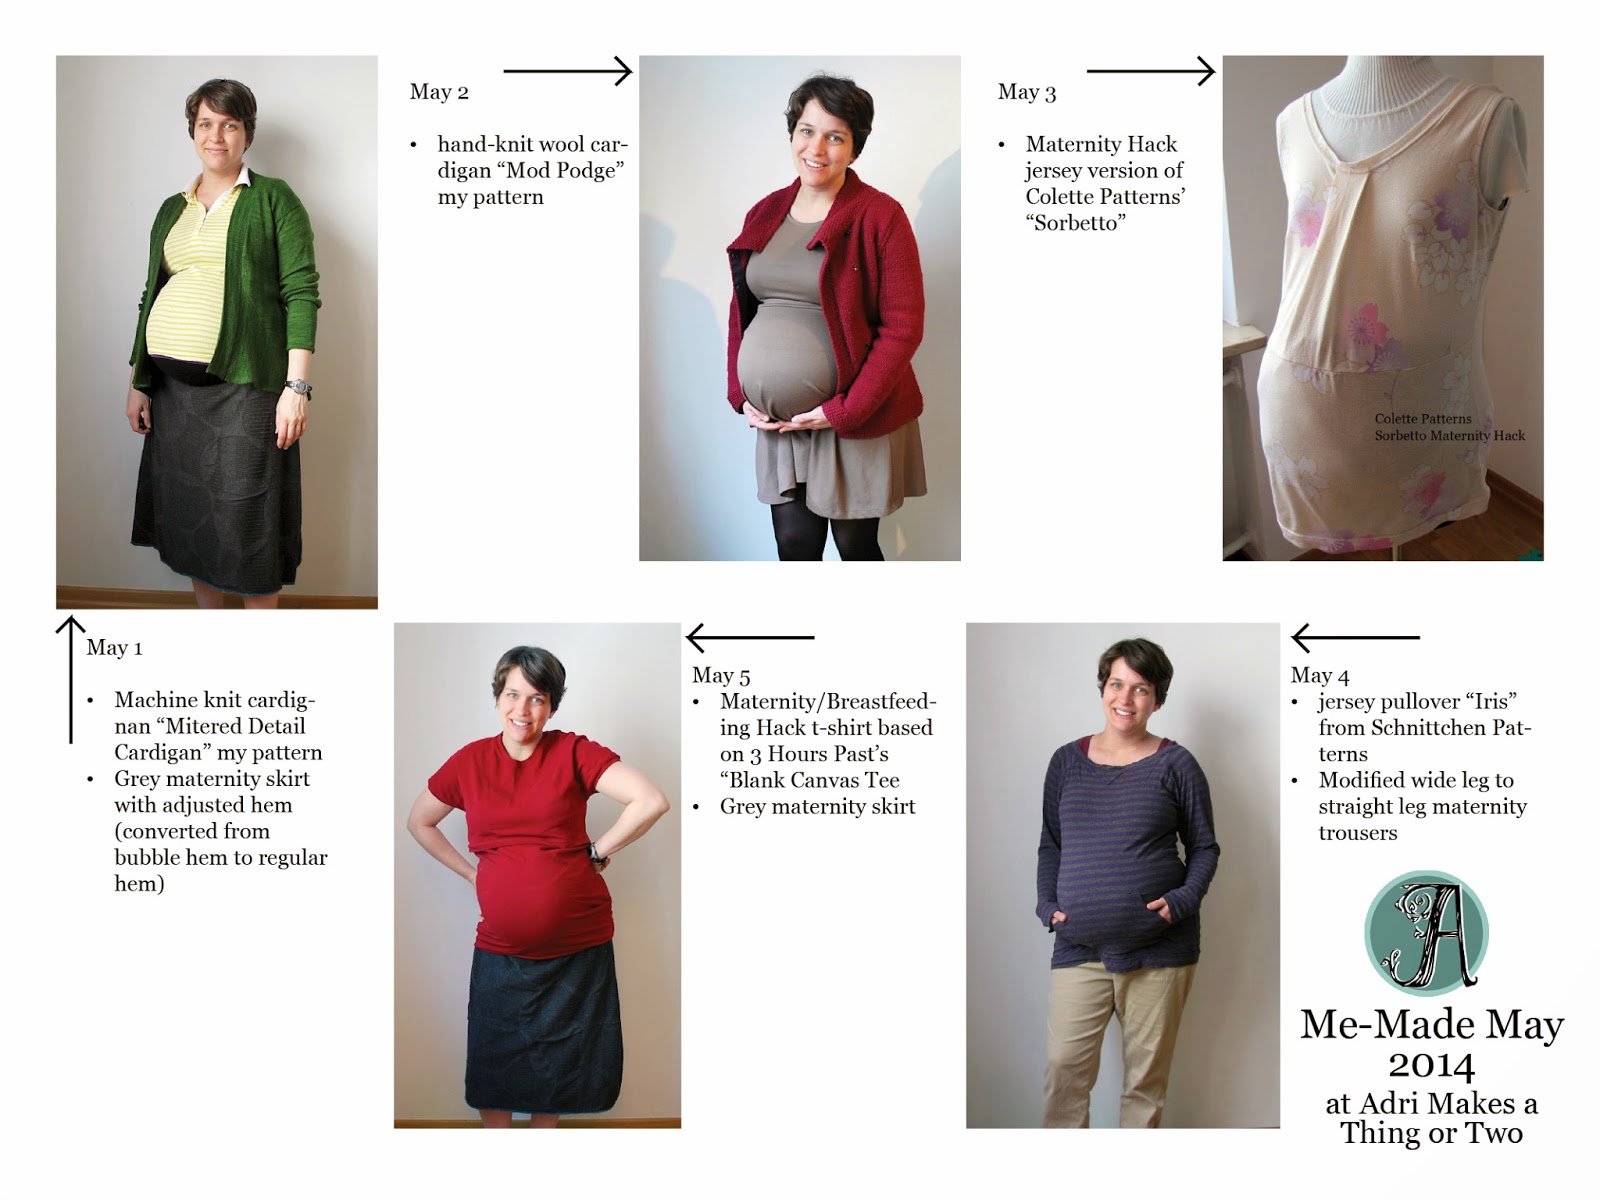
Sewing for two new shapes (baby + me) has been interesting!  My figure has definitely become fuller after having the baby, and it continues to change even now that I'm two months postpartum.  I'm not getting too attached to my new bust-line because I've heard everything shifts and changes after having a baby, but in the meantime...

Knits!  I've been sewing a lot with jersey in order to give me a little flexibility with this changing body of mine, and that adorable and speedily growing baby in my life.

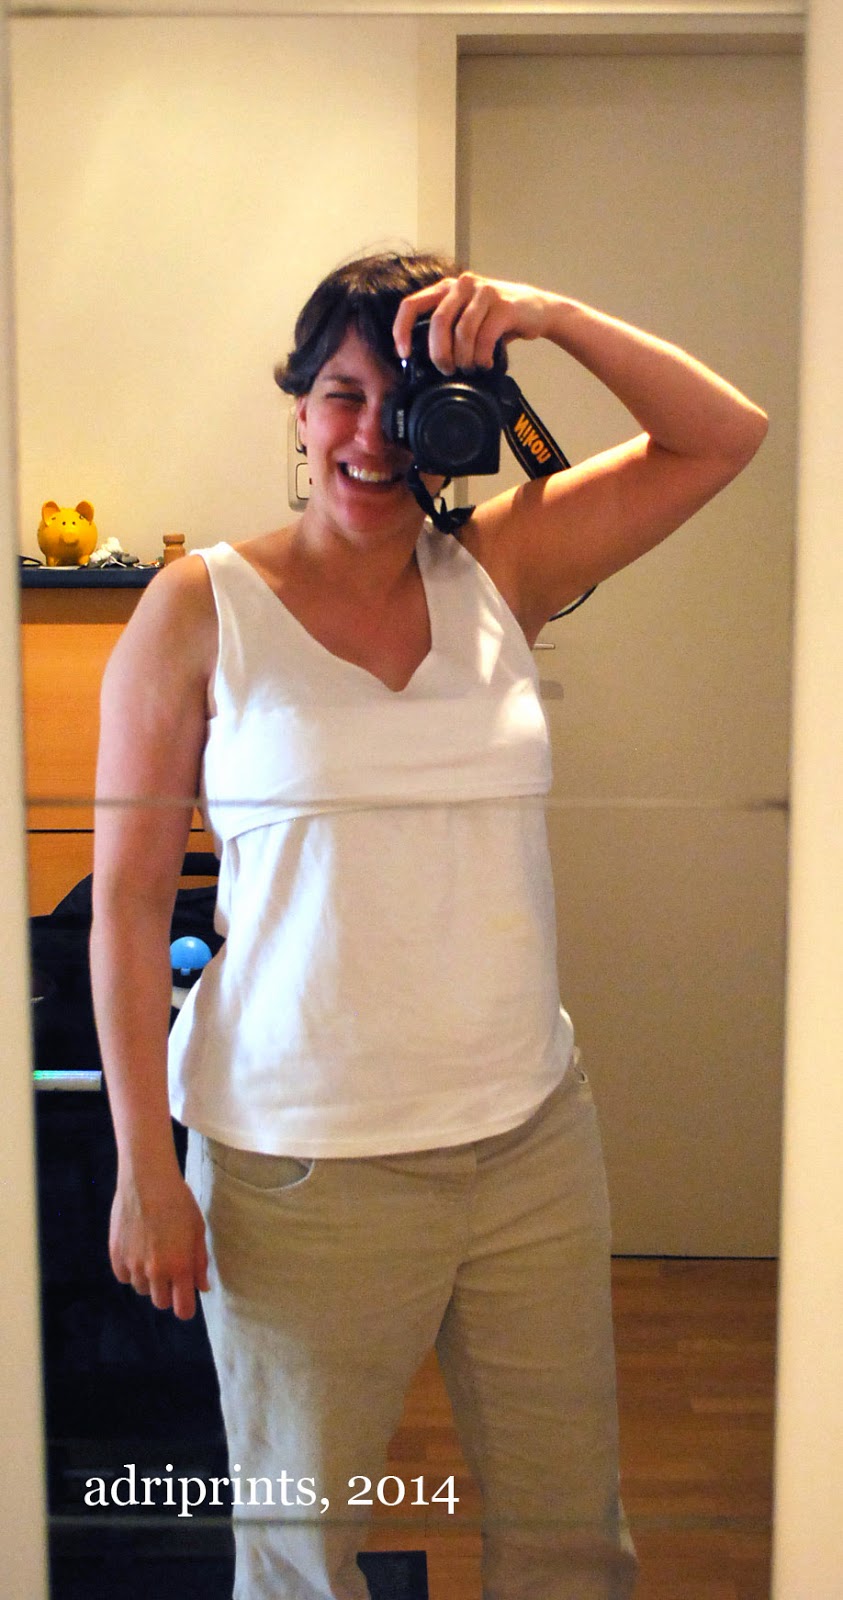
The first project I tackled was a super fast pattern that I heartily recommend to those with little time to sew: Colette Patterns' Mabel.


I made a slightly more A-line adjustment to the pattern and added a lining to diffuse some unexpected bulges, but other from that,  it's straight from the pattern sheet.

Pattern: Mabel from Colette Patterns
Fabric: single jersey

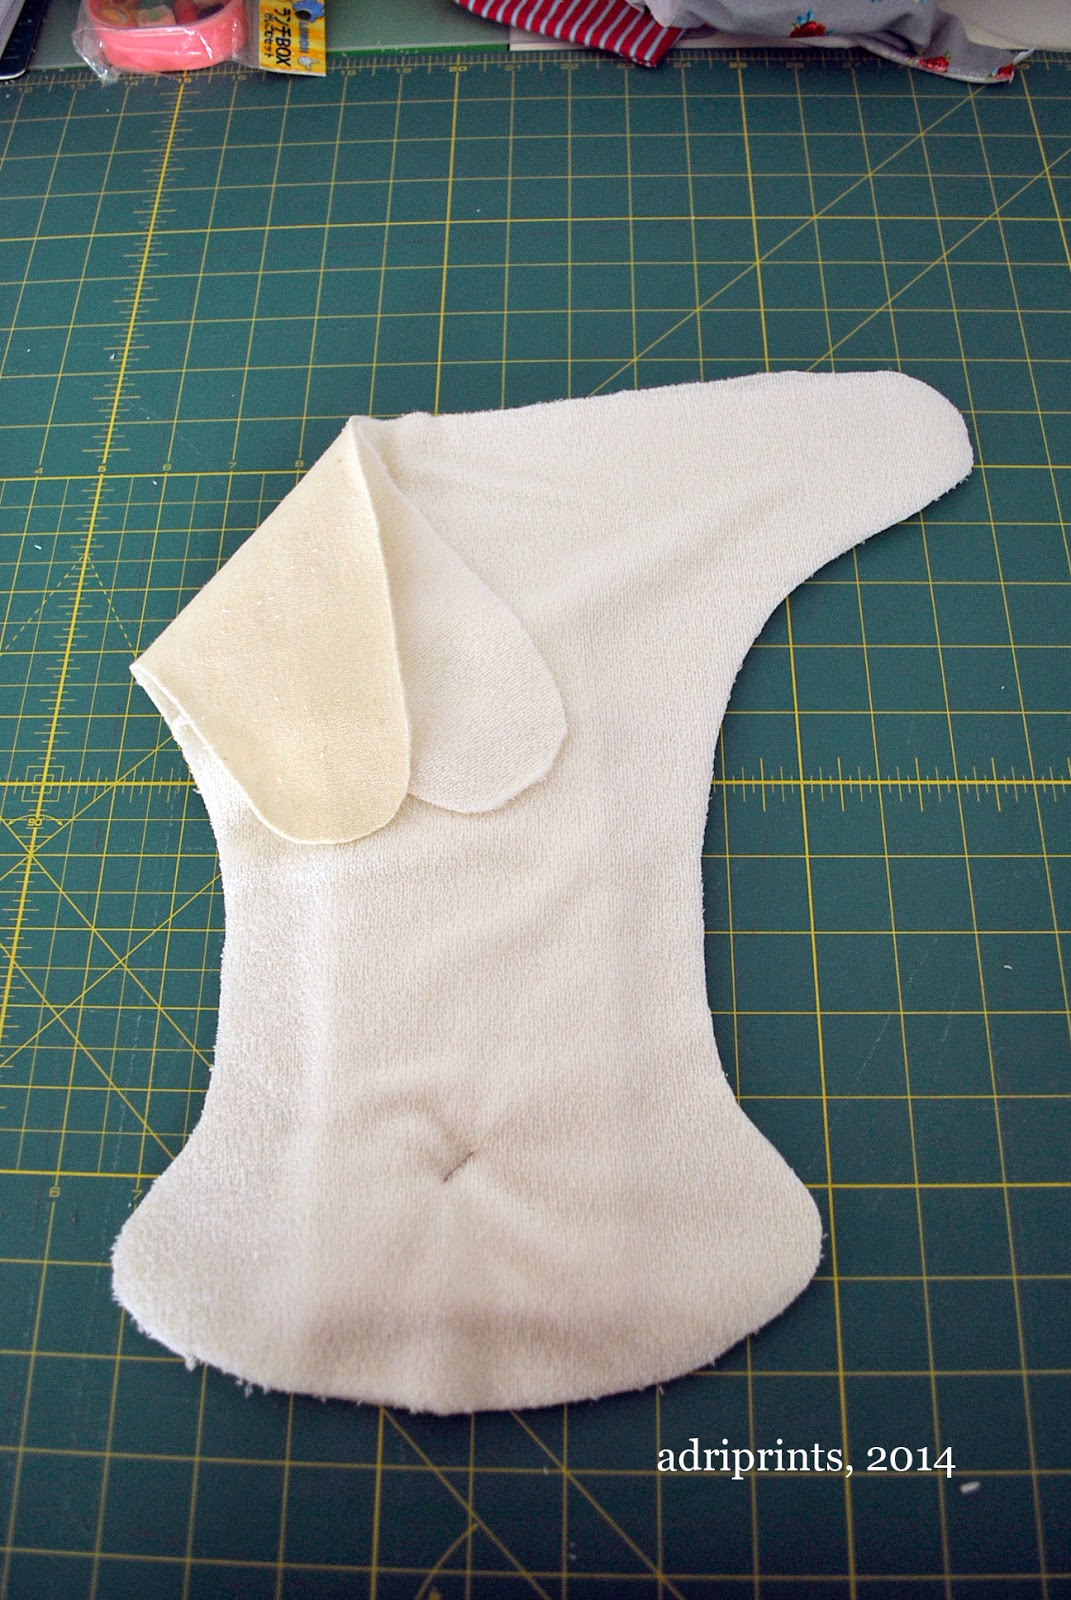
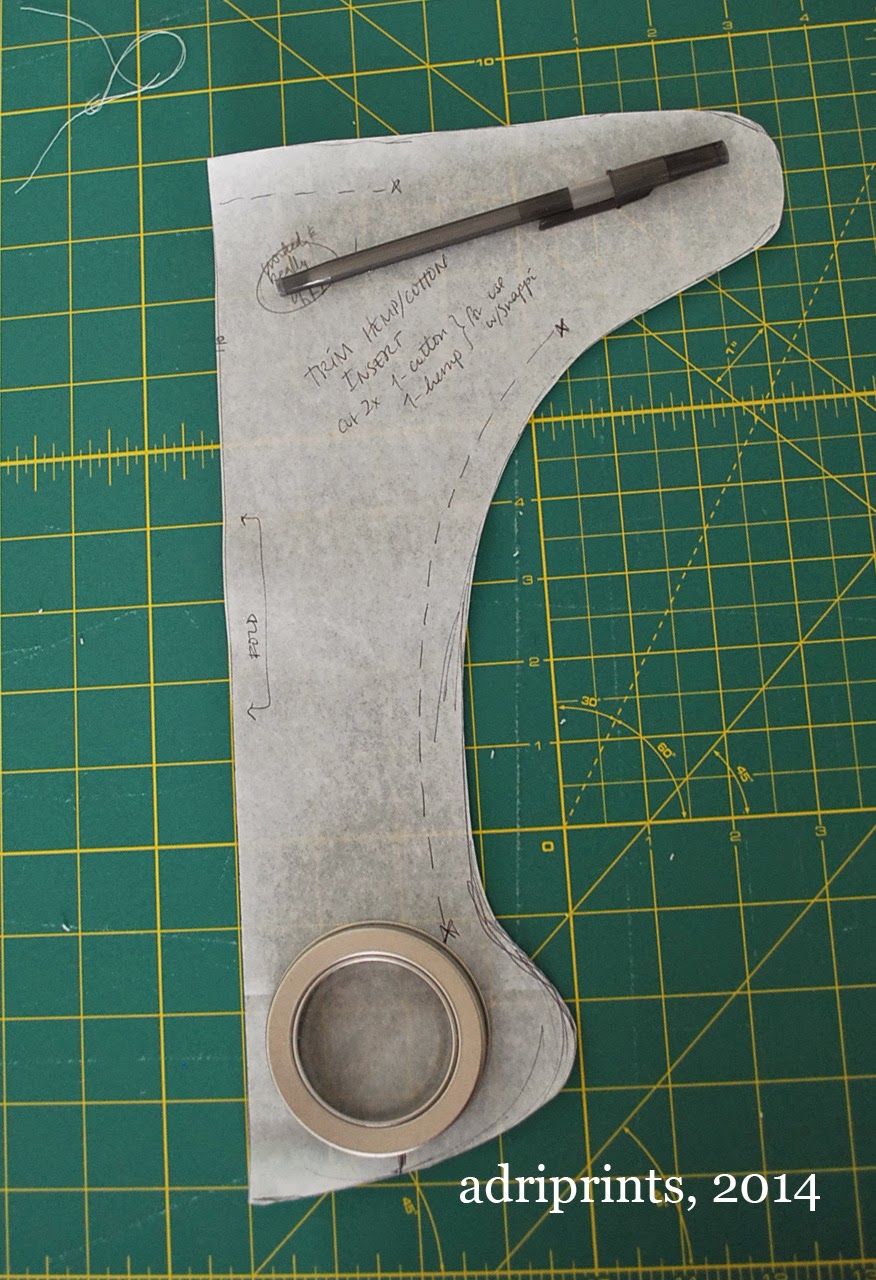
For baby, I've been working with knit hemp and knit terrycloth in order to make some cloth diaper inserts.  I've since tested them, and they work really well! They're trim and really absorbent. I'll share the pattern as soon as I trace it digitally  ((we'll see when that happens! Hah!)).


Project: Baby's cloth diaper inserts
Pattern: self-drafted
Fabric: hemp knit, cotton terrycloth

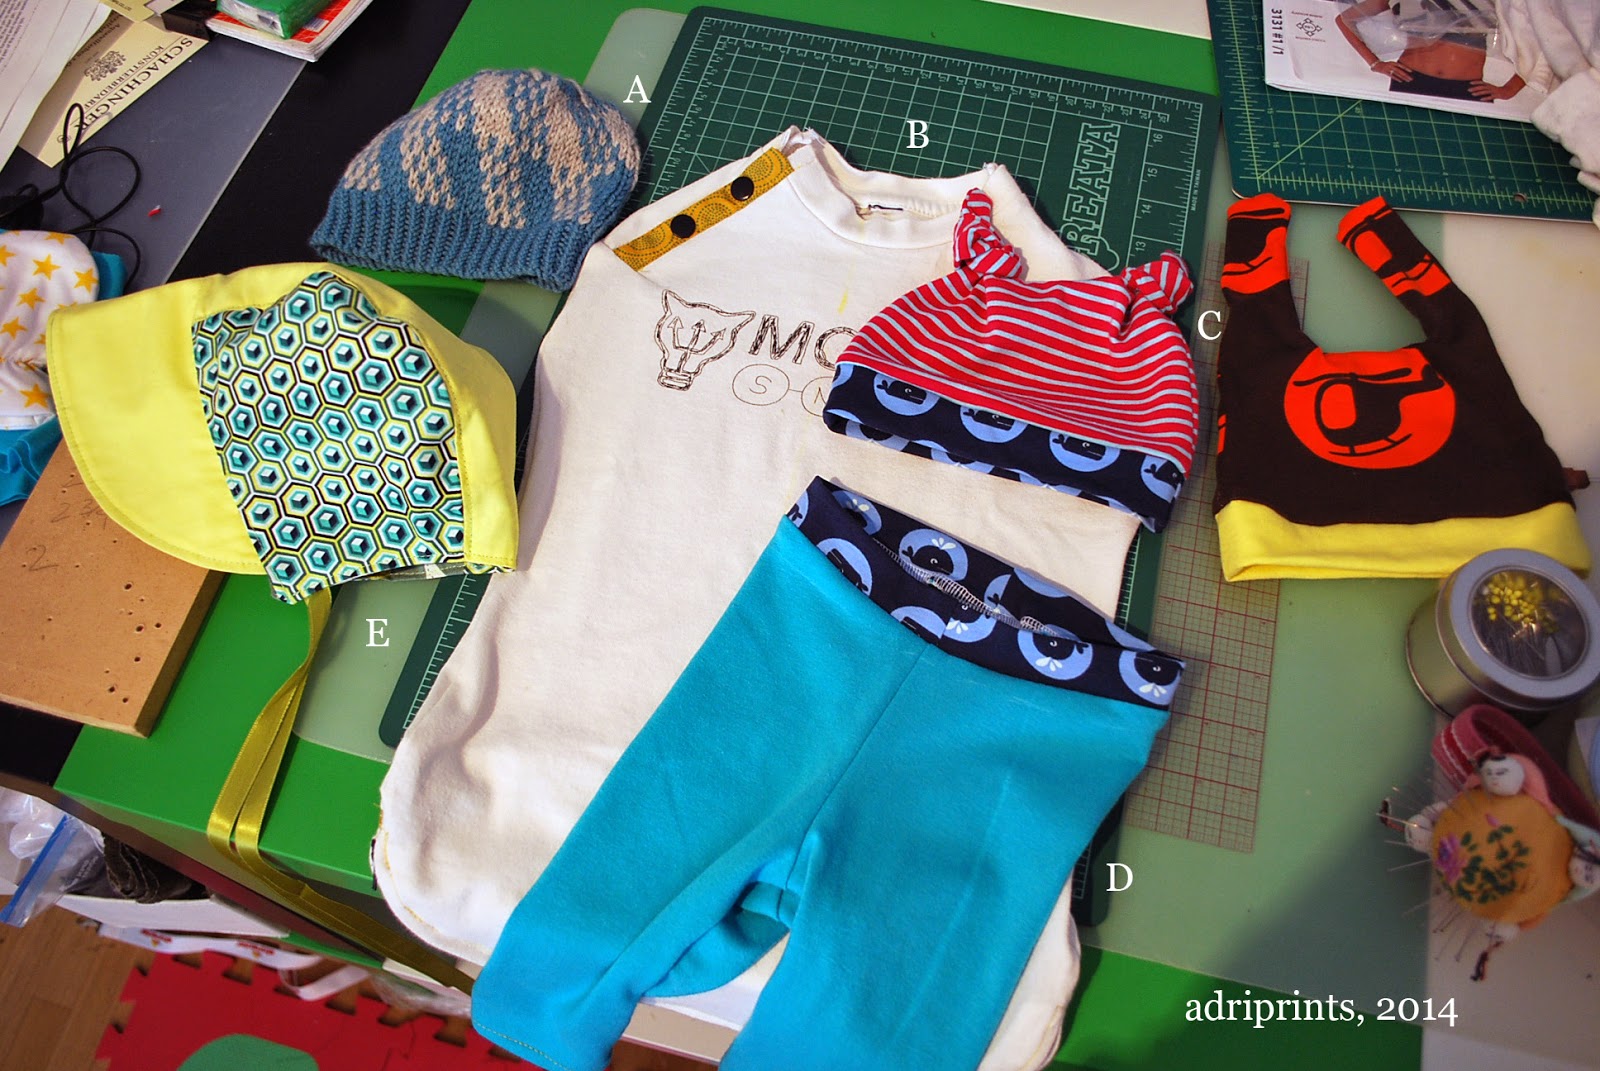
And, those failed diaper covers were converted into breast shields.  Yep.  I just cut 'em up and sandwiched some soft interlock on both sides of the PUL fabric.  So sad to see all those snaps go to waste.  Oh well.

MMM 2014 Wrap-Up and Thoughts

Wow!  I'm still trying to catch my breath after a whirlwind month.  May 2014 totally kicked my butt!  I'm still reeling from giving birth, and the steep learning curve that is early motherhood.  I don't know if I'll ever have a real sleep routine again, but I'm at least getting some shut-eye and getting out and about a bit more.

As a result of all the new routines in my life, MMM 2014 took a bit of a back seat.  I definitely wore mostly second-hand and me-made items, but I had trouble keeping up with photographing and posting regularly.  I think I may have to use my mobile phone a bit more to photograph.  Surprisingly enough, with the help of my parents being in town, I was able to make new items!  I made a white sleeveless nursing top with some success and I even finished a Baby Surprise Jacket for the little dude.


Project: White sleeveless nursing top
Pattern: Simplicity 2317 - with a LOT of modifications to Top "A"
Things to change for next time - choose a smaller size!  I added darts to the bust, overlapped the top to make a nursing tank, drafted a higher back.

This year's MMM definitely made me realize that I inherited lots of maternity clothes, but very few nursing tops so my goal is to make some nice, fashionable nursing tops to get me through the summer and fall.  My jelly belly is also quickly shrinking and all my favorite maternity trousers are getting too loose.  Believe it or not, I'll miss a lot of those clothes - they're so comfy!  Perhaps it's time to bring back my old clothes?  We shall see.  Even though I'm shrinking, my body has changed a lot and I will likely have to make some new items or adjust old ones.  And, I also realized I need a hands-free way to hold the little dude.  I use a wrap when I'm going out, but I think I need to make a sling or something that's a bit faster to get him in and out of... perhaps learn new wrap ties, too.  So many goals!

Wide Leg to Slimmer Leg Trousers

My friends were so generous during my pregnancy.  They gave me so much of their maternity clothes, that I really only had to buy new underwear (when my attempts at making my own fell flat, or to my ankles in this case)...

Either way, one of the most useful items I was given was this pair of trousers that I wore constantly since the middle of my pregnancy.  And, post-partum, I'm still wearing them, but they're getting loose!


Here's what I did to make them my style:

They started out as these wide-leg Gap trousers which make me look even shorter than I already am.  Too much fabric at the ankles really made me look bottom heavy, and they were really not my style.


So, I turned the trousers inside out and placed my modified slim-leg Jalie jeans pattern over the trousers. I wrote about that here. The results looked like this if you recall...
I placed the hand drafted pattern piece over the trousers so the crotch gussets would roughly match, and drew a curve that would ease the new leg design into the already existing style.  I left a lot of ease so the change wouldn't be too dramatic. Here's what they looked like after serging and turning up the hem.


Finished the legs using a blindhem stitch and that was that!


Week 2 Round-up, MMM14

This week was craaaaazy!  I had the baby!  So, my me-mades are a mix of handmade items made by me to be worn by me, and also those that I made for baby.

Also, I couldn't have been luckier with how the delivery went, and baby and I are doing well!


If you'd like to make any of the above items that have a pattern, here are the links:
May 8- Colette Pattern's Sorbetto can be found here and my modifications can be found here.
May 12 - Ottobre Spring 1/2014 patterns can be found here.
May 13 - Blank Canvas Tee can be found here and my modifications are here.
May 11- Christine's Stay-On baby bootie pattern can be found here on Ravelry.
May 14 - Simplicity 2317 Lounge wear pajama pants can be found here.

Giveaway Day: Green Zip Pouch


Sew Mama Sew is hosting that lovely May Giveaway Day, and I've got a zipper pouch for you all!  If you'd like to enter and win this hand-made, fully lined zipper pouch, follow the instructions in the Rafflecopter widget below!  Shipping internationally, too.

+1 for simply stopping by
+2 for commenting on this post
+2 for "liking" my facebook page (if you've already liked my facebook page then it's an easy +2)


Thanks for stopping by, and take a look around if you'd like.  I'm an illustrator who likes to design for hand and machine knitting, and I also love to sew and quilt.  If you think you'd like to read more about my work, feel free to follow me on Bloglovin' here...
Follow on Bloglovin

3 Hours Past’s Blank Canvas Tee: Maternity Hack

During Me-Made-May 2014 I'd like to share some of the me-mades I've made in more detail.  In order to see if I could replicate a maternity/breastfeeding top that I love, I tried my hand at drafting and here are the results!


If you're just starting out sewing with knits, a great place to start is a simple dolman sleeved t-shirt like the Blank Canvas Tee from 3 Hours Past the Edge of the World's Blog.  If you're past that, are ready to try some drafting, and would like to make yourself a breastfeeding or maternity top, then this is the mod for you!

Start with the Blank Canvas Tee from 3 Hours Past...

Added Materials

  • additional fabric because the length of the T-shirt is extended.
  • 1 piece of elastic - soft baby elastic or elastic about 1/4" wide that suits your fancy in the width of your t-shirt + 2" or so.

Extra Skills

  • sewing with elastic

Special Tools

  • twin needle
  • stretch needle 75/11  (a whaah?  Here's a needle guide from Schmetz)
  • pencil and ruler
  • maybe tracing paper if you don't want to write on your pattern
Inspiration: From boob design, this short sleeve maternity/nursing top is one of my faves.  It fits really well and the split top allows for belly room.


Okay.  Ready to make your own?
First print and assemble your pattern pieces from 3 Hours Past... Then, here's our goal: we want to create two pieces for the front that overlap by around 5" / 13cm for the smaller sizes.  You'll likely need a bit more overlap for the larger sizes or if you usually find yourself doing large bust adjustments.

The goals.
Measure from just below the armpit curve to your goal overlap length, then add 1" / 2.5 cm so you have enough to turn up a hem.  Trace what you have onto your fabric, or onto tracing paper to make pattern pieces.  I've highlighted what I did to the pattern in the photo below.


See the red highlight?  That's the top front piece.  The blue highlight shows where the the bottom front piece would be.  For the bottom, I took the design line straight up and did not taper in like the pattern - it's housing a big belly at the moment, and I thought it would be advantageous to have a little leeway.

The other change I made here was adding length.  Add what you will.  My goal was to have a t-shirt around 28" so I added a few inches to the bottom of both the back and front bottom pieces to achieve that.  I just followed the design lines to my goal length. To calculate length, I measured from the peak of the shoulder, parallel to the fold line.

Alright, you've traced and cut your 3 pattern pieces.  Do you have your edging pieces (no change from pattern) cut, too?  And those two strips of interfacing for the shoulders?  What interfacing? I used Vlieseline G785 since it's stretchy, lightweight, and works with knits. Everything cut? Great! Let's get these pieces ready to put together.

Assembly:

  1. Step 2 from pattern: Iron on interfacing to WS of back piece shoulder edges
  2. Front top piece - finish bottom edge with zig zag stitch or serge, turn up and twin needle the hem from the right side
  3. Front bottom piece - add elastic to top RS edge using a triple zig-zag stitch.  How?  I simultaneously slightly stretch the elastic while guiding the main fabric under the presser foot.  I do not stretch the main fabric.  Right hand for elastic, left hand for guiding fabric.  I do this 2" at a time so I don't lose my nerve.  Then, I fold over the elastic so I only see the final fabric, and straight stitch the bottom edge of the elastic.
  4. Overlap the two front pieces- With RS facing you, make sure the front top is on top, and the front bottom is behind it.  Make sure the overlap is what you desire and pin.  Stay stitch within the seam allowances (so ~1/8" from the edge) to secure the overlap.
  5. Step 3 to 9 are the same as the original pattern.
And there you have it!  You've made a maternity/breastfeeding t-shirt!  Feel free to change the neckline and make it a scoop neck like in the inspiration photo.  I like crew necks so I kept the pattern as is.  But, I think I'm going to try and make a tank or sleeveless v-neck.  We shall see!

Week 1 Round-up, MMM14

Here's the weekly round up of me-mades worn this past week!


If you'd like to make any of the above items that have a pattern, here are the links:
May 1- Mitered Detail Cardigan can be found here on Ravelry.
May 2- Mod Podge can be found here on Twist Collective's site or here on Ravelry.
May 3- Colette Pattern's Sorbetto can be found here and my modifications can be found here.
May 4- Iris Pullover from Schnittchen can be found here.
May 5- Blank Canvas Tee can be found here and my modifications here.

Zig Zag Quilt Finished!

Happy Easter!  And, happy finished Zig-Zag Quilt!

The FMQ foot for my new machine is still on back-order so I decided I should just stop waiting and finish the quilt.  So... I did!


 I used a couple of tools to help me finish the quilt which I can recommend...


Firstly, I used the Robert Kaufmann Android phone app to help me calculate how much fabric I needed for binding and sashing.  You can find that here.  For i-phones you can find it on i-tunes.

Secondly, I used this tutorial to get a kind of hand cross-stitch look with a plain old zig-zag stitch on my sewing machine using this tutorial here.

It looks like this when finished...


On the front, the finish is invisible, but the back has a pseudo-cross-stitch look which I really like!

And, that's about it.  I cut the striped binding fabric across the stripes so it would make a checkered border, and echo quilted the zig-zags to add some interest and structure.  I'm really pleased with how it came out, and hopefully the baby will enjoy crawling on it and being cozy in it!  I'll post a tutorial in case you all want to make your own zig-zag quilt.  It's fairly straightforward.

FO’s: Baby Stuffs

Baby stuff is so satisfyingly quick to make!!  I guess there's extra motivation when you've only got a few more weeks left in a pregnancy to "finish" everything on your to-do list.  In my case, I've had to put the Zig-Zag Quilt on hold because my free-motion quilting foot is on back order.  If I don't get it by this week, I'll just do simple zig-zag echo quilting and call it a day.

In the meantime, here are a few of the things I've been knitting and sewing...

Baby Booties


These are one of the quickest and most satisfying knitted items you can make, and these are made with all the mini leftover skeins I wind after a project so they're a bit of a motley crew.  These booties used sock and sport weight yarns and this pattern is called Christine's Stay-On Baby Booties.


Baby Items & Accessories

I photographed my latest sewing and knitting exploits together.  These include knitted and sewn hats, leggings, sleep sacks, etc.


From the top...

A) Hipster Cred Hat - made with SMC soft merino yarn in 2 colors - pattern from Dilettant Knits
B) Baby Bedtime Bag - made from a recycled t-shirt - pattern from Running with Scissors
C) Tie-Top Baby Hats - made with knit scraps - pattern from Tie Dye Diva via Sew Mama Sew
D) Baby Leggings - made from knit fabric and scraps for waistband - free pattern that came with Baby Bedtime Bag from Running with Scissors
E) Reversible Baby Bonnet - fabric scraps featuring prints from Tula Pink's Prince Charming - pattern from the book "Hat Shop: 25 Projects to Sew..."

And, I'm hoping that everything goes well in the next few weeks!  I'd love to get the quilt finished before baby comes.  Yep, I think I'm going to forgo FMQ plans and get straight to it.

Red Lady Skater

This weekend I was very excited to finally try out the Lady Skater Pattern from Kitschy Coo.

I had bought some red organic cotton from fabric.com specifically for it and couldn’t wait to cut into it.  I mean, seriously – a dress that’s made to be flattering out of easy-to-care-for and comfortable tee shirt fabric?

WIN!

04.03.14a

I am super happy with it.  I did have to take it down a few sizes from where I thought I should be.  Even after measuring it was too big the first go around.  I honestly could probably even take another inch out of the waist area, but right now I am just enjoying the swing of the skirt and the softness of the fabric.

04.03.14b

I haven’t hemmed the bottom yet; with knits like this it’s best to wear them a few times to let the fabric settle out where it’s going to fall before adding a hem.  Also, it was a pretty clean cut so I may not need to hem at all, if I don’t want it to be super “finished”.  It’s got a tiny bit of a natural “roll” right now that I am kind of digging.

04.03.14c

I really want to make one in every color now.  I think this one is going to look fantastic with my Shepherd sweater once it’s done, in all its creamy oatmeal-brownness!

04.03.14d

And shut up about my hair.  I know it’s waaay overdue and my roots like terrible.

I’ll get to it.

Eventually.


Tagged: Sewing