Monthly Archives: October 2012

2013 Calendar Time Already?

Um…could someone please tell me where the heck 2012 has gone? It seems like a week and a half ago I was posting about the 2012 calendar and *poof* here we are at the time of year when the Halloween decorations are vying for space with the Christmas ornaments in all the stores.

As baffled as I am, the Juniper Moon Farm 2012 calendar in my pantry is insisting that it’s time get the 2013 calendars up in the shop.

Next year’s calendar features cover girl Bananafish the duck, and is filled with lots of other lovely pics of your favorite farm animals. Luna, Stella, Gnocchi and lots and lots o’ lambs!

Because of the way we ordered our printing this year, we have a limited number of calendars for sale. Specifically, it’s limited to 92. When those 92 are gone, we are officially out of the calendar business till next year, so don’t wait to order yours if you want one.

You can find the 2013 calendar right here.

Roasted Applesauce

What DOES one do with 76 pounds of apples?

A lot.

There’s my Butternut Squash and Apple Soup.  Apple Pie.  There’s Martha’s German Sausages with Apples and Saurkraut.    Fried Apple Rings Brie and Apple Tarts.

You can chop up or slice apples and put them in pancake batter, on waffles, in crepes. You can eat them sliced with a good quality cheddar or other cheese.  Throw some on a sandwich with some ham and goat cheese.

Apples are ridiculously versatile.  They go equally well with sweet and savory foods which is why you will find them in everything from pies to curries.

Around here, though, we use an awful lot to stock our larder withe the grandmother of all comfort foods: applesauce.

I try to fill the freezer each fall and it usually lasts until around the end of January.  This year we may get a few moths more, with all these apples!

We like the deeper and smokier, more complex flavor that comes from roasting the apples before pureeing.

Chop up as many apples as will fit in your baking dish.  I usually do one 9 x 13 pan at a time so I am not enslaved to the applesauce all day.

You can leave the chunks fairly large.

For this size pan I add about 1/3 packed cup dark brown sugar, about 3 to 4 TBS cinnamon, 1 tsp cloves and a dash of nutmeg plus half a stick of butter, sliced into TBS – sized chunks (so about 4 TBS).

Mix everything just enough to incorporate the sugars and spices in with the apples.

Then put in a 375 degree oven for about 45 minutes to an hour – checking every 15 minutes or so to turn over apples and prevent the top from burning.

Once the apples look nice and soft and juicy and brown you can remove the pan from the oven and allow to cool enough to puree.

I use a stick blender to puree the apples – you can use a food processor or blender if you like.

I store about a jar at a time in the fridge – it never lasts more than a few days with these apple-vores around here.  The rest I freeze in large mason jars and defrost as needed.

YUM!


Tagged: food

Autumn Flower …

100_2191


zig zag, jig jog

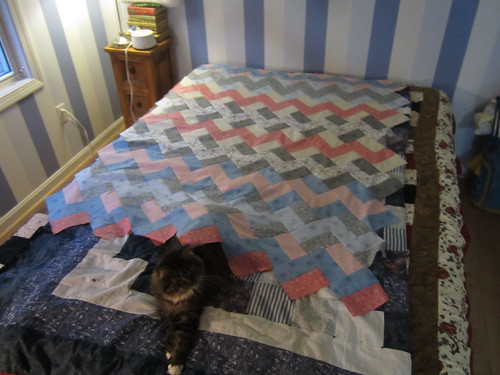
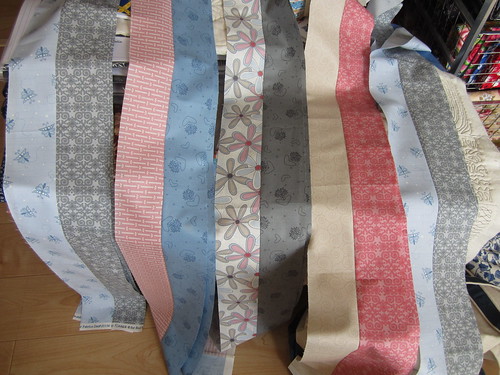
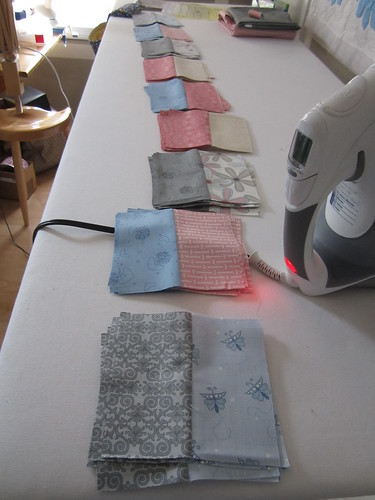
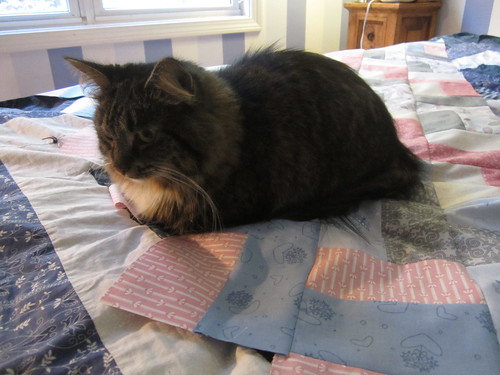
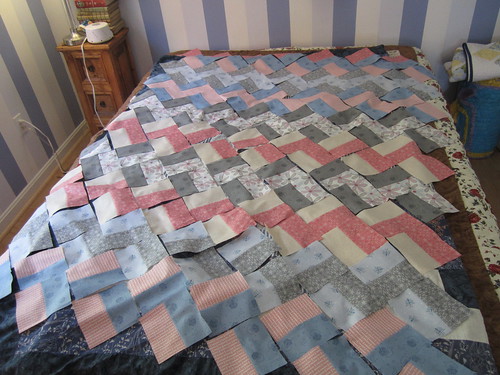
zig zag quilt IMG_8711 IMG_8719 zig zag quilt zig zag quilt IMG_8733

Farmer’s Wife blocks are waiting patiently while I knock out another deadline project. This quilt is based on the tutorial given here but I’ve gone with a full assortment of colors rather than alternating with a solid which gives zig zag every row. It works up very quickly and I”ll soon be ready to pin after a bit of trimming up.

Vineyard Oct 2012 …

Lucky, lucky me, two trips to MV this year, May and October, both beautiful months to be on the Vineyard.  Come along and join me, my daughter Deb, her dog Chappy and my granddaughter Tiffany on our adventure.

Welcome to Cape Cod… getting closer to Woods Hole and the ferry by the minute.

 100_2078 100_2079

Arrived late afternoon on Saturday and mostly walked, browsed, stretched our legs and paws, enjoyed a good meal and then settled in for the night.

Sunday morning was stunning. After breakfast in the garden at Espresso Love we drove out to W Tisbury to the Artisan Fair at the Grange Hall.

100_2089 100_2098

100_2093

We browsed,  bought a few trinkets and then headed down the road to the whimsical and delightful Field Gallery.  You can’t visit here and not smile.

100_2128

100_2122 100_2105

100_2125 100_2119

100_2121 100_2116

A moment of relaxation and contemplation before moving on.

100_2124

The afternoon culminated with a ride on the Flying Horses. You can never be too young or too old to not enjoy a spin and a chance to catch the brass ring.

100_2174

100_2165 100_2160

After breakfast Monday morning at the Black Dog Cafe…

100_2177

…we headed to pumpkin heaven at Morning Glory Farm.

100_2182

100_2185 100_2203

100_2190 100_2181

100_2194

Part of the afternoon was spent walking through the Campground.

100_2224

100_2229 100_2233

This is the first cottage in the Campground…1864.

100_2231 100_2230

Tuesday’s breakfast was at Among The Flowers in Edgartown.

100_2248 100_2257

Then a drive Up-Island to the Beetlebung Cafe and to spend the day with a good friend.

100_2260 100_2265

100_2266

The nexy day our time on the Vineyard came too quickly to an end.

Here comes the Martha’s Vineyard to take us back to America.

100_2284

One final picture.

100_2282

PS… Chappy waiting patiently as always.

My creation


Skin care

IMG_8694 IMG_8695

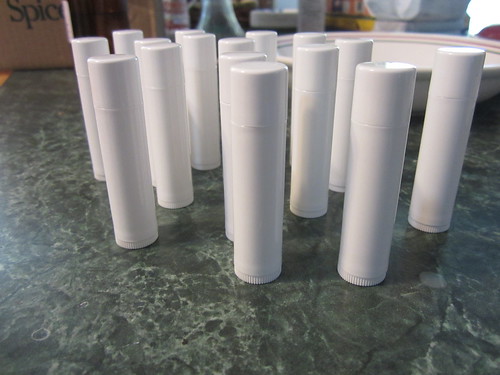
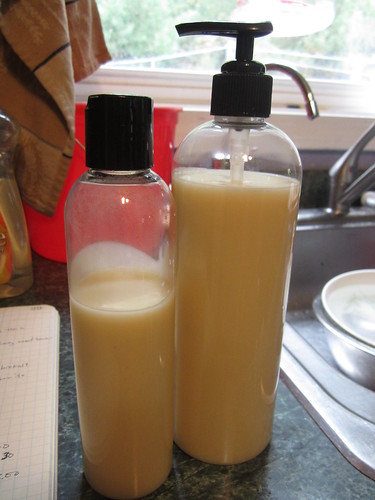
This has fast become my favorite lotion recipe as it banishes the dry skin and moisturizes a full 24 hours easily. I’m using plain water and lavender essential oil but otherwise following her recipe as written with the addition of a preservative. I also decided it was high time to try making lip balm. I followed the peppermint recipe and it’s very nice stuff but my yield was 20 tubes, not the ten as mentioned in the recipe.

another step closer

…to finishing the back living room (aka the living room living room as named by boyo when he was 3, to distinguish it from the family room living room that we actually do the “living” in). The living room is probably the prettiest room in the house, and the least used of the downstairs rooms. We close it off in the winter with a blanket in the doorway, and it gets really cold in there.

All summer I’d been noticing a faintly mildewy smell (or more accurately for me, taste) in that room, and when I’d walk by the doorway to go upstairs. It was finally time to take some action. I learned this summer that I have a slight mold allergy, and even with the dysosmia issues, I can still taste mold/mildew perhaps more than smell it. Not especially pleasant.

The beginning

liv rm project (1) liv rm project (5)

liv rm project (2) liv rm project (9)

It’s not too cluttered in these photos, but it is… Stuff just lands there. Camping gear, stuff that should go into the attic, stuff that should go in the barn, stuff that should just go away… Often there is a weight set in there over the winter and/or a bicycle in a stand. The room serves as library, laboratory, and herbarium. There’s a fireplace behind that chest, but we closed it up because of the drafts.

When the house was built, this was originally two smaller rooms. Not sure when they opened it up, but I’m glad somebody did. Now the room measures about 25 feet by 10. This is half of the downstairs of the main part of the house. The other half is the kitchen, which is open into the dining room. Open from the dining room is the ell where we mostly “live”, and where there’s a woodstove.

in progress

Two coats of paint on the ceilings took longer than I thought it would! And then…
liv rm project (24) liv rm project (34)

There was loose wallpaper around the fireplace. Yes, somebody had painted over the wallpaper. I wasn’t going to take it all down, but I had to get up that hanging, loose bit. And then it was hard to stop. And then I had a good time skim coating it (really, I did).
liv rm project (40)

Two coats behind the bookshelves, ceilings done, trim has a coat, and a coat or two on the walls…
liv rm project (46)

There are six windows in this room! When I did the back (red) wall, I just painted the window, but as I did the rest of the room, I realized that three windows needed attention, and I may as well take out and put back in the one with the sash weights so that the cords are new.

things i discovered

The window that had cords hanging from the lower sash, and pulleys at the top of the window case, doesn’t actually have pocket doors to access the sash weights. I have no idea if there are sash weights in there or not! Also, this window glass was cracked, so out it came. It’s still in the barn, waiting for a piece of glass.
liv rm project (60)
Where is the weight pocket???

painting windows pc heat gun
Painting the lower sashes and trim pieces that hold the windows in. The heat gun is a new toy; it allowed me to get the old glazing out of the window with the broken glass without killing myself or the window sash…

Two windows had the sash weight/pulley system replaced with something called a Caldwell Sash Balance. They still make these things, but they are totally different. Generically, these things are called coil spring balances.
caldwell sash balance (6) caldwell sash balance (9)

caldwell sash balance (7) caldwell sash balance (3)
They sit where the pulley goes, and there is a metal strip that comes down where the cord goes, and that open triangular hookey thing goes where the knot goes. All of mine are broken and/or rusted. And the windows need sticks to prop them open.

Do you think anybody makes these anymore? I’ve found a company in the midwest who sells them, but their sizes are a tad different than what I have. I have to call them soon. I have two other windows in the house with these things in them. Pain in the ass. Why did anybody replace the so easy to maintain sash and pulley system???

Be still my beating heart!
I think I just found them!!

I also discovered that at some point the mantel was gold. Bright, shiny, and gold.
liv rm project (66)
:::::shudder:::::

The stuffed chair that was in the room is especially mildewy. It came to us with some issues, and they’ve gotten worse. It’s a good chair, but it’ll be ~$700 to reupholster. I may try to do this myself… I mean, what is there to lose?

And now

liv room painted (5) liv room painted (8)
(things still aren’t quite picked up… we need to organize some of the plant specimens… and I never pulled the stuff off of this wall to paint it, but it’s totally covered by cabinets and shelves. Maybe in the spring.)

The oldest books (over 100 years old some of them, but none valuable… they’re all in middling condition or so) are going through an airing regimen to get rid of some of the mustiness… and they got sprayed with Lysol. We just need another sunny day or two to put them out again.
airing old books (1)

What’s interesting is that the wall changes color in the different lights,
liv room painted (3) liv room painted (10)

and the best part?

We’re getting a gas fireplace insert and planning to use the room this winter!

WOW! What a party!

I think I can safely say that our Fall Shearing Celebration-slash-BY HAND Magazine launch was the best party we’ve ever had at JMF. The weather was perfect, the food was outstanding, the band spectacular and the fact that so many of you came out to share this momentous event with us was completely overwhelming.

The thing is, a party of this magnitude doesn’t happen without the dedication and hard work of a whole lot of people. My mom and my sister have been working on all the details of this party for more than a month and they both came in from Texas for a week beforehand (my mom DROVE! From TEXAS! With a car full of party stuff!) My mom set up and ran the shop, re-landscaped the front of the house and stuck labels on magazines with alacrity.

My sister Carrie took care of the menu, the decorations, ordering supplies and a thousand other details that came up. Carrie is definitely someone you want on your team!

Our friend Danny came down from Boston to help get the house in order, repainting, re-fencing, fixing the gate, hanging the lights, and just generally sprucing up the joint. (If you live in Boston and need a general contractor, hit me up for Danny’s info. He is a MAGICIAN. He can fix anything, he is a master carpenter and painter. (He did a gut rehab of my mom and sister’s house when they lived in Boston that was absolutely amazing. Now he’s a close family friend, which, if you’ve ever remodeled a house, you will know is a very big deal for a customer to still be speaking to a contractor at the end of a job.)

My friend Vicki drove up from Texas with my mom and worked he backside off all week, doing every job that anyone threw at her and did so with a smile on her face. Vicki, I owe you HUGE!

My mom’s boyfriend Ted flew in from Kansas and tried like crazy to get our (apparently broken) apple cider press working, in spite of the fact that he’d never even tasted apple cider before. And he did a lot of other great stuff, but really put his heart into the apple cider press.

My friends all pitched in and worked their butts off all weekend. I don’t think I would have made it through the weekend without Muffin, Shirra, Tanya, Kris & Charlie, Jen Cox, Amy & Paul, the other Paul, the Randolphs, and Lisa and Will.

Speaking of Amy and Paul, Paul set up our credit card system at the 11th hour (cause he’s awesome like that) and Amy -knowing I was running around like a loon- took the pictures below for y’all. And all these for her own blog. Cause she’s awesome like that.

And I want to thank one person who didn’t make it to the party (due to an online ticket-purchasing fiasco that would bring a tear to your eye.). When I went to my friend Jeannie and said, “Hey! Let’s make a magazine!”, Jeannie said, “Let’s!” For the last few months, Jeannie has been my sounding board, the voice of reason and the person who kicked my butt when it needed kicking. I was terribly sad that she couldn’t be at the party to share the excitement and joy BY HAND brought to our supporters. Thank you, Jeannie, for always being there.

Shirra’s blog post about the party has even more awesome pics over here.

P.S. For those of you who couldn’t attend the party, the digital issue of BY HAND Magazine is now LIVE! 

Autumn 2012 Shearing!

Saturday was Juniper Moon Farm’s Fall Shearing and Magazine Launch party.

There was locally – raised pork barbecue courtesy of our friends Will and Lisa, pies, hot apple cider, bluegrass music, and the Shearer Extraordinaire, Emily Chamelin.

I recently got my hot little hands on a copy of the very first issue, so I was thrilled to help Susan celebrate the premier of  her By Hand Magazine.

If you are at all interested in DIY  (cooking, crafting, building, gardening….) and haven’t had a chance to check out By Hand yet, what are you waiting for?

Taking pictures of the animals never gets old, either.  These three have a bit of attitude.  In fact, I agreed to take them off Susan’s hands once we are ready.  They have been getting a bit too aggressive with the sheep and goats lately, and I could use them for patrolling for snakes.

Sweet Mr. Orzo.  He is such a love.  But he’s very much a puppy also.  I’ll be making time to do some serious training with him before long.

Check out this little cutie’s Hunter Boots!  Her mother is our awesome friend (and JMF’s web designer), Michelle.

The always lovely Shirra!

Peggy and George started off the square dance after dinner.

My friends Diana and Keith enjoying the shearing and some cider.

Lucy, the self – appointed farm ambassador.

Cookie tree!

You won’t see many pictures of Susan and I together; neither one of us particularly likes getting our picture taken.

Our adorable and very pregnant friend Lisa.

Fall Shearings are always my favorite, and this was exceptional.  We stayed late under the lights and banners and stars, enjoying the brisk air, the smell of cider and the warmth and company of good friends.


Tagged: Farm, food

Review: Stitch Works Crochet Charts

Stitch Works Crochet Charts, $50. Available for Windows, Mac & Linux.

You all know how much I love charting my knitting stitch patterns, so it should be no surprise that I like crochet charts as well.  I love being able to get, say, a Japanese crochet stitch dictionary and being able to decipher what I need to do.

A nice thing about crochet charts – more so than, I think, knitting charts – is that they depict the final product quite clearly.

As such, of course I want to include crochet charts in my designs that use crochet motifs.

Stitch Works Crochet Charts (SWCC) is the only dedicated crochet chart maker that I’ve seen.  The alternative is Illustrator or other vector based drawing programs (or by hand).  (If you know of any others, please note them in the comments!)

SWCC comes with a pdf manual as well as online instructional tutorials and examples.  I’d like a bit more detail in the manual, or perhaps a few more videos showing some of the more advanced manipulations available.

When playing with the program, I didn’t ask the designer for aid, but he clearly lists his email if you have questions.  There’s also a Ravelry group here.

It’s pretty straightforward to get started, though I recommend watching the videos (especially the first demo) & reading through the manual first.

Here’s a chart I made in Stitch Works:


And here’s a version I made in Illustrator:

Both are still works in progress!

It’s easier to generate a chart from scratch in SWCC than in Illustrator, especially if you’d need to create all your stitch symbols from scratch.  If you need to create a custom symbol in SWCC, you can, but with 109 symbols available you’ve got a good number of choices already available.

I’m not quite sure how to really utilize the rows feature;  when I entered 4 rows for the number of rows, it automatically generated them in chain stitch (or, I think, whatever default you choose);  but it doesn’t give an option to have each row different.

It’s easier, I think, to manipulate the symbols in Illustrator.  I had a harder time scaling, reflecting/mirroring etc the stitches in SWCC than in Illustrator, and in some cases simply wasn’t able to do what I wanted in SWCC.  Grouping a set of stitches then trying to mirror them as a group just didn’t want to happen in SWCC, for example;  I had to just make another group that approximately mirrored the original.  (Reading through the Rav group discussions, this is a known issue and is supposed to be fixed at some point.)

Though you can’t draw a line around the repeat in SWCC like I did in the Illustrator example, you can change the background color of the stitches, which I seem to like better — it seems less confusing.  See here:

You can always, of course, import the SWCC image (exportable as pdf, png, tiff, bmp and jpg) into, say, Illustrator, and manipulate it or add lines etc to it afterwards.

Although I’ve only played with charting rows, there’s also a function for laying out your chart in the round (as shown in the demo video).

I’d recommend this program, especially if you don’t have Illustrator or another similar program with which you’re adept.  If you’re like me, and don’t do a lot of crochet, having a solid library of stitches readily available (as opposed to having to draw/create each in Illustrator), makes it simpler and faster to generate crochet charts.


Pros
Cons
Relatively inexpensive ($50)Difficult to manipulate groups of stitches (if at all possible)
Works on Mac, Windows & LinuxScaling seems awkward
Large library of stitchesAnswer in Ravelry to some questions: If you can't do in SWCC, do it another program after you've created the chart (altering text size, adding outlines, etc)
Ability to create custom stitches
Ability to export in a variety of file types
Ravelry group for questions and features request

I received my copy of StitchWorks Crochet Charts from the company for purposes of this review.  All opinions are my own.