Tag Archives: illustration

Global Art Gathering


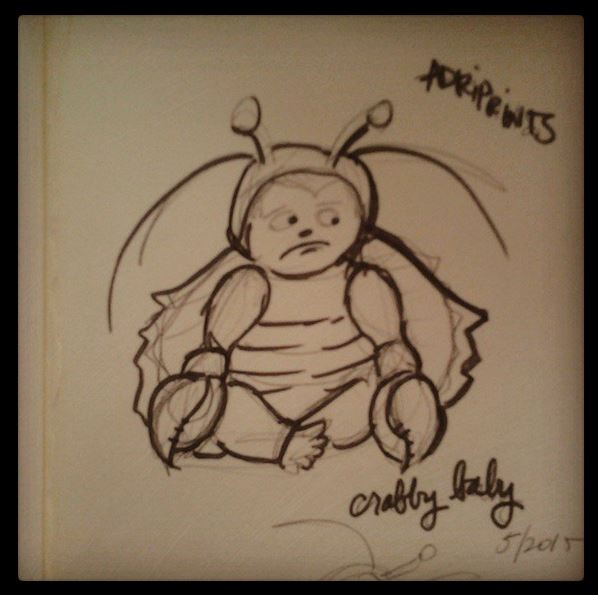
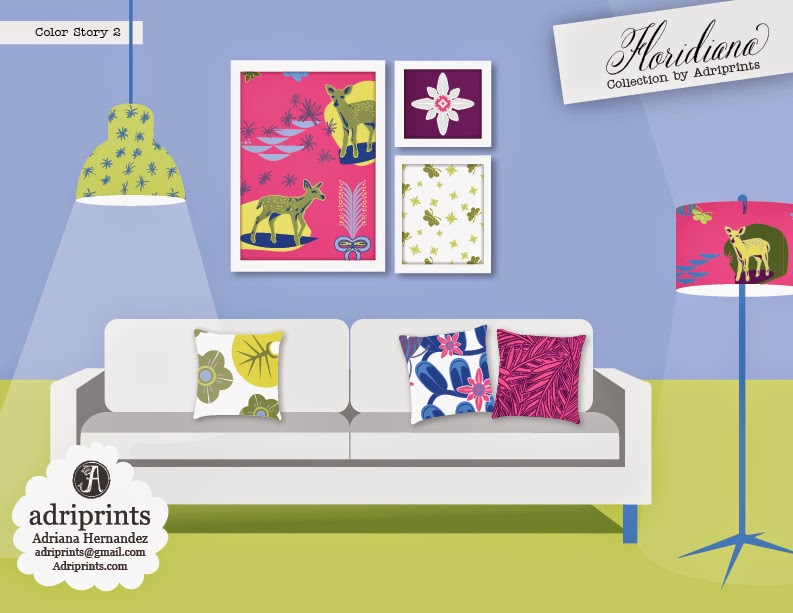
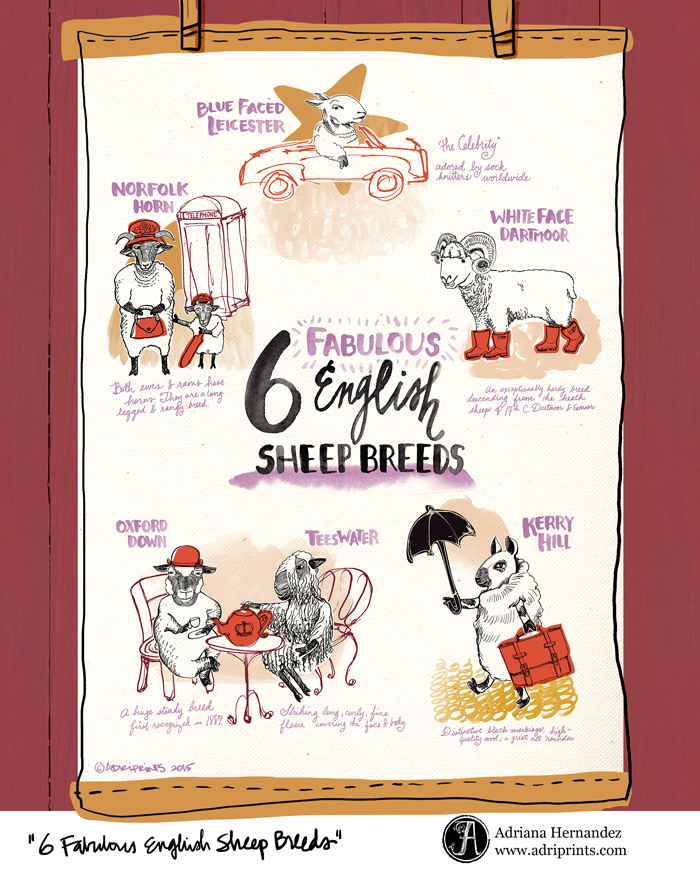
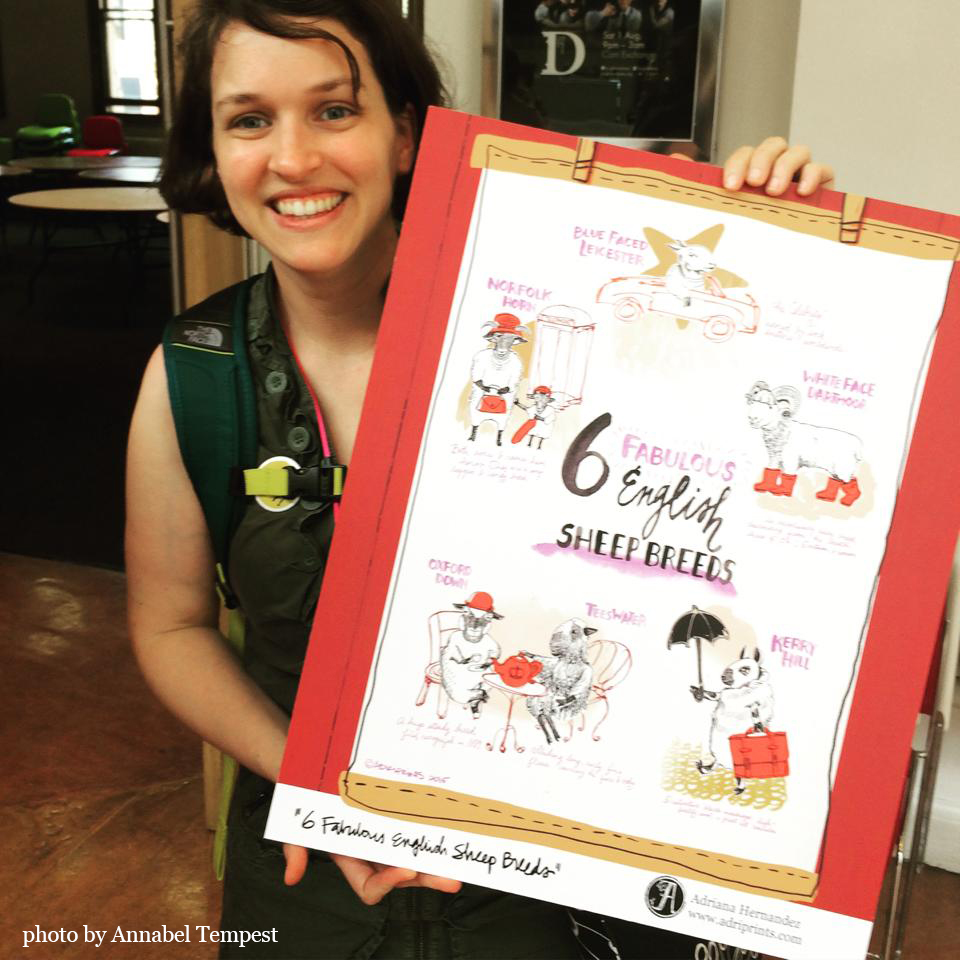
Last Friday was the Global Art Gathering in Brighton, UK with Lilla Rogers, Margo Tantau, Rachael Taylor, and Kelly Rae Roberts!  Weeks before the event, we were asked to illustrate a tea-towel based on the theme "Englishness"... I brainstormed for weeks until stumbling upon the rich history and enormous variety of English breeds of sheep.  Here's my assignment...


Once I figured out a way into the assignment I was mega-inspired!  And so, I happily attended the event with no idea what would come.  The event was held at the Brighton Dome which is situated on the same beautiful grounds as the Brighton Pavilion and it's gorgeous gardens.  So many, many beautiful flowers to see...


pretty, pretty blooms everywhere...


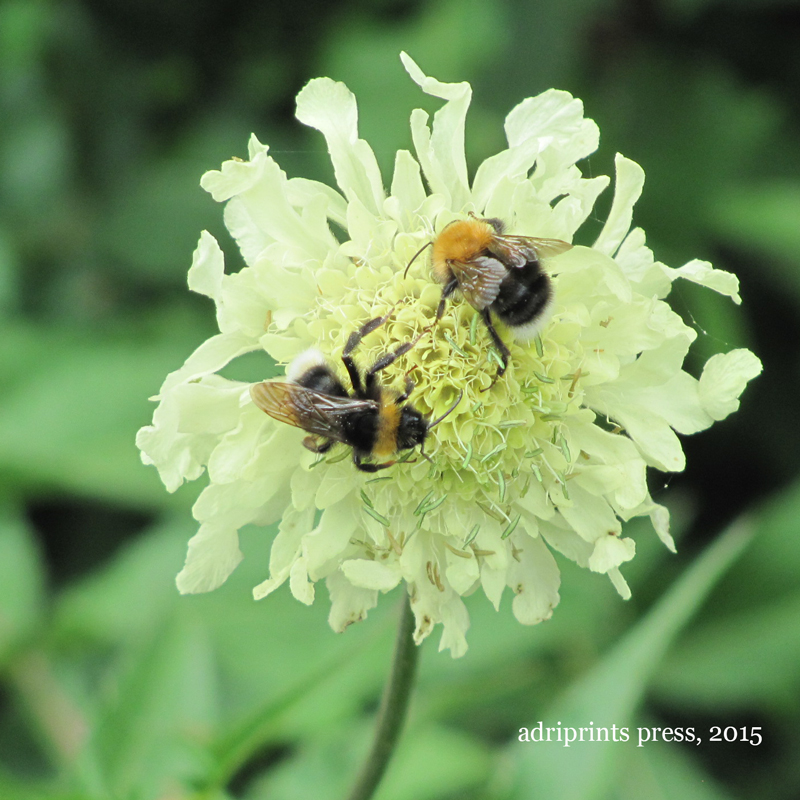
Anyway, let me get my head out of the flowers and get straight to it...

- - - Recap of the Global Art Gathering, 2015 - - -

We started off in the morning with an interview-type chat between Lilla & Kelly Rae Roberts.  If you're not familiar with Kelly Rae Robert's work, she does a kind of smudgy, painterly, sweet collage work with rough text and positive affirmations.  I wasn't too familiar with her work or life before the event, but was so happy to learn about her and meet her in person.  She and Lilla said a lot of things that resonated with me:


  • Stay childlike, keep dreaming, and respect your passion.
  • What is it that you love? Have confidence in what you choose.
  • When you can, delegate tasks that are better done by others.
  • When you are fully "you" there is no competition.
  • Avoid burnout/overwhelm by taking it one task at a time and keep choosing the joyful thing each time.
  • In practical matters, try to make everyday tasks joyful.
  • When talking to yourself, use your kind voice.
  • Commit to making the work you want to get.

Kelly Rae also talked about selling original artwork and how it makes room for new things, ideas, and new opportunities!  The lingering question I had about this point was... how do you properly record an original or scan a slightly 3-D object before you sell it?  Is there a proper way to do it?  Also, when selling original artwork, be sure to stipulate that the new owner of the physical artwork is not the copyright holder, that the rights to the image are retained by the artist.

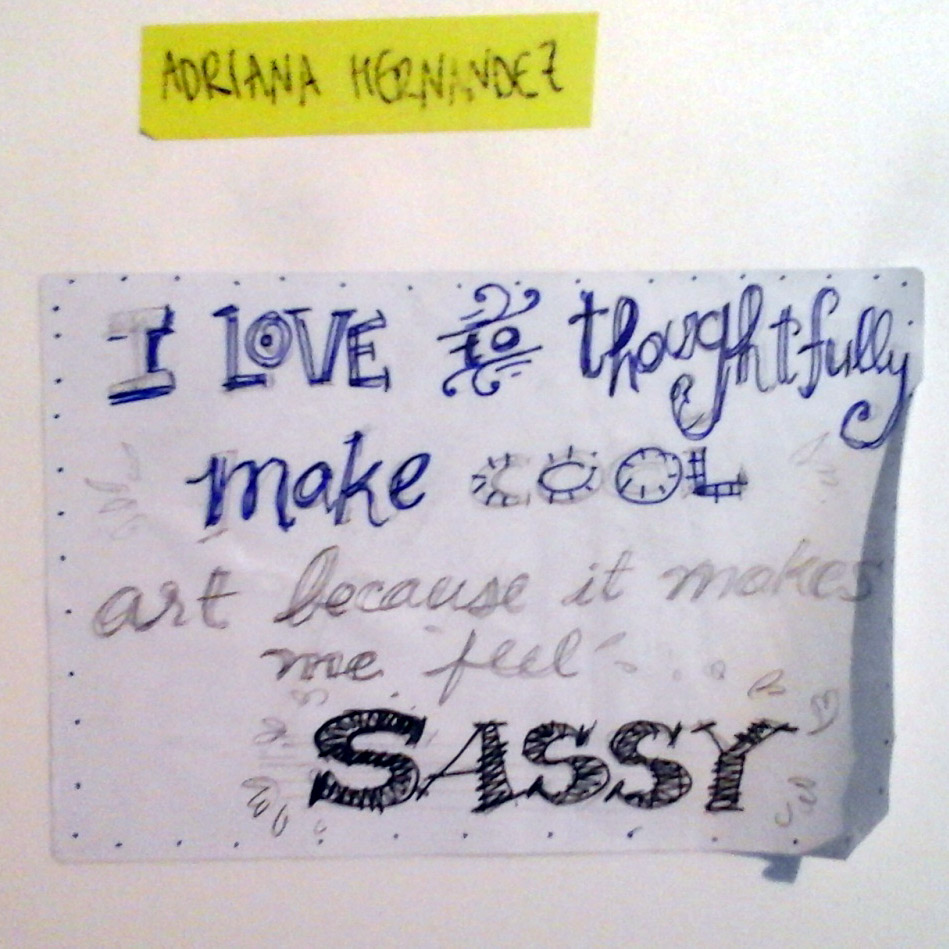
Next, came a lovely affirmation project directed by Lilla, where I learned to embrace my "sassy-ness".


Afterward, we learned about branding and embracing our individuality with a talk from Rachael Taylor, Margo Tantau, and Joanne Hus.  That was really informative, and I took lots of specific notes about improving my website.  So much to do!


Rachael spoke a little about making sure your work is registered with A(c)ID or similar in case the need should arise as it did for her in her landmark case against M&S back in 2012.  I remember her case -- it seems to have been one of the first high-profile "artist-being-ripped-off-David vs. Goliath" type cases to use Twitter and social media to bring attention to the matter.  It was funny to hear her annoyance, more so in that M&S chose one of her simplest designs and it would've saved everyone the hassle had they just done their own version.  (Your positive attitude shined through, Rachael!) She was a joy to chat with and is as sweet as she sounds on paper.

At lunch, I chatted with Flora Waycott and Trina Dalziel who are much further along on their illustration journey and are a real inspiration to me.  Both work with lighter colors and softer palettes than I do, but I just love their style and composition!  So beautiful!

After lunch, Lilla went over a slew of color trends and textures... and then the review.  I was certain that on a regular day, my work wouldn't have been reviewed, but as luck would have it, Lilla Rogers reviewed all the tea-towel designs!  Yay!  She noted my anthropomorphic sheep in her comments.


The whole event was so personalized and special.  Each of us received these lovely totes made by Rachael Taylor and there was so much care put into everything.  Lilla signed a copy of her book "I Just Like to Make Things" and even hand-wrote our name tags...


I am so grateful to have had the chance to attend.  I'm not sure if I'd have been in the U.S. whether the opportunity would have afforded itself, but there it is.  I just happened to still be living here in Munich!

After the Global Art Gathering we all landed at the North Laine Pub
I feel like I could write 10 posts on the event, but I'll end it here.  I loved meeting my fellow artists with whom I've shared a digital classroom for the last six months. In fact, meeting everyone in person was the highlight of my trip.  It can be very isolating to work as a freelancer for so long.  I missed them the moment I had to leave the pub as it was nearing on 9pm which is bed-time for our boy.  I walked off abuzz with new ideas, new friends, and a positive outlook on my future career as an illustrator.

Hopefully see you all soon fellow illustrators and artists!

Feeling Crabby

Our little guy has been having lots of teething days.  On those days, he moans and groans and drools.  He is so sad and gloomy.  I suffer with him.  Teething sucks.   That inspired me to illustrate this one...


I learned tons about combining Illustrator's vector shapes with textures in Photoshop in this Skillshare class by Matt Kaufenberg.  I started out with a pencil and marker sketch.


Then, I found something that has been so freeing to me... sketching in Photoshop.  I know it's a weird hang-up for a traditional illustrator, but I hate wasting paper.  And, when you sketch a lot, you inevitably end up using loads and loads of paper.  And, no matter how cheap it is, you kind of feel the weight of how many trees you've decimated on your creative journey.  Okay, maybe it's just me.  In any case, it doesn't pain me to do sketches on layers in Photoshop.  Not. one. bit.  So, off I went!

I started off using traditional shapes for figure drawing (can't help my training!)...

 I knew I didn't want to go this route.  I have had a kind of artist's block when it comes to drawing babies.  Every time I attempted to draw my son, it came out so weird!  I wasn't happy with any of the results, so I just focused on expressions he makes when he's in a funk...

I had a breakthrough with that big head up top.  I then pushed the exaggeration of the size of the head even further.


After drawing the top one, I said out loud, "aww."  And that's when I knew I was onto something!  So, off I went using the techniques from the Skillshare class, and the end result is the first photo from this post.

Make Mine a Mini, Workflow

Previously, I posted this animated short featuring my illustrations.  In this post, I wanted to share my workflow in After Effects so that I could easily reference what I did, what I learned, and what I think could improve in my workflow moving forward.  This post is also to help my illustration friends who might want to try it, too!

Workflow #1
for the first half of the short
the "overwhelm" sequence

1. Complete final sketch for placement of all items

2. I used a light table to illustrate various elements of the final image in pen & ink individually (so they're not touching or overlapping).


Inked text and brain for final animation.
3- Scan and make a vector composition (placement of all assets/icons) use sketch for reference.

NOTE: Everything that you want to animate individually, needs to be on its own layer (head vs. top of head in my case) and use an artboard that is the size of your final screen to help with proportion.  You don't wanna draw in After Effects.  It's clumsy, and on my computer it's so huge it time-lags to do anything.

4- Bring illustrated assets into project panel of After Effects (file> Import, x-retain layer size> Import)
5- Make a new composition (ctrl+n) at the desired length and specs.
6- Drag your file from the project panel to the timeline area.
7- Convert your file from vector to shape layer (right-click layer in timeline> convert to shape layer)

NOTE: This will explode into 200+ layers in After Effects if you're a rough-line illustrator like me. It's okay.  We will get through this.  If you're a super-clean vector illustrator it's even easier-- also maybe look at Flash as a simpler solution than AE.

8- Carefully separate layers into groups (took a long time with such tiny pieces in my artwork).
9- Then form groups into Pre-Comps (mini animation canvases).  Assign the anchor point to the right part of each element (Y).  Make sure all elements are where you want them to be at the end.
10- ANIMATE!


Tips on Animation
  • Let your storyboard be your guide.
  • Work backward from your storyboard key images.
  • I think about the biggest movements and mark where I want those actions to hit on the timeline using the markers.
  • It's easier if you already have music to match the movement.
  • Then, I work between the markers.  I go through each pre-comp to animate each item individually, then as a group, and lastly, each section until satisfied.
  • To export hit Ctrl+m to render queue and click"render".
  • Lastly, I put the rendered clips together in MovieMaker... You do not want to do any real editing in MovieMaker so be sure your clip is the approximate right length, your transition in and out is the way you want it to look, and that your text is the correct size. Windows Movie Maker is really easy to use, but you cannot control details very well.


Workflow #2
for the second half of the short
the "ibis hideaway" sequence (as shown above)

1- Used my final pattern "Ibis Hideaway" as layout for my final composition
2- separated each layer (30+) into .png files with transparency exported from Illustrator

Note: I preserved the artboard size for each item.  I thought this would help with placement in AE and it did, but it makes anchor points really critical and you can't use the shotcut "ctrl+alt+home" to automatically center the anchor point for each object b/c it's the size of the artboard. Plus it's annoying to select items when you do this.  But, I did like that it created a more manageable series of layers and pre-comps.

See what I mean about preserving the artboard?

3- In AE, import files into the Project Panel and make a new composition.
4- Drag your files from the project panel to the timeline area.

5- Form layers into groups (took a long time with such tiny pieces in my artwork).
6- Then form groups into Pre-Comps (mini animation canvases).  Assign the anchor point to the right part of each element (Y).  Make sure all elements are where you want them to be at the end.
7- ANIMATE!

- - - -
I asked Jake Bartlett of the "Animating With Ease" Skillshare Class about his workflow after he's done animating, and here's what he had to say:
...I use Adobe Premiere for all of my editing needs. It works wonderfully with all of the other Adobe products and is extremely robust. For still titles, I use the built in title maker, and for anything animated or more designed, I'll use AE or Illustrator. The workflow depends on the project, but if I'm animating to music or a VO track I typically will edit the audio first in Premiere, and then copy and paste the audio clips directly from my Premiere sequence into a composition in After Effects. That way I have the audio reference inside AE while I'm animating. Hope that helps!
Thoughts, Questions, etc.

Moving forward, I liked the simplicity of the second workflow.  Pre-grouping the elements that I knew were not going to need individual animation saved me a lot of time.  It sacrificed control, and in some cases visual quality - one of the butterflies came in pixelated and I don't know why. I must not have used the same settings as with the other .png files.

If I do a character or puppet animation I would need to export each element of the figure as a transparent .png illustrated in either PS or AI.  I think it could work, and then I'd use the anchor points like the hinges we made in paper animation!  So excited.

If you know of a better way to get raster or complex vector images into AE, or if I glaringly forgot or missed something, please do not hesitate to e-mail or comment and let me know.  I'm just getting into AE and would love to use my time as efficiently as possible so any advice is welcomed!

Make Mine a Mini

My first animated illustration in at least 7 years.


I made the video itself over a few days, but the artwork had already been through a storyboard, script, etc.  Honestly, I had too many ideas and now resort to watching my own video to avoid repeating my own mistakes!  The purpose of the video was to present our favorite lesson learned in the Make Art That Sells course.

Last time I did any sort of real animation was 7+ years ago through elective classes at RISD which I adored.  You can see it here if you're curious (the lady was my puppet).  And, while I'm parading my freak-flag, I might as well share my old animated .gifs which you can see here.  Those were done using Photoshop layers.  I blame my brother for that.  He got me into pixel art (you can see his work here & here -- he mainly works in 3D).  This time, though, after going through all the prep work: writing a script, drawing a storyboard, starting my illustrations, scanning them in, ready to start animating... I froze!  I psyched myself out!

I knew I needed to use something else to help me get the results I wanted because I wasn't going to do traditional animation.  I thought of using either Flash or After Effects, but it seemed like such a huge task.  I chose After Effects and started exploring it through various tutorials trying to chip away at it and taking the skills I needed to get the effect I wanted.

- - - -
Helpful Tutorials:

First, I started with the Adobe.TV tutorials here which are fine (a little dry, but efficient).

Then, I watched this tutorial series from Phil Ebiner on Skillshare called "Complete After Effects Course" to familiarize myself with the skeleton of the software.  These tuts run somewhat long and you can skip the first 15-30 seconds of each.  These could be condensed.  I recommend with reservations - pick and choose what skill you need to know more about.

Next, I watched Jake Bartlett's "Animating With Ease" Skillshare series and this is where the meat is.  He masterfully edits all the episodes into 100% content.  Have a notepad ready.  Have After Effects open in the background or separate screen.  Be ready to go.

For very specific tasks like the walk cycle or lip-syncing, I really like Fraser Davidson's tutorials also on Skillshare.  The "con" to the walk-cycle course is that he uses strokes to make the limbs.  This makes most people's projects from the class look very similar.  I do like his tutorial-style and he does illustrate the concepts clearly so they're still valuable.  Also, he's humorous and his tutorials are fun to watch which is often not the case with tutorials.

Also, I dedicated an entire post to sharing my workflow in detail in case you were interested!

Floridiana: Behind the Scenes Part 2


I first signed up for Bonnie Christine's Surface Pattern Design 2.0: Start a Career Skillshare Class in April, but I kept a diary of my process, and thought it would be nice to share with you all, my readers.  This is Part 2 of 2 explaining my process behind the Floridiana surface patterns.

May 4, 2015

My first go-around at putting the patterns together with Palette #1(warmer colors)... I think I need some with more patterns with open space.  I see now that I tend to make very "busy" patterns.


 May 6, 2015
I tried my hand at doing  a room mock-up, and yes, confirmed that I need some patterns with less "stuff."  Okay!  Will do!


May 6, 2015: Finals Uploaded
May 7, 2015 - Edited Images for naming consistency
With so many patterns in the collection, I found that I had to go back and re-check to see if they were all exactly the same in all the final documents.  Maybe next time I will choose simpler names!

Color Palette 1: the Everglades (warm colors)


Color Palette 2:  Night & Day (Cooler Colors)


Mock-Ups
Some are better than others, that's for sure!  Here are my attempts at trying to pull a room together and  mocking up products using the patterns in the Floridiana collection. This is an area where I absolutely have room for improvement!


Phone Cover
Are custom i-phone covers really a thing?  I'm a bit behind in this trend.


Stationary
This mock-up excited me the most! I love paper and stationary!


Clothing
I think the KeyDeer print would make a lovely t-shirt... and dress, and skirt, and lots of other stuff too, but this post is waaaay long as it is.


Thanks for stopping by and making it through the entire project!

-Adriana


Floridiana: Behind the Scenes Part 1

I first signed up for Bonnie Christine's Surface Pattern Design 2.0: Start a Career Skillshare Class in April, but I kept a diary of my process, and thought it would be nice to share with you all, my readers.  This is Part 1 of 2 explaining my process behind the Floridiana surface patterns.

April 10, 2015
My hometown is a place full of contradictions.  I grew up in South Florida mostly in Miami, and being far away from it gives me some perspective on what a beautiful place it can be.  Lush, tropical plants grow everywhere: palms, hibiscuses, bougainvilleas, banyan trees, vines, orchids, and old oaks with Spanish moss hanging from them.  Wild parrots, ibises, and all kinds of birds made it their home along with the tiny, adorable key deer. It's not completely unheard of to find a gator in your yard, and/or see celebrities with their tiny dogs in their handbags.  Summer in Miami usually meant a long stay at the beach with your family... sardines on crackers, collecting seashells, water out of the cooler, running to the shade to avoid burning your feet, and do NOT feed the seagulls...
I'll see what kind of journey this reminiscing takes me...

April 15, 2015
First, a snapshot of our family.


All of these photos are from my family's albums.  Unfortunately, my grandma is not in any of these since she was usually behind the camera.   See what I mean about the palm trees?  Our backyard faced a canal that frequently had gators floating by.  We always had family over the house, and there was never a dull moment growing up.
If anyone else is working with family photos, isn't it hard to stop looking through all the photos?  I had to stop myself before I got too emotional.  I just wanna reminisce!  I miss my grandparents very much (they've all passed).   But, after mulling it over, I think I know what I'm going to draw now.

But first, an exploration in color.  My 2 (preliminary) palettes with colors directly from my family photos...
I've divided my colors between past and present which, in turn, created a warm and cool palette.  Handy!


Next, it's sketch time!

April 25, 2015
So I've been researching local Florida wildlife, flora, and fauna and started to sketch!  


I think I'm going to need to make a moodboard to help guide the style before I go digital.


April 29, 2015
I most definitely needed a style guide!  So I made one using my favorite print heroes.


April 30, 2015
And then I digitized and refined a lot of icons including lettering...


May 1, 2015
Working on the "hero" or main pattern, I chose to work with the ibis (instead of the key deer).  I may still do a repeat with the deer, though, since it's so cute.  But, here's what I did so far with the main one.  It really helped to have my style guides to help me figure out how I should lay out the ibis.


Happy Mother’s Day

Happy Mother's Day!

I painted these flowers for my mom, but thought you all might enjoy them too.

With love,

-Adriana


Working on Magic

Something clicked for me after MATS A, and that's the concept of joy in one's work.  I connected it finally with the idea of creating magic in an illustration. It's something I have struggled with for a long time, and am always working on.  So, this past week, I made it a point to focus on this element and re-work some past illustrations.

I started with my sketches from the Global Talent Search back in 2013.  I loved my sketches for this project, but ended up submitting something completely different and kicked myself afterward.

Anyway, I worked with this palette which I used for the competition and that I love, and it helped me focus on just having fun and making a sweet little repeat.

revamped repeat

original illustration from 2013

Next, I thought of a different concept with the playground scenario.  What if the playground animals came alive at night and had fun jumpin' around in a magical firefly forest after dark?  So, I re-inked the original sketches, illustrated all-new spring animals, and created a night-time palette to help me focus on illustrating.  Here is what I came up with:

alternate night time theme, 2015


Wouldn't it be so cool if it came in actual glow-in-the-dark fabric?  I keep thinking of a pajama set for my little guy that glows in the dark!  That would be neat!