Tag Archives: Sewing

Waves

IMG_8480 IMG_8479 IMG_8478

There are “wave” blocks to go along with the turtle blocks in the quilt I”m working on. I’ve quilting these “waves” before when I made a snail’s trail quilt and I made the same initial mistakes as last time. I think, in future, I need to write the color names on the foundation paper. I can’t remember what method I used for the snail’s trail quilt but the centers came out nicer so I need to keep that in mind should I use this block pattern again. The wave blocks are slower going so they’ll take a little while to work through before I can piece the top of the quilt.

Equinox

Happy first day of fall!

It is decidedly UN-fall-like out there today, but that’s okay.  Paul’s working on brush burning and I am working in the craft room.

You ever get mostly done with a dress and realize you have to tear out the zipper and re-do it? No?  Just me?

Yeah, that’s what I am working on.

Also, these:

Halloween – colored socks.

If I get this dress sorted out I’ll be making more couch pillows from this:

Love those fall colors.


Tagged: Knitting, Seasons, Sewing

rip it, roll it, and punch it

IMG_8453 IMG_8454 IMG_8456

Getting ready to catch the East Australian Current!

Pillow Shams

Pillow shams Pillow shams

Yesterday I whipped through these pillow shams. They came out allright but they need a bit of tweaking next time. The front needs to be an inch shorter (width), and the back pieces each need to be an inch longer. My ruffle was also 10-15 inches longer and I had just enough. She doesn’t mention any tips for turning the corner so I need to work on that next time too. All that said, they turned out very nicely!

Mariner’s Compass

IMG_8426 IMG_8424 IMG_8418

Yesterday, I spent the afternoon finishing up my mariner’s compass. I wanted to get that done while it was still fresh in my mind and I’m glad I did since a few of her tips were not in the book. One thing she mentioned was to have your sewing lines cross as you come off the edge of those red and blue points. Another tip was to assemble the compass into halves because if you just keep adding wedges you’ll end up with that last wedge you can’t get in. She says to leave the paper in until you’ve appliqued the compass onto the background fabric to prevent all those bias edges from stretching and becoming misshapen. This will probably sit for awhile now because I’m not sure what I want to do with it.

Pieced

IMG_8413 IMG_8414

I finished up the perfect piecing project very quickly once the sewing room was put back together and tidied up. I’m probably going to turn it into a pillow and gift it.

Cast Iron Skillet Mitts – Tutorial!

46

To recap from yesterday's post, I was interviewed for an article on cast iron cooking in our local paper, The Reading Eagle: "Cooks like ease and health benefits of using cast iron pans," and the recipe I submitted: "Recipe for cast iron cooking", and decided it would be the perfect time to finally throw together a tutorial on making some super easy skillet handle covers!

This is very picture heavy, so let's dive right in, okay?


-----------------------------------------------------------------------------------------------------------------

Cast Iron Skillet Mitts

1) First up: choose your fabrics wisely. You want not only heat resistant materials to keep you from burning yourself on hot skillet handles, but also fabrics that will not catch on fire when exposed to high temps. (NOTE: I cook on a electric range -- I do not recommend leaving fabric covers on during cooking on a gas range or other open flame!)

I chose a variety of cotton scrap pieces I wanted to use up. You could choose anything your heart desires for the outside, but I do recommend having some flannel for an added layer of protection between your pretty fabric and your innermost batting layer.

1

2) The skillet you are making mitts for should hang out with you while you work, like a dressmaker's dummy, or a really good pal that models for you. You will be sizing these up as you go, so you'll want the handles handy.

2

3) The very important innards: heat proof batting. It can be purchased at your local fabric store or online, OR you can recycle an old pot holder, which I have now done three times with great success.

Also shown here is some heavy duty "Hook-y and Floof-Snag", or whatever it is we're supposed to call Velcro now so we're not infringing on any official business names... (Note: Mine is Velcro brand, so I am allowed to call it that.) You will need some of this, or the clasping mechanism of your choice for the small handle cover. I used snaps with some success on my first set of mitts, but I would not recommend them unless you have the proper snap setting tools. I don't, and they were extremely difficult to use.

3

4) Simply cut your pot holder in half, or if you are using fresh batting, cut two pieces: one about 5" x 7" for your long handle and the other about 4" x 6" for the small handle. You'll be "trying them on" then and trimming any waste as needed, but those sizes should accommodate most handles.

4

If you're recycling a pot holder, one piece will form the guts for the cover that wraps around your long handle like so:

5

and the other piece will wrap around the small handle thusly:

6

7

5) Now is the time to wrap your batting around the small handle -- just as you saw in the last two pictures -- and make any size adjustments as needed.

6) Starting with the small handle cover, cut a piece of flannel four times the width of your batting, and with about an inch extra on each end.

8

7) Fold over until batting is completely wrapped.

9

10

 8) Prepare your underside fabric (ie: the stuff on the side that you will not see once the mitts are on the handles). First, using your flannel and batting sandwich as a guide, cut around, leaving a one inch margin on all four sides:
sandwich
9) Fold about 1/2" of fabric over to the wrong side (not the outside) and crease. Do this for all four edges.

11


10) Sew around outside edge to hold folds down.

12

Getting there!


14

11) Now we'll do the same for our top fabric. This time, using your underside fabric as a guide, cut with a one inch border around the outside.

15

12) Crease and sew just as you did for your underside.

17

Ready to assemble:

18

13) Stack your layers with fold flaps facing IN, centering the best you can, and slowly quilt them together.

19

I sewed two simple seams that divided my rectangle into thirds.

20

14) Now you will want to carefully and slowly sew around your outer edges, working with your underside fabric up. I found that my machine had no trouble making its way through all those layers as long as I took it slow and steady.

21

Working at an angle on each side (as seen below) helps keep things from shifting and wrinkling, and that bit of an extra lip on the topside fabric (the striped fabric on the bottom in this picture) ensures that even sloppy sewing will not leave you with outside fabrics that don't match up. I am allowed to state this as a fact because I am often a sloppy sewer, especially on utilitarian objects like these.

22

15) Now we're going to put it on and mark for our closure(s).

23

24

25

16) When you find a good, snug fit, you'll probably want to mark your mitt in the places where you'll be putting your closures. I marked mine with dots, which I what I would do if I were using snaps again,

26

but it also worked for lining up my Velcro.

27

17) Once your pieces are in place, make sure it is a good fit and if satisfied, stitch around the edges of your hook-and-loop to make it more secure.

28

Hey now! One handle done. Not too shabby.

29

This second one will go even faster now, I swear.

Now would be a great time to make absolutely sure your material isn't too wide for your long handle by casually wrapping it around and eyeballing it.

5

A little gap is fine as your sewing will make up for that. What you don't want is the opposite: too much of an overlap and your mitt will be too loose.

18) Line up your batting on your flannel just as you did for your short handle. (Mine is pictured slightly differently only because I was working with smaller scrap pieces and couldn't do four times the width this time, but rather two pieces at twice the width each.)

30

19) As before, fold over until batting is covered.

31

20) Prepare your outer fabrics just as you did for the first handle, but double the border size on the topside fabric:

sandwich longhandle

21) Once your outer fabrics have been creased and stitched, stack them as before to quilt, but this time your quilting seams will run lengthwise (again, two seams dividing the rectangle roughly in thirds):

32

22) Stitch around outer edge.

33

23) Fold excess end edges over toward the underside fabric and stitch down. Please note which end I mean by the position of the lengthwise quilting seams in the picture:

34

35

36

24) Now we make a tube. Fold lengthwise with your topside fabric on the outside, and line up the edges of the open side the best you can.

37

25) Run a quick seam down the side to officially tubify your tube.

38

26) Picking whichever end strikes your fancy as the one you'd like to sew shut, hold your tube, seam up, at the soon to be sewn shut end.

39

27) And squeeze it down flat like so:

40

28) Now sew it shut. I found myself not brave enough to try and sew through that fat center seam, so instead I went as far up to it as I dared on one side,

41

and then came back at it from the other side. Still sewn shut, and I didn't break a needle. Yay!

42

Holy cow look at that little beauty!

43

29) Now go ahead and slip it on the handle and admire your handiwork.

44

45

Congratulations! You are now the proud creator of some lovely little objects which will save you from many accidental burns and make moving and handling your skillets so much easier!


------------------------------------------------------------------------------------------------------------------


If applicable, I will correct any errata promptly and do my best to answer comments and emails which contain questions as they come in, but please be patient with me as things are always a little hectic around here lately! :)

Fall table linens

IMG_8198
I just finished up these quilted placemats and reversible napkins.

Dan’s dice bags

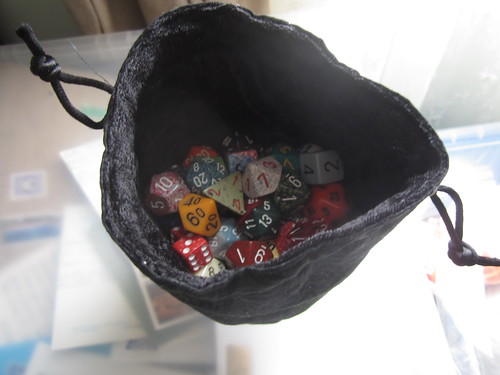
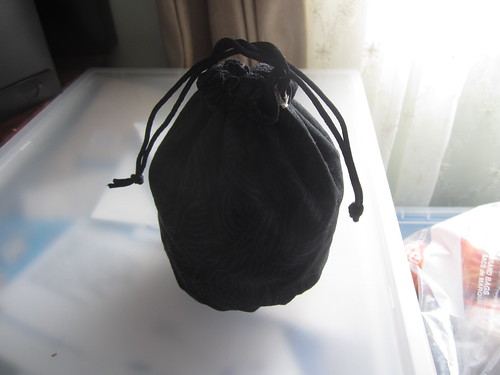
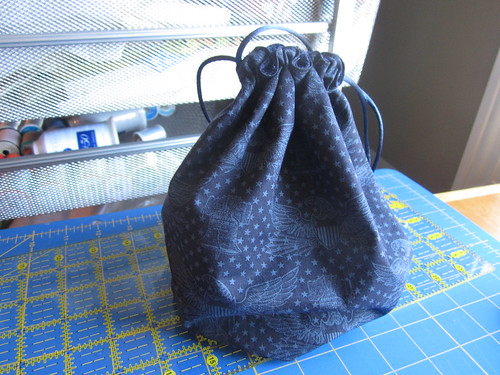
Dan's dice bags Dan's dice bags Dan's dice bags

By special request, I made a couple of dice bags yesterday afternoon. Dan chose the fabric and requested a velveteen lining. He wanted something to hold 100 dice for himself and a larger one to hold 300 for his friend. I used this tutorial with the sizes written for the smaller bag and then scaled up to a 6″ circle and a 9″ x 19″ rectangle for the larger bag. I wanted the bags to cinch up with the cording so I made two buttonholes on opposite sides of my rectangles. When the bag was ready for cording I threaded one piece through one hole, around the bag and back out again. Then I threaded the second piece of cording through the other hole, around the bag and back out again. I tied the ends of each piece of cording into and overhand knot and trimmed.