Monthly Archives: September 2012

Rhinebeck Bound

I’m going to Rhinebeck again this year!  Cooperative Press will again have a booth (I’m thinking it’s in the same location as last year — in the covered buildings, opposite end from the barns).  Of course all of us authors there will be merrily signing away copies of our books.

There’s also going to be a Cooperative Press party in town Saturday night — check out some of the details here or here.

In the spirit of Rhinebeck I’m planning on bringing (and wearing) one of the sweaters from my next solo book.  I won’t be able to resist bringing the Wrought Cardi as well, though I wore it last year.   Rhinebeck is really one of the few opportunities for me to really cozy into some of my handknits.

Are you going to Rhinebeck?

Union Street Fiber

Coming Soon

Visit with Madame Purl

IMG_8203 IMG_8205 IMG_8209

When visiting Madame Purl, we invariably stop at the Fold on the way home from the airport. This trip I chose a pound of this wonderfully soft Polworth (%20 off!). Now that we’ve both gotten into quilting, quilt shops have been added to the itinerary. At Material Girl I found some crabby laminate I could not pass up. This is destined to become a lunch bag for Jason at some point. At Acorn quilts, I couldn’t pass up this fun blue and yellow stack of fat quarters. And of course there’s always a fabulous kitty welcoming committee.

Introducing: Herriot

As I warned you yesterday: please sit down before reading any further. I know from experience that there’s simply too much wonderful contained in Herriot for an ordinary knitter to resist. It’s named, of course, for James, whom we invoke so frequently in our farming lives that he might well be our patron saint.

Back in February, when the UPS man dropped off the box from the mill, I had to use a wheelbarrow to get it into the house, it was so overwhelming. When we showed it off to the attendees of our Lizzy House Quilting Workshop– “Wanna see what awesome things we’re working on for fall?”– they were knocked flat, then begged us for some. Our test-knitters went nuts over it. It stopped traffic on the floor at TNNA.

You heard it here first: Herriot is going to be a kind of a big deal. What is it, exactly?

Herriot is a DK-weight yarn made of 100% baby alpaca that comes in 10 natural shades (ie, undyed, never-gonna-bleed, straight-off-the-alpaca gorgeous). The colors are:

Talc, Bullrush, and Heartwood,

Walnut, Ghost Fern, and River Birch,

and Eucalyptus, Sycamore, Travertine, and Granite.

Have I gushed enough about this yarn?

Well. Let me tell you about the knitwear collection.

It’s a collection of 14 patterns designed by Pam Wynne and myself. The only guideline Susan imposed was that she wanted a colorwork book– we were otherwise left to our own devices, completely free to design what we wanted. I’d never designed a collection in collaboration before, but Pam was great to work with, and I had lots of fun planning the whole thing out with her. After grouping our ideas into chapters, we realized that our designs were arranged in increasing complexity.

That is to say: if you begin with the first pattern in the book, and knit straight through, cover to cover, the designs in this book will help you build your skills as you work until you are just about the most skillful, competent, amazing colorwork knitter this side of the Andes (the Peruvians, in my opinion, take the proverbial knitted cake).

I could go into crazy detail about the genesis of each design, or tell a cute story about what happened in each photo on the shoot, or maybe talk about how much I like the pants that a certain sweater is styled with, but that would be a bit too much birth story, and I have a feeling you’re pretty eager to see what we came up with. For now, I’m going to let our designs speak for themselves.

Egbertine hat and cowl, designed by Caroline Fryar, test-knit by Jennifer Britton and Jessica Dunsmore (respectively), modeled by Emily Karasz.

 Bessie, designed and modeled by Caroline Fryar, test-knit by Melanie Clark.

Herbie Hat and Mittens, designed by Pam Wynne, test-knit by Helen Elston and Erin Lucido (respectively), modeled by Emily Karasz.

Edie, designed, test-knit, and modeled by Pam Wynne.

Cora, designed by Caroline Fryar, test-knit by Marci Lavine Bloch, modeled by Caroline Fryar.

Here are all three of us sitting on a fence, swathed in alpaca and tweeds, as one does in the first week of June.


Amy & Emily, proving just how strongly beauty runs in the Karasz family.

Hattie, designed by Caroline Fryar, test-knit by Krysta Harty, modeled by Emily Karasz.

Ida Mae, designed by Pam Wynne, test-knit by Gail Defendorf, modeled by Amy Karasz.

Vera Marguerite tam and mittens, designed by Pam Wynne, test-knit by Nancy Harrington and Elizabeth Vores (respectively), and modeled by Emily Karasz and Pam Wynne (respectively).

 I’m allowing myself to gush (and use multiple photographs), because these last two are our capstone pieces. This is Maeby, designed and modeled by Pam Wynne, and test-knit by Eve Ramos & Daisy Blinn.

You look at it and think,Oh, wow, what great colorwork! And elbow patches!

and then you turn around and the sweater’s like,Bam! Drawstring funnel neck! Kangaroo pocket!and it’s everything you ever wanted in a sweater, ever.

I’ve already cast on for this sweater, because I want it something fierce.

Okay, and, lastly, this is Esther, designed, test-knit, and modeled by Caroline Fryar.

It’s a double-knit coat done in a traditional Swedish brocade pattern. There’s loads of i-cord trim, and an attached fair-isle scarf that grows out of the left lapel and wraps around the front to become the collar.

 Did I mention? The whole coat is double-knit!

And, just in case some of you live in some crazy dreamworld where there isn’t ample time to knit not one, but two coats (when it comes to double knitting, there’s the rub), the scarf is also offered as a stand-alone pattern. It is named Margaret.

I barely know where to begin with the thank-yous.

Susan came up with the yarn in the first place. Pam was a joy and an inspiration to work alongside, from inspiration photos to styling the garments on the shoot. Alison was a phenomenal technical editor. Caro kept us laughing throughout the several days she shot the garments. Our amazing team of test-knitters created each and everyone one of these garments, and our beautiful models sweated it out in their alpaca without a word of complaint. Zac anticipated our every need. Lauria helped us hold the whole thing together. Michelle gracefully put up with a thousand nick-of-time revisions, and made the book look super nice. And everyone who put up with me while coat-knitting reduced me to a shriveled and embittered husk of my usually-nice self– you know who you are.

Here you go, world. Here’s Herriot.

School Books

btt button

We all had to read things in school that we didn’t like … but what
about something you read for a class that you ended up liking (or
loving)? An author you discovered that you might not have found? A
genre you hadn’t thought about?


Don’t forget to leave a link to your actual response (so people don’t have to go searching for it) in the comments—or if you prefer, leave your answers in the comments themselves!


Back To School

Two days of school are behind us.  I think we are getting close to figuring out our rhythm for the year, and I am rather pleased with how well it has been so far.  Oona has taken to it like a dream (as long as I get her lessons done first thing.  She gets antsy if she waits too long).

Last year we did a lot of work on letters and sounds, shapes and colors, so this year we are expanding on that with sight words and counting and basic geometry.

Neve is starting off reading the first Harry Potter book.  I’m excited to see how much more she’ll enjoy the books than the movies.

Emily doesn’t really care what I put in front of her to read; she’d just be happier if she could sleep till noon first.

Maddie’s working on some advanced math and chemistry that terrifies me.  Good thing I have teacher’s guides.  And a husband who is a whiz at both.

And to complete our cozy little schoolroom, we even have a class bully.

Hey kid.  Gimme all your snacks or I’ll come sit on your book.


Tagged: Homeschooling, Pets

Cast Iron Skillet Mitts – Tutorial!

46

To recap from yesterday's post, I was interviewed for an article on cast iron cooking in our local paper, The Reading Eagle: "Cooks like ease and health benefits of using cast iron pans," and the recipe I submitted: "Recipe for cast iron cooking", and decided it would be the perfect time to finally throw together a tutorial on making some super easy skillet handle covers!

This is very picture heavy, so let's dive right in, okay?


-----------------------------------------------------------------------------------------------------------------

Cast Iron Skillet Mitts

1) First up: choose your fabrics wisely. You want not only heat resistant materials to keep you from burning yourself on hot skillet handles, but also fabrics that will not catch on fire when exposed to high temps. (NOTE: I cook on a electric range -- I do not recommend leaving fabric covers on during cooking on a gas range or other open flame!)

I chose a variety of cotton scrap pieces I wanted to use up. You could choose anything your heart desires for the outside, but I do recommend having some flannel for an added layer of protection between your pretty fabric and your innermost batting layer.

1

2) The skillet you are making mitts for should hang out with you while you work, like a dressmaker's dummy, or a really good pal that models for you. You will be sizing these up as you go, so you'll want the handles handy.

2

3) The very important innards: heat proof batting. It can be purchased at your local fabric store or online, OR you can recycle an old pot holder, which I have now done three times with great success.

Also shown here is some heavy duty "Hook-y and Floof-Snag", or whatever it is we're supposed to call Velcro now so we're not infringing on any official business names... (Note: Mine is Velcro brand, so I am allowed to call it that.) You will need some of this, or the clasping mechanism of your choice for the small handle cover. I used snaps with some success on my first set of mitts, but I would not recommend them unless you have the proper snap setting tools. I don't, and they were extremely difficult to use.

3

4) Simply cut your pot holder in half, or if you are using fresh batting, cut two pieces: one about 5" x 7" for your long handle and the other about 4" x 6" for the small handle. You'll be "trying them on" then and trimming any waste as needed, but those sizes should accommodate most handles.

4

If you're recycling a pot holder, one piece will form the guts for the cover that wraps around your long handle like so:

5

and the other piece will wrap around the small handle thusly:

6

7

5) Now is the time to wrap your batting around the small handle -- just as you saw in the last two pictures -- and make any size adjustments as needed.

6) Starting with the small handle cover, cut a piece of flannel four times the width of your batting, and with about an inch extra on each end.

8

7) Fold over until batting is completely wrapped.

9

10

 8) Prepare your underside fabric (ie: the stuff on the side that you will not see once the mitts are on the handles). First, using your flannel and batting sandwich as a guide, cut around, leaving a one inch margin on all four sides:
sandwich
9) Fold about 1/2" of fabric over to the wrong side (not the outside) and crease. Do this for all four edges.

11


10) Sew around outside edge to hold folds down.

12

Getting there!


14

11) Now we'll do the same for our top fabric. This time, using your underside fabric as a guide, cut with a one inch border around the outside.

15

12) Crease and sew just as you did for your underside.

17

Ready to assemble:

18

13) Stack your layers with fold flaps facing IN, centering the best you can, and slowly quilt them together.

19

I sewed two simple seams that divided my rectangle into thirds.

20

14) Now you will want to carefully and slowly sew around your outer edges, working with your underside fabric up. I found that my machine had no trouble making its way through all those layers as long as I took it slow and steady.

21

Working at an angle on each side (as seen below) helps keep things from shifting and wrinkling, and that bit of an extra lip on the topside fabric (the striped fabric on the bottom in this picture) ensures that even sloppy sewing will not leave you with outside fabrics that don't match up. I am allowed to state this as a fact because I am often a sloppy sewer, especially on utilitarian objects like these.

22

15) Now we're going to put it on and mark for our closure(s).

23

24

25

16) When you find a good, snug fit, you'll probably want to mark your mitt in the places where you'll be putting your closures. I marked mine with dots, which I what I would do if I were using snaps again,

26

but it also worked for lining up my Velcro.

27

17) Once your pieces are in place, make sure it is a good fit and if satisfied, stitch around the edges of your hook-and-loop to make it more secure.

28

Hey now! One handle done. Not too shabby.

29

This second one will go even faster now, I swear.

Now would be a great time to make absolutely sure your material isn't too wide for your long handle by casually wrapping it around and eyeballing it.

5

A little gap is fine as your sewing will make up for that. What you don't want is the opposite: too much of an overlap and your mitt will be too loose.

18) Line up your batting on your flannel just as you did for your short handle. (Mine is pictured slightly differently only because I was working with smaller scrap pieces and couldn't do four times the width this time, but rather two pieces at twice the width each.)

30

19) As before, fold over until batting is covered.

31

20) Prepare your outer fabrics just as you did for the first handle, but double the border size on the topside fabric:

sandwich longhandle

21) Once your outer fabrics have been creased and stitched, stack them as before to quilt, but this time your quilting seams will run lengthwise (again, two seams dividing the rectangle roughly in thirds):

32

22) Stitch around outer edge.

33

23) Fold excess end edges over toward the underside fabric and stitch down. Please note which end I mean by the position of the lengthwise quilting seams in the picture:

34

35

36

24) Now we make a tube. Fold lengthwise with your topside fabric on the outside, and line up the edges of the open side the best you can.

37

25) Run a quick seam down the side to officially tubify your tube.

38

26) Picking whichever end strikes your fancy as the one you'd like to sew shut, hold your tube, seam up, at the soon to be sewn shut end.

39

27) And squeeze it down flat like so:

40

28) Now sew it shut. I found myself not brave enough to try and sew through that fat center seam, so instead I went as far up to it as I dared on one side,

41

and then came back at it from the other side. Still sewn shut, and I didn't break a needle. Yay!

42

Holy cow look at that little beauty!

43

29) Now go ahead and slip it on the handle and admire your handiwork.

44

45

Congratulations! You are now the proud creator of some lovely little objects which will save you from many accidental burns and make moving and handling your skillets so much easier!


------------------------------------------------------------------------------------------------------------------


If applicable, I will correct any errata promptly and do my best to answer comments and emails which contain questions as they come in, but please be patient with me as things are always a little hectic around here lately! :)

Perfect Piecing?

IMG_8400 IMG_8399

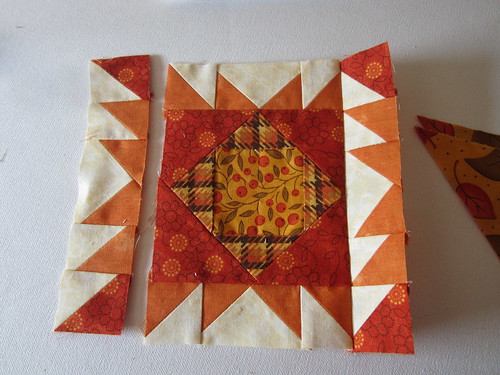
Yesterday, instead of Farmer’s Wife class, I had a “perfect piecing” class. Lately, I’ve been the only student there for the daytime class so I get a one on one class. For Farmer’s Wife class that’s great but I think it introduced some error for the piecing class since I wasn’t really looking at the pattern, just sewing what was handed to me. I had to rush off a bit early to get Gabby to the vet so I’ll have to finish this up later as I’m headed out of town today and will be away all week. Obviously, what I’ve sewn so far is far from perfect but I got many great tips that I hope will improve my piecing. Her best tip was to do the math for the blocks you are working on and check the size of each unit before assembly then check the final block size and square up units and final block.

Introducing: Marlowe

It probably won’t surprise you to learn that we’re big readers of poetry here at the farm. Nor should it surprise you, then, to learn that we’re fans of pastoral poetry in particular, and that we award special bonus points to any poem that uses the word “Shepherd” in its title.

I’d like to share one of our newest yarns with you: Marlowe.

It’s pure poetry in yarn form. A worsted-weight merino/silk single– pause for a second and consider how soft that is– its beautiful and gentle variegations float from one color to the next like notes of a song. Thanks to the silk content, the yarn absolutely glows, and has a very satisfying weight and drape. Named for the poet, we chose similarly musical and pastoral names for the ten gorgeous colorways.

Madrigal, Melodious, and Riparian,

Carpe Diem, Stanza, and Arcadia,

and Georgiana, Allegro, Garland, and Sylvan.

We were so over-the-moon thrilled with the Sabine collection that Marie Grace designed for us this past Spring, we asked her to design another collection for us, this time using Marlowe.

The Marlowe collection she designed for us is just as pretty, feminine, cohesive, and wearable as we knew it would be– thank you, Marie Grace! Each of the projects requires 3 balls of Marlowe or less, so they’ll knit up quickly. The lace patterns were all kept deliberately simple in order to best complement the variegated yarn. I’d say that this collection is utterly perfect for knitters who’d like a fun taste of lace (and other fancy stitchwork), but who might not want to tangle (yet) will full-on lace knitting in a laceweight yarn.

The Cypress Accessories Set– a cowl, hat, and fingerless mitts in two lengths– in a mock-cable rib, test-knit by Debbie Palmer (the cowl, hat, and shorter mitts) and Beverly Katz (the longer mitts, pictured), modeled by Lisa Richey.

(Puppy not included).

Blaine, a lace-edged shaped wrap, test-knit in two different colors by Jen Kelley and Marie Grace Smith, modeled by Emily Karasz.

The Daphne Accessories Set– a hat, cowl (not pictured), and a long infinity scarf– in a traveling diagonal rib, test-knit by Susan Swanson, modeled by Emily Karasz.

Kenna, a simple lace-edged shawl, test-knit in two different colors by Chaitanya Muralidhara and Jennifer Bohlig, modeled by Amy Karasz.

Seneca, which can be worn buttoned-up as a cowl or left loose as a scarf, test-knit by Rachel McKinney, modeled by Amy Karasz.

Terra, a beautiful cowl in a honeycomb cable pattern, test-knit by Ainslie Hodges, modeled by Emily Karasz.

And, lastly, we have Sorrel, a scarf edged in lace, test-knit in two different colors by Marcy Jones and Marie Grace Smith, modeled by Amy Karasz.

Also, I would be absolutely remiss if I didn’t share the extra-special something extra that’s included in this pattern book. See, since the creation of the yarn line, we’ve wanted to make sure that the yarns and books reflect us– the way we work, live, and knit at the farm. And you know us– we love to cook only slightly less than we love to eat, which is why we’ve paired this collection with 5 of our most-requested farm recipes.

It’s highly likely that you, like us, are happiest sitting down to knit when there’s a pot simmering on the stove or something delicious baking in the oven. This wonderful trio of yarn, patterns, and recipes should keep you warm and cozy straight through the winter. You can find all seven designs on Ravelry, here.

Marlowe and the Juniper Moon Farm Marlowe pattern book should be available at any of these stockists starting in September. If you don’t see your LYS listed, ask the owner to bring it in by getting in touch with his or her KFI sales rep.

Again, an enormous thank-you, and congratulations on a job well done to our knitters (named above, with their garments), test-knitting coordinator, photographer, editors, models, stylists, and to everyone else who helped us bring you this collection. Putting together this post really has re-warmed my heart towards this collection and everyone involved in bringing it to life– I feel like shouting, look what we did, everyone!

Tomorrow’s collection– well, just make sure you’re sitting down when you read the post. It’s that good.

BOOK REVIEW: Happier At Home

Happier at Home: Kiss More, Jump More, Abandon a Project, Read Samuel Johnson, and My Other Experiments in the Practice of Everyday Life by Gretchen Rubin My rating: 4 of 5 stars This last week, I decided that I was...